How To Stretch A Gallery Wrap Canvas


How To Stretch A Gallery Wrap Or Box Canvas
The hot trend right now in the art world is to skip the expense of framing and simply mount your canvas photos or paintings on a deep box stretcher bars (also called strainers) to create an elegant and clean modern look. And with the advent of so many print on demand companies that offer raw canvas you can save a little money by learning how to stretch your own artwork.
This is something that requires only a couple of tools to do and isn't nearly as complex as you might think. If you are a do it yourselfer and want to save a little cash or simply like to be active on a project from start to finish, this page is dedicated to showing you how to stretch your own canvas in a few simple steps.
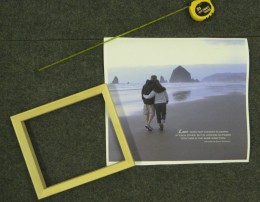
NOTE: I created this canvas as a gift. It is a photo I took while on vacation of my brother and his soon to be wife. I chose a love quote that suited them and with a little photoshop added it to the photo for a truly personalized gift.
Materials:
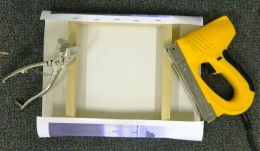
- Box Strainer Or Stretcher Bars
- Canvas
Tools:
- Canvas Stretcher Pliers
- Staple Gun
And Now To Begin ...
Instructions:
1. * First Create A Clean Work Surface making sure there is nothing that might scratch or damage the canvas surface. Many of these canvases are rather delicate and it's often recommended to wear gloves while working with them so oils from the hands doesn't effect the surface coating.
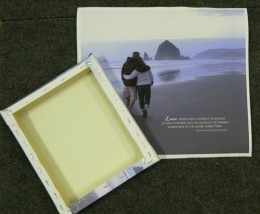
So here's one of those "Well Duh" things but be sure that your canvas is large enough to not only cover the face of the box strainers but also the sides. My example here shows the image to be considerably larger than that of my box strainer.
Center Your Canvas On The Stretcher Bars.

Two Options For Covering The Sides Of Your Bow Wrap Canvas
2. So What Do You Do When The Image Isn't Big Enough To Cover The Sides Of The Gallery Wrap? *
* One Option is you can add a colored border like I have done here. Choose a complementary color and create a band large enough to cover the strainers.
* A second option that requires a little more effort is to duplicate the image in a photo editor, crop part of the duplicate photo along the edges and copy-paste onto the original photo to enlarge the area. I did this on three sides with the example canvas that I am demonstrating with here.
A Good Canvas Pliers Is A Must

Center Your Image And Staple
3. * Flip Canvas So It Lays Face Down.
* Center Your Stretcher Bars On The Canvas.
* Staple One Side and then the opposing side. I usually use some push pins or Super Sticky double sided tape to help hold the canvas in place along one edge until I get started.
* Then using a canvas pliers I grip the opposite side to the one I just tacked into place and pull tightly starting at one corner. Then with my other hand I staple onto the back side of the strainers all the way down the one edge.
* Then return to glued or pinned side and do the same there.
* Followed by the last two sides. The canvas should be pulled tightly so it's surface is like that of a drum. If there is a warping, simply pull the staples and try again.

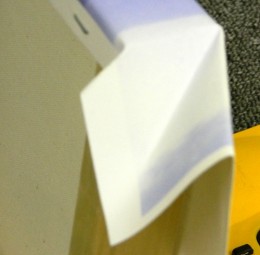
How To Fold A Tight Corner
4. * Determine On Which Sides You Want The Corner Canvas To Be On. In This Example it is going to be top and bottom. In the intro photo it was on the sides.
* Tuck in the corner (see photo) I often use an awl tool to crease the inside edge which will help the corner to lay as flat as possible.
NOTE: many companies cut the canvas to provide a tighter more flat corner fold. I don't do this as a professional and personal choice, but trimming away the excess canvas will provide and even tighter corner.
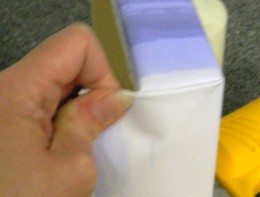
5. * Pull canvas corner tightly over to create a clean smooth looking corner. DO NOT cut canvas as it may fray over time. Staple.
Note: This wrapping strategy provides a clean edge which creases at the corner but stples on the back. If you wanted to staple your canvas to the interior of the strainers you would need to fold the canvas at such an angle that this would be possible. Both ways look great but I tend to prefer having the crease fold line directly on the corner edge.
Stapling and Trimming The Back
6. *After doing all 4 corners you are done. It's as simple as that. If there is extra canvas I may use a blade to trim it to the strainer edges.
* If you want a finished back cover with paper. It is my experience most people like to see the back of the canvas but if things aren't as neat as you'd like this may be a good option.
* Apply a sawtooth hanger and bumpons and it's complete.
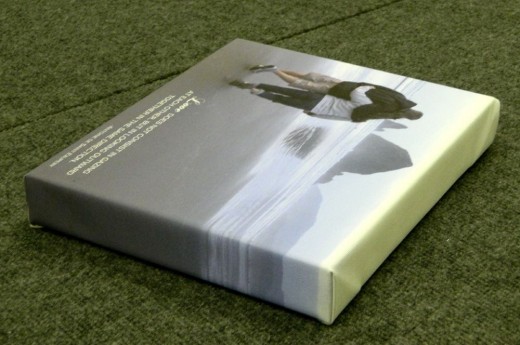
7. For a comparison to the intro photo, here's the finished gallery wrap with the image along the sides.
Applying A Top Coat To Your Gallery Wrap Canvas
8. This Step Is Optional:
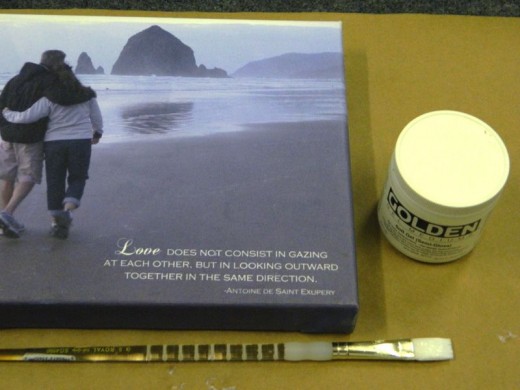
I often coat my canvas with a gel coat. This serves a couple of things. One it helps to protect the surface so if it gets a spot or something spilled on it it can easily be cleaned. The canvas prints I make are waterproof and archival fade resistant but there is a comfort in the extra protection and the surface will scratch if left unprotected. Plus if you brush it on it gives the canvas a soft painterly feel which is particularly nice on canvas prints of artwork.
I like Golden medium as it stays flexible but there are many wonderful products on the market. And you can choose from Matte, Semi-Gloss and Glossy depending on personal tastes or application. It is also a quality brand that is available at many art stores.

Wild Faces Gallery houses a fine art giclee publishing division on both paper and canvas so feel free to ask any questions you may have regarding stretching a canvas.


