Learn To Do Faux Opal Nail Art!


Do you love Opals? Do you love to show off your flashy nails? In this workshop, I'm going to teach you how to create beautiful Faux Opal nail art! I am the "Opal Queen," being an October baby, and I've always dreamt of doing opal nail art. Well, I finally did it, achieved the look I was after, and thought you might like to try your hand at it too!
The technique is really very simple! If you're a nail polish junkie, you probably already have everything you need on hand! If not, a quick trip to your beauty supply store or your corner drugstore will fix you right up! I have a really embarrassing selection of nail polish on hand. In the photo you'll see all the colors I used to create this look. Wow, it even shocked me to see how many I used! I looked closely at my favorite opal rings and just tried to duplicate the look as best I could in nail polish.
I created the layers of color over a couple of days so that everything would be dead dry. (This takes discipline because you get the urge to just keep painting!)
I decided to take my nail art to the next level using gold metallic striping tape and some polish secured crystals. The brand I prefer to use for both is Cina. If you check out the Kiss nail art line available at most drug and discount stores, you'll find an ever growing selection of nail art items such as stripes, decals and crystals.
The key to securing all that polish secured nail art successfully is a great top coat and lots of coats of it! I used to use Cina's nail art topcoat but recently I have discovered one I like better. I found mine at Sally Beauty Supply and it's called Seche Vite Dry Fast Topcoat. It dries like lightning, before you even finish polishing your second hand. It's also very durable and extremely shiny.
All the steps I took are right here for you to follow. Remember there is no right or wrong, no way to mess it up! This is about free expression art. The only lines you have to stay within are those of your cuticles!! And you can always clean those up after you're done painting. I hope you have as much fun with this as I did! Be sure to take photos of your pretty nails so that you can duplicate the look in the future if you want to.
Shopping List

Time required: Days
Difficulty: easy
Cost: Free if you have lots of nail polish
Materials:
- Various colors of nail polish
- Assorted nail crystals
- Striping Tape
- Polish Remover
Tools:
- Cuticle Stick or tooth pick
Instructions:
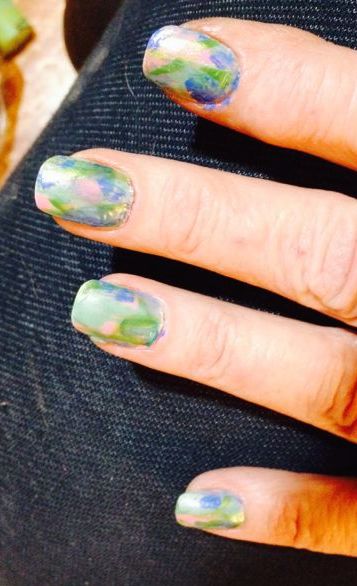
1. I started with a base color of a light seafoam green.
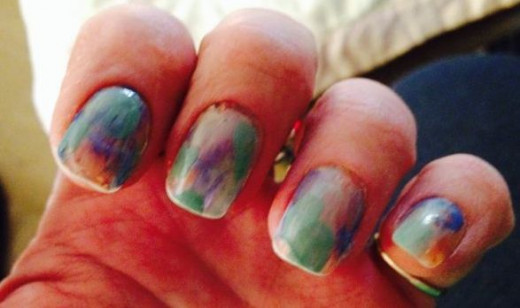
2. Removing most of the polish from the brush, I did dabs of pink. To create the color gradation effect, I would put a dab of polish on the nail, then brush through it with a coat of Sally Hansen Diamond Strength in "Platinum," which is a sheer translucent white with an opal tint. Then later that day, I added a dab of blue to each nail, repeating the brush through coat with the Sally Hansen. I continued this process over a couple of days adding orange, teal, medium blue, a light blue and a green,
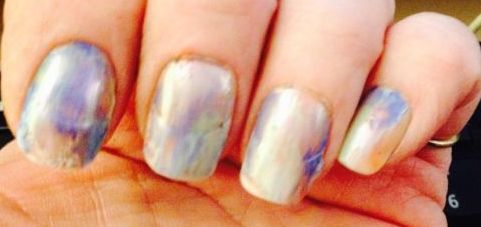
When I was completely satisfied with my colors, I added a dash of gold glitter polish here and there, finished with a brush-thrucoat of the Sally Hansen over it and let dry overnight.
3. My nails would have been fine leaving off at step 2, but I wanted to create a background from which my "opals" would pop out. I decided on Black for the most impact. I did the outlining freehand using Kiss Nail Art Paint in Black for this.

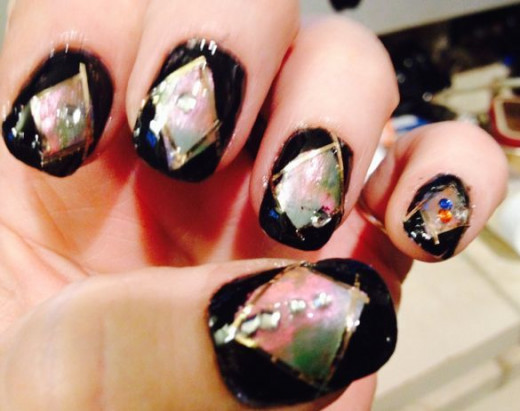
4. Deciding to go all-out, I added gold striping tape to the outlines of the "opals" then did polish secured crystals into a layer of Cina's nail art topcoat.
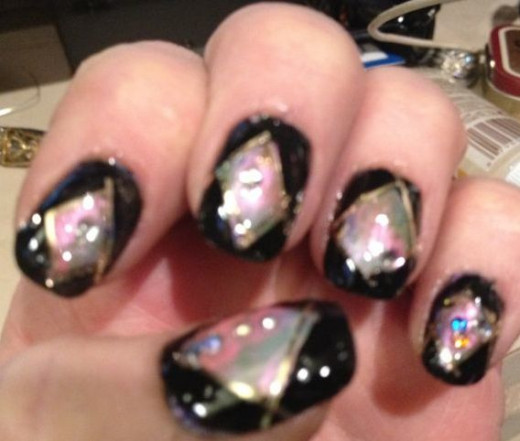
5. I'm continuing to add additional coats of the Cina topcoat until I have about 5 coats. (Ok, I'm really hard on my nails!)


