My Favorite Ideas For Crafts-Painting T-shirts

Painting T-shirts craft projects for the Fourth of July
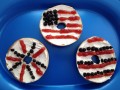
My Favorite Summer Craft Projects-Painting T-shirts. We begin our summer vacation doing art by painting t-shirts for the fourth of July. Each year we celebrate the fourth of July with our family and friend 3 day after Canada Day in Northern Ontario, Canada. Our family spends the summer at our cottage with our Canadian friends and members of our family. There we begin our summer by first celebrating Canada Day which falls on July 1 every year with pot-luck meals and firework, and of course Canada Day t-shirts, Since we are the ones from the U.S. it is our responsibility to plan the fourth of July celebration and make our shirts to celebrate our American traditions. Of course this means we need to start our painting t-shirts long before we arrive in Canada.
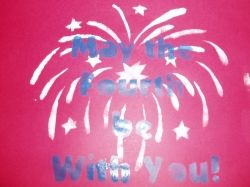
I am going to show you how we go about creating our paintings. It first starts with a plan, this year we decided to make a shirt with a play on words. This years shirt will say "May the Fourth Be With You!" Since I am in charge of this project I start by first creating a template on the computer using my word processor program. I type the word and center them in a large bold print and make a paper copy of the design. The next step is to place the copy under a piece of plastic stencil material. Since it is clear I can see the lettering through the material and carefully cut the stencil following the paper pattern under it. I make 2 stencils for the graphic design which this year is a simple hand drawn pattern of fireworks. I follow the same process and carefully cut the stencil following my paper pattern..
Cutting the Stencil
Stencil Making
There are a few things that you will need to make the stencil for the shirt. You will need to create a picture or word that you made on a word processor. With an Exacto knife you will cut the stencil by placing the your desired imagine face up on a cutting board and then a blank stencil plastic sheet. If you only plant to make a couple of shirt from the stencil a file folder is an easy material to substitute for the stencil plastic. I generally tape the 2 pieces together with masking tape to stabilize it for cutting. Simply cut the outside edges of the design and carefully remove the cut pieces without tearing the stencil plastic. Simply recut any spot the did not cut through with the first cut.
Materials Needed to Create a Stencil
1. Printed design, the simpler the better
2. 1 sheet of stencil plastic for each color you plan to stencil.
3. 1 Exacto knife or craft blade
4. 1 rubberized self-healing cutting mat or board.
5. Masking tape
Place the design with the stencil plastic on to the cutting board and secure it with masking tape, Place it on the cutting board and using the tip of the knife blade carefully cut the outline of your design. Be sure to use continuous strokes to prevent jagged edges. Carefully recut any area that does not follow the outline of your design.
I start and end my cut at a corner or point, then I tease the straight cut area open with the tip of my blade and run it along cutting any little spots that remain uncut. Do not pull the piece off be sure to cut it. I finish my cut stencil with a sharp pair of manicure scissors. This allows me to shape any area that are ragged or cut short. Do this by holding the stencil to the light to see any imperfection that need to be corrected.
How to cut a stencil
Design Stencil Patterns
I cut with the design in place under the stencil plastic. I find that it makes a more accurate pattern, rather than tracing the pattern to the material. The line is never perfect when you trace, just make multiple copies of your patterns in case you make a mistake. If you make extra you won't need it, but if you don't you know the routine.
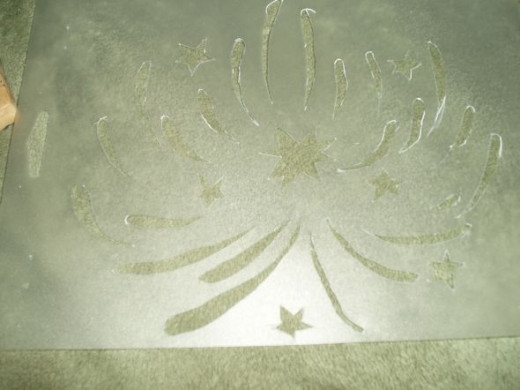
First layer stencil drawing

Second layer stencil from word processor

A Better View of the cut stencil while I pounce paint on it

Paint a stencil on a t-shirt
I recycle
An old foam plate and a previously use paint brush work great. Be sure to dip the brush in paint then pounce off any extra. I like the aged look so my first pounces are random over the entire stencil, then I fill in with a dryer brush to complete the stenciling. It gives a well worn look.
A recycled foam paint I use to hold my paint

The Craft Paint and Brush I use

Creating You Fourth of July t-shirt
To stencil you shirt, make sure you find the exact spot you would like your design to be on the shirt. Most purchased t-shirts have a fold-line down the middle of the shirt you can use as a center guide. If you are doing multiple shirts you may want to cut a template by measuring from the neckline so you place the stencil in the same place on every shirt.
The first thing I do is use the stencil on a similar color piece of paper to make sure the stencil is cut correctly and my second layer placement is correct. This will insure me that I make every shirt correctly and not ruin any in the process. I hate to make mistakes that could be prevented. At this point I find the exact placement of the second stencil in relation to the first one. In this case I will stencil the fireworks first, allow it to dry, then stencil the lettering over the top of the first stenciling.
Using cardboard or wax paper between the 2 layer of the t-shirt will prevent a seeping of the paint through the fabric to the back of the t-shirt. Make sure you have an area free from cats that are curious and decide to step on the wet shirt. I say this because I had a cat that decided to take a nap on my freshly painted shirt and ended up ruining the shirt and painting everything she came in contact with later that day.
Supplies:
Exacto Knife of razor knife
Cutting Mat or Several Layers of Cardboard to cut the stencil.
Stencil Plastic
Craft Paint or Fabric Paint
Cardboard or Wax Paper
Stencil Brush or Small Sponge
The Steps:
1. Print the design or draw a design on a sheet of paper.
2. Tape the design face-up on to the stencil material.
3. Cut the design with a sharp razor-type knife, and trim imperfection with manicure scissors.
4. Test the stencil on paper.
5. Sandwich cardboard or wax paper between the layer of the t-shirt.
6. Stencil the first layer and allow it to dry.
7. Stencil the second layer and allow plenty of drying time.
8..Wear your new custom designed shirt.
Notice the stencil after use, i didn't bother with the center of b,o,e, or a's

Exactly like I planned!

My July 4th Guest will love it!