FREE Crochet Seamless Striped Vest Pattern by SheilaSparkles

You'll Love Crocheting This Seamless Vest!
This vest is designed with horizontal stripes on the back and vertical stripes on the front. It is then edged with black sequin yarn called "Enchantress," available from Hobby Lobby. You can choose to do the stripes or all one color, do colorblocks or whatever your dream vest might be! I have a lot of gray and black in my wardrobe so I wanted something to coordinate with it all. Just have fun with it, and I'll bet you'll want to make more than one - I know I do!!
About yarn selection - the one thing you want to do is keep your yarn thicknesses similar. You don't want to use Homespun (a very thick yarn) with Vanna's Glamour (a sport weight thin yarn), for example. But what you CAN do is to use the Vanna's with two strands held together, or combine it with a worsted weight yarn to equal the size of the Homespun. Hope that makes sense! I really like using two strands of different yarns together, it adds color interest and depth to the finished work. So go yarn shopping - or grab 8-10 different yarns from your stash - and let's crochet this vest!
You will find this pattern is just a bit unconventional - I don't dictate hook sizes, gauges, etc. Try it - you'll like it! It's using what I call my "make to custom fit" method. You make IT fit YOU. It will work with any size of yarn. Make it any length you want, too!
Just one favor - please don't publish this pattern anywhere electronically on the web or otherwise... you may publish a link to this page instead. Thank you!
Pattern and images ©SheilaSchnauzies

More About The Yarns I Used
My goal was to find yarns similar in size that were very luxurious to the hand. I figured I'd be handwashing the finished vest in cold water anyway, so care was not a concern.
Some of the yarns I used included various chenilles, Boucle Traditions, Homespun, Vanna's Glamour, Enchantress (a sequined yarn in gray, black and white; Lion Brand Fun Fur, Bernat Galaxy, 100% cotton yarn, Paton's CiCi, Lion Brand's ribbon yarn in gray/black/white, (sorry can't recall name!); (BambooSpun, Infatuation, Angel Fleece, Cameo Soft Bulky, Gilt Eyelash, Haute Fur, all Hobby Lobby); from JoAnn, Bernat Satin, Bernat Baby Clouds, Paton's Silk Bamboo, Bernat Alpaca Chunky, Red Heart Pompadoodle, Paton's Lace, Red Heart Moon & Stars, Paton's Divine, Red Heart Shimmer, JoAnn Beautiful Sensations, JoAnn Sensations Cello, Bernat Denim Style, Bernat Pipsqueak, and whew... there are probably more!
You have to understand that I had this big project going on last year... I was doing striped pocket scarves in color themes. So I'd go shopping for the turquoise family, or the purple family, or whatever... Unfortunately I didn't save labels because I had no idea I would need them later. DUH! I sure will from now on. Lesson learned!

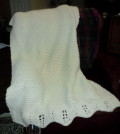
White Yarns

Vest Back


Starting Your Vest
Time to Measure!
You need to take a favorite sweater that fits around your hips the way you want your vest to fit, and lay it down flat with the back side facing you. Now make a starting foundation chain that measures exactly the same as the back bottom of that sweater, with no stretching. Now add 2 more chains. That was easy!
Row 1 - SC in 2nd chain from hook and in each ch across. Ch 1, turn.
Row 2 - SC in first SC. *Ch 1, skip 1 SC, SC in next SC. Repeat from * across. CH 1, turn.
Row 3 - SC in first ch-1 space. *Ch 1, SC in next ch-1 space. Repeat from * across. CH 1, turn.
NOW - very important - count your SC's as you repeat row 3. This is the "magic number" you will need to maintain as you repeat this row to complete the vest back. (It's easy to miss a stitch when you are working with big fuzzy yarns).
If you are working in stripes, just change yarns at the beginning of a row. You will have lots of ends to weave in later!
Work in pattern until piece reaches where you want your armhole to start.
Sheila's New E-Book!

Creating The Armhole

Armhole/Vest Upper Back
At beginning of row, slip stitch over next 3" of work, ending with a slip stitch in a chain 1 space. Ch 1, work in pattern across; skip final 3" of row. Ch 1, turn. Work in pattern until piece comes up to where you want neckline to be and with right side facing you. Fasten off.
Attach yarn to lower right corner of work. (You will be working up the side of the work now). SC evenly acoss side of vest back. Ch 1, turn. Repeat rows 1-3 from previous section. Work in pattern for 4", ending at upper end (armhole). Make a chain long enough to reach top right side of neckline without stretching. Attach to upper right side of neckline. Ch 1, turn. SC evenly across the chain and pick up pattern when you reach vest side. CH 1, turn, and work in pattern back up to shoulder.
Creating The Shoulder


Creating The Shoulder
You are creating the shoulder seam as you work. (So I guess the pattern's not totally seamless... just not in the conventional way!)
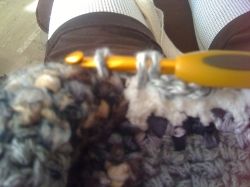
When you reach the shoulder, slip stitch into vest upper back, ch 1, and turn. Bring yarn to front of hook. (See closeup photo) Work down to hemline in pattern. Ch 1, turn, work in pattern back up to shoulder seam. Ta-da!!
You will need to work 3-5" of vest front for the shoulder, try it on and use your judgment.
Vest Front

Vest Front
Not So Tricky!
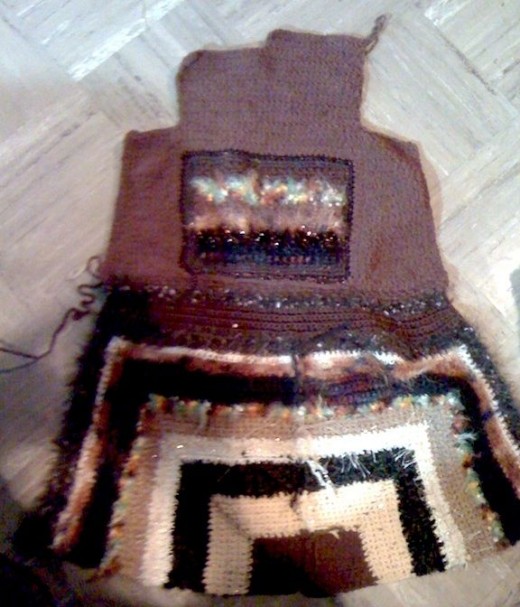
Please look at the photo above left and find the arrow. It is pointing to the black stripe. Notice the stripe before it; that is where you will want to fasten off that stripe and start your decrease row (black stripe). Now as to where on the stripe you will start your decrease, that's where your mirror comes in again. Try on the vest and see where you want the decrease to start. Mark it on both front edges with a piece of yarn so you don't have to do it again later!
Attach your (whatever color) black yarn shown in photo in the nearest ch-1 space to the point you marked. Slip stitch in next 2 stitches, ch 1, work in pattern down to hem. Work back upward. Slip stitch rather than SC in last stitch. Ch 1, turn. Slip stitch in ch 1 space, ch 1, work in pattern to hemline. Continue in this manner, decreasing 1 stitch per row at the upper end. Continue to work in stripes if you are doing that. Continue in this manner until the vest front is 2" away from the centerline. Fasten off. Repeat on other side for left front.
Vest Finishing (Better Picture Coming, I Promise!)
")
Finishing Details
Choose the yarn you will use for your edging. Start anywhere you wish and work evenly (CH 1, skip, SC in next stitch) around vest bottom, front edges, necklikne, and armholes. Fasten off. Weave in all ends.
Button Loop (as shown)
Attach yarn to right front at point where decrease starts. Ch 10, sl st in base of ch just made. Ch 1, work 15 SC in ring. Fasten off.
Button (as shown)
Round 1
Ch 5, join with sl st to form ring. *Ch 2, work 5DCP (5 DC Popcorn) in ring. Repeat from * 3 times (4 popcorns made). End with ch 2, sl st to top of first popcorn.
Round 2
Slip stitch in each stitch and space to corner. In corner loop, sl st, ch 1, sl st. Repeat around, fasten off. Attach to right front point where decrease starts.
NOTE: Rather than the button and loop, you could also attach ribbon to underside of each point for a tie front. You could also use a crocheted chain in desired length with a SC in each ch across.
Pattern Poll! - Appreciate Your Opinion!
What do you think about your search for the perfect vest pattern?
About Accessories...
As an image consultant, I've always advised people to invest 80% into accessories, and 20% into actual clothes. Last year and this year everything I've bought has been either gray or black or white, or a combination thereof. Now everything I have matches. This vest is the perfect accessory!
Wait Til You See My New Brown Crazy Vest! - Completed vest model picture coming soon so you can see what the heck it really looks like!!