How To Open An eCrater Store

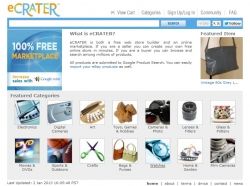
What Is eCrater?
Ecrater is an online web store builder which is free. You don't pay a fee when you upload your product and you don't pay a fee when you sell an item. The only fee you will pay is when you get to your payment processor. This means that you will get 100% of your product price.
It is easy to create and have your items for sale in no time. All you need is a browser (Internet Explorer, Mozilla/Firefox, Opera, Safari or Konqueror) and an internet connection. You can have unlimited products in multiple shops. There is a limit of 10 photos per product.
Ecrater does not sell any products of it's own so you are not competing against them. It is easy enough for a new online seller but efficient enough for a pro. It has a great search engine and is Google friendly. It also has a Community Forum where you can go to get help. Also, not only can you use Paypal but you can use Google Checkout as well.
Photo Source: These are my images so please do not copy.

My First Introduction To Ecrater
By my Aunt Joyce
My Aunt Joyce has shops on Ecrater. She has a store for each type of item that she sells. I was discourage with Etsy one day so sent her an email asking her how she was doing there. Her answer was that she loves it. She doesn't have to pay any fees to Ecrater. Her stores are fee free for as many items as she wants. The only fee that she has to pay it to paypal to receive her money. She also stated that she is doing pretty good with her shops. While I was in Illinois, we went shopping to various resell shops where she was
looking for items for her shops.
I thought "Why not? I have nothing to lose with a free shop".
Photo Source: One of Aunt Joyce's eCrater stores
Online Selling - Library Source


Grandma Marilyn's Ecrater Store
My own little mini-mall
I have several shops in my store. I wanted this capability so that my customers would not have to go through everything in my store to find what they wanted.
My first shop, Bead Patterns, is where I upload the bead patterns I have designed. These are further sorted by the type beading, ie. peyote, brick stitch, and so on.
My second shop, Craft Supplies/Kits, is where I destash my craft supplies that I no longer use or duplicates of the supplies that I do currently use. I also have my bead kits for my bead patterns listed here.
My third shop, Home Décor, includes items that I have crafted that would be usable in the home, such as crochet top kitchen towels.
My fourth shop, Beaded Accessories shows beaded accessories (Pen wrap, lighter cover, lip balm cover, etc) that either my daughter or I have beaded for sale.
My last shop, Beaded Jewelry showcases the ready-to-wear jewelry that I have beaded from either my own patterns or those of other bead designers that I admire. I have decided to sell these pieces and hope that they find a good home.
I may add more shops as time goes by but for right now, these are the shops in my mini mall. I love the fact that it is like a mini mall with a whole bunch of shops in it. I love the way that it is set up and it is so easy to keep up.
How Do I Sign Up - For an eCrater Store?

First, you go to the eCrater site and click on Sign Up Now.
1. You will need to think of what you want to call your store. Since GrandmaMarilyns has always been what I have used since I started doing craft shows, this is what I used. Have the name represent what your store will be selling. Enter this in the eCRATER Store ID box.
2. Think of a password. Now enter it and re-enter it.
3. Enter your Company Name (if you want), Contact Person, Address, Phone Number, Fax (if you want), Your Email (and re-enter it), an email address for your orders to go to, type letters and numbers in blue box into the white box to show you are human. If you agree to the terms and policies, click on Create Store.
You now have a store to put your products in. The Administrative screen will now come up so that you can start creating your store.
Next, I will go through some of the administrative duties that you need to do.

Basic Setup and Shipping and Taxes
Administrative Duties
Before you start uploading products, you need to take care of some administrative duties. I will go through these with you. I didn't do some of these things and even though I had products for sale, all the information wasn't there.
BASIC SETUP:
CATEGORIES: Just pick a few to start off with and you can add the others as they go. These will be the name of your shops in your mini-mall. Click on Categories in the menu to the left. Then click on Add New Category. You will be asked to name the category and what picture you want to use on your main store page. Type in the name of the category. Then click Browse next to the box for Picture. Select the picture from your computer that you want as the illustration for the shop. Click on the dot under the picture to make sure it is used for this store. It will say taken on any other categories that you choose.
PAYMENT OPTIONS: There are a 6 ways to receive money for your products from eCrater. You need to go through and put a check in the boxes of the ways you want to receive money.
1. Secure Checkout through Google Wallet - need Merchant ID and Merchant Key
2. Paypal - need your email used to add money to your Paypal account
3. Money Order - needs your name and address to mail the money order to
4. Cashier's Check - needs your name and address to send the cashier's check to
5. Personal Check - needs your name and address to send the personal check to
6. Cash on Delivery - for an item that is being purchased locally.
SHIPPING & TAXES:
WEIGHT SCALE: Choose the weight scale for the weight of the products you will be sending out. These are Small (1-16 lbs), Medium (10-90 lbs), Large (100-900 lbs), and Jumbo (1000-9000 lbs).
SHIPPING ZONES: Select where you want to ship your items. They have all the countries in the world listed here.
SHIPPING MATRIX: This is a matrix for the weight scale that you chose and lets you put in the price for shipping your products to where you chose. I left this blank and give a weight and chose Weight Dependable on each product.
SALES TAX: Click on Add Sales Tax. This will ask you what zone you are in. I am in Texas. And it will ask you for Tax Rate in %. I put in 8.25 for where I live.
There is still more that you need to do but I will put that into another module.

Texts and Colors
How to set up your store
We have gone through how to set up for your shipping and taxes and some basic stuff. Now we will be setting up how your store will look.
COLOR TEMPLATES: You will have 8 different color combinations to pick from. If you want, you can click on each one and then click on Preview in the upper right corner of this page to see what each one looks like. Pick the one that you like best.
UPLOAD LOGO: You can upload your own logo that will be displayed in the upper left portion of your store. This logo must be a maximum of 250 by 68 pixels. It must be a jpg, gif, or png file.
HOME PAGE IMAGE: Browse your computer for an image that you want displayed below the logo on the left side of your store. This image should be a max of 175 by 196 pixels. It must be a jpg, gif, or png file.
EDIT TEXTS:
HOME: Write in the information that you want everyone to see when they first enter your store. This will be displayed in the center next to your Home Page Image. You might want to check out other stores to see what type of information that they put in this area.
ABOUT US: Tell a little about yourself and your business in this section.
CONTACT US: Place how you can be contacted in this area. I suggest your name, company name, address and phone number.
TERMS & CONDITIONS: In this area, I put email and mailing address (telling them to make sure this information is current and correct), my cancellation policy, Shipping information for Domestic and International shipping, and my refund and exchange policy. Again, you might want to see what other stores have in this area to see what you might want to add.
TITLE TAGS: I put Grandma Marilyn's Ecrater Shop in here. You can put whatever you want your shop called in Google in here.
META DESCRIPTION TAG: These are the tags that describe your store. I put artwork, ready-to-wear jewelry, bead patterns, home décor, craft supplies created by Grandma Marilyn's (Marilyn Southmayd) as this described all of the shops in my store.
META KEYWORDS TAG: This area is where you will put all of the keywords that describe your products. There are too many in my shop to put them all here. Here are a few of them that I used: handcrafted, handcrafted jewelry, memory wire jewelry, handmade, beadwoven, beadweaving, bead pattern, peyote pattern, loom pattern, brick stitch pattern, seed bead pattern, etc.
FAQ: In this section, you would put any questions that keep getting asked over and over. If you know of some that people will be asking you, you can put those in there right now. I didn't have any that I could think of.
In the next module, I will be letting you know some optional administrative actions that you should take.

More Options
That need taking care of before you upload your products
Ok, now that we have taken care of the basic set up, shipping and taxes, and setting up your store, I will give you a few more duties that you can take care of now and get them out of the way. These will help to promote your store or add products to your store.
BULK LIST/EBAY IMPORT:
If you already have an eBay store or account, you can bulk transfer them over to your new eCrater store. If you do this, I would recommend that you go through and edit each listing to make sure all the information is there and add whatever you think the listing will need.
The Bulk Lister allows you to make a txt file with all the information for the listing that can be uploaded in bulk.
1.This file must contain at least 50 products, but no more than 10,000 products. Wow! That is a lot of products.
2. You cannot be an affiliate site, dropshipper, or distributor and must be able to ship all the products.
3. The images must be your own and not a 3rd party picture. Also cannot have the same photo on multiple products.
4. Cannot be used to update products already uploaded. Also cannot have several very similar products.
5. Must have a header line with column names in the first row (tab delimited). A sample of the text file can be seen at bulk.txt. To get definitions of all the columns, you can go to Bulk Lister.
a. Must be saved in UTF-8 encoding.
b. Each row must represent a product
c. Do not include line breaks
6. If you upload more than 200 products, you must accept either Paypal or Google Checkout or Both.
Again, I would recommend that you check to make sure everything is correct and there.
GOOGLE ADSENSE: Here you will need to put the email address that you used to get your Google Adsense account and your client id.
SOCIAL: This lets you link your store to your Facebook account
OPTIONS (SET STORE OPTIONS): You need to go through this area will allow you to decide whether you want to enable inventory control, set the way your store shows the listings, allow other currencies to show, enable some of the other options. This is also where I chose to Enable USPS Calculated Shipping Instead of using the Shipping Matrix. I was able to pick the types of shipping that I would use for the customer to pick from.
Ok, now you are ready to upload your products.

Adding Your Products
To your eCrater store and shops
Now you are ready to start uploading your products. Go to the menu on the left and click on Products.
Next, click on the blue button Add New Product. This will bring up a screen for you to enter all of your new information. I will now go through each one of the entries.
NAME: for this one, you will want to pick a name for your product that is unique and describes it as thoroughly as possible. DO NOT put in a lot of extra characters. Just use letters and numbers. Make sure that you use good keywords that people will be searching for.
DESCRIPTION: Describe this item as thoroughly as possible. Make sure to let them know if this is used or new, size, color, condition, how it can be used. Also include the Google Attributes here.
PICTURE: here you load your main image to be used for the product.
PRICE: This is the price of the item minus the $ sign.
LOCAL CATEGORY: This is the store.subcategory that your item is to be located in (For Instance, Home Décor>Kitchen Towels).
GLOBAL CATEGORY: This is the eCrater category the product would fall under.
GLOBAL SUB CAT: The subcategory under the eCrater category that the product would fall under.
The next four items are elective. If you want to use the feature, just click the box in front of the item.
Show as featured on the home page.
Show as featured in the category.
Hide this product. (select if don't want the product immediately available)
Used products. (select if used or vintage)
TAXABLE: Select this is you collect sales tax for your state.
QTY: Number of this product available for sale.
WEIGHT: Weigh the item and place that here. This would be entered as 1, 2, 3, etc for full pounds. For fractions of a pound, you would need to enter 0.1875 for the matrix or USPS to calculate correctly.
SHIPPING: Check the type of shipping that you want to use.
Free shipping to US & Canada
Weight Dependable (Select to use the shipping matrix or if you clicked Enable USPS Calculated Shipping Instead in OPTIONS)
Fixed shipping to: (You would put the cost of the shipping to this area if you want to use it.)
US-Mainland
Alaska
Hawaii
Canada
At this point, you can click
ADD & EXIT: This will add just what you have entered. To add more pictures or the Google Attributes, you will need to edit your product.
ADD: This will bring up a screen that will allow you to enter the following:
PHOTOS: you can add up to 9 more photos
GOOGLE ATTRIBUTES: This will allow you to enter the allowed attributes for your product. These will show up in your description.
SOCIAL: this tab will allow you to send your new product to your Facebook page.
CANCEL
Once you have entered a product, you can copy it to make a similar product. Just click on the second button in the second row of the buttons on the right side of your product.
If you sell products that differ only by all or any of the following attributes (size, color, material and pattern) then Google requires you to somehow flag these as variants. First, you need to go to Options on your left menu in the Account section and click in the box for Enable Google Variants. Then you find all the similar items by clicking on the boxes in front of all the like items or by using category or search for a keyword. Once you have them, click on the blue button with Link Variants. You can put each product into only one variant group. You will be able to link up to 40 products in each variant. You can also remove google variants by deselecting the desired products and clicking on the "Link Variants" button again. If you would like to remove all Google variants that you created you can use the global editor to easily do this.

Editing Your Products
In your eCrater shop
Now you have entered your products but find that you clicked ADD & EXIT or have more information to add to your product. The first row of buttons on the right side of your product will allow you to do the editing. The first button is the G for Google Attributes. The second button shows a camera for adding or editing the photos. The last button is a pencil and paper for the decription.
The first button in the second row with the 2 people is for sending your product to your Facebook page. The next one is for copying the product pages and the last is for deleting the product.

Promoting Your eCrater Store
Recommend you read these
Now that you have your store with all the shops up and running, I would recommend that you do the following from the menu on the left side of your Administration Page. I would give you a link but you wouldn't be able to get to it as it would be the page for my store.
READ OVER HOW TO PROMOTE YOUR STORE: This area will tell you ways that you can promote your store.
CHECK OUT HOW TO CREATE YOUR WIDGETS: These are widgets that can be used on other websites and blogs to promote your shop.
I wish you a prosperous store on eCrater.">
I love getting comments from my readers either good or bad. It shows me that someone is stopping by and reading my articles. If it is bad, then I will correct the fault.

")