THE OPENOFFICE.ORG WRITER FUNCTIONALITIES

OpenOffice.Org Writer
Today word processing is the common of all computer applications. The use of a word processor is to create, store and print document. A commonly used word processor application is the Microsoft office Word.
OpenOffice.org Writer – is an open source software word processor which is a component of the OpenOffice.org package. It is used to create documents such as notes, memos, letters, business documents, etc. It is used to create web pages.
Writer can be used across a variety of platforms.
To open OpenOffice Writer:
· Click on Start.
· Choose All Programs.
· Point the pointer to OpenOffice.Org 3.2
· OpenOfice.Org Writer
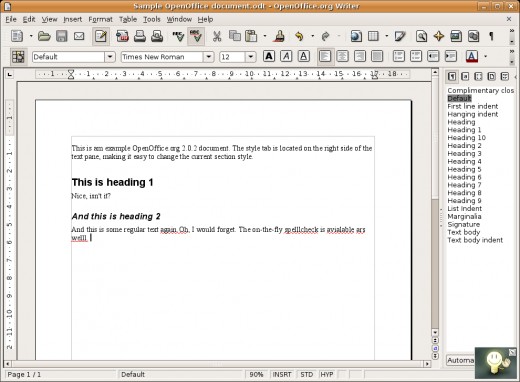
The OpenOffice.Org Writer is composed of different toolbars such as:
· Title bar – displays the document name followed by the program name.
· Menu Bar – list commands in a menu style; clicking on a menu name with the left mouse button displays the content o the menu.
· Standard Bar – includes icons for common actions, such as open, save, cut, copy, paste, etc.
· Formatting bar – list icons for text formatting.
· Status Bar – represented at the bottom of the page and displays general information about the document such as current page number, current template, zoom percentage, etc.
View other Toolbar:
1. Click on the view menu.
2. Point to toolbars
3. Put a check mark beside the name of the toolbar if you want it to be displayed in the window.
· To remove the toolbar in the window, deselect the toolbar by removing the check mark.
Create a new document:
1. Click file menu
2. Choose new
3. Click text document
Or
· Using the shortcut key by pressing the <CTRL + N>
· Clicking the New icon on the Standard Toolbar.
Save a document:
1. Click on file menu
2. Click on save
3. The Save As dialog box appears.
4. In the File Name: text box, type the name of the file.
5. Click on the Save button.
Or
· Using the shortcut key by pressing <CTRL+S>.
· Clicking the Save button from the standard toolbar.
Close a Document:
1. Click the File menu.
2. Click on close option.
Open an existing document:
1. Click File menu.
2. Click on Open.
3. The dialog box appears. Click the drive or folder that contains the document.
4. Select the file then click the Open button.
Or
· Using the shortcut key by pressing <CTRL+O>.
· Clicking the Open icon from the Standard toolbar.
Use the Help Function:
The Help Function is used as a reference for OpenOffice.org Writer that includes instructions for simple and complex tasks.
To open, click on the Help menu. Then click on OpenOffice.org Help or press F1.
The help window is consists of four tabs:
· Content tab – organizes help according to topics.
· Index Tab – list information alphabetically.
· Find Tab – searches for keyword.
· Bookmark tab – finds a page that may be used as reference.
Use SpellCheck:
SpellCheck and Grammar features scan the entire document looking for misspelled words or other words that are not contained in the built-in dictionary.
1. Click on Tools Menu.
2. Click on Spelling and Grammar or Press F7. The SpellCheck dialog box appears.
3. It displays the misspelled words and suggestions for the closest possible matches.
4. Specify the action to perform against the corrected word whether to ignore or change the word.
5. Click Close button when done.
Insert New Paragraph:
1. Place the insertion point after the last sentence of the last paragraph where you want to insert new paragraph.
2. Press the Enter key and type in the new content of the new paragraph.
Format a Paragraph:
1. Click Edit menu.
2. Click on Select All or Press <CTRL + A> to highlight the whole text.
3. Click Format menu.
4. Click on Paragraph. The paragraph dialog box appears.
5. Then, do the necessary setting for the paragraph depending on your preferences.
6. Click OK button when done.
The different alignment options are:
· Left-aligned: the most common from where each line is even with the left margin.
· Centered: each line is centered on the page.
· Right-aligned: each line is flush with right margin.
· Justified: every line is flush with the left and right margin.
To preview a document:
1. Click File menu.
2. Click on Page Preview.
3. Click on the Close Preview button to return to the Print Layout view.
Inserting Graphics:
1. Click on Insert menu, point to Pictures.
2. Select From File. The insert picture dialog box appears.
3. Locate the graphics you want to insert.
4. Select the graphics then Click Open button.
The common file types used for graphics include:
· Bitmaps (.bmp)
· Joint Photographic Experts Group (.jpeg or .jpg)
· Graphics Interchange Format (.gif)
· Portable Network Graphics (.png)
To move a picture:
1. Select the graphic by clicking on it.
2. A square appears around the selected graphic called Handles.
3. Drag the selected graphic to any position on the page.
To change the size of the graphic:
1. Click on the graphic. A sizing handles appears on the corners and edges around it.
2. Place the cursor over one of the corner handles. The cursor will change into a double-headed arrow.
3. Click the left mouse button and drag the handle until the image changes into the desired size.
Format a Text:
Font – is a set of characters in a specific typeface, specific point, and in a specific style.
1. Highlight the text to format.
2. Click Format menu.
3. Click Character. The character dialog box appears.
4. Scroll through the Font drop-down list.
5. Choose your typeface it’s either Regular, Bold, Italic or Bold Italic.
6. Choose your desired size.
7. Click OK Button.
Inserting Table:
Tables – allow you to present large amounts of text or numbers in an organized and easy to read fashion.
· Row – runs horizontal in a table and is divided by borders.
· Borders – separate cells in a table.
· Column – runs perpendicular in a table and is divided by borders.
· Cell – the box that is created when rows and columns intersect each other; it contains your data and information.
1. Click on Table menu
2. Point to Insert, click on Table. The insert dialog box appears.
3. In the Name field, type a name for the table.
4. Specify the size of the column and rows.
5. Click OK button.