Tools for Schools: How Kids Can Make Their Own Learning Tools

Summer is a great time to engage in some of these activities. On those hot days when everyone is wanting something to do, gather some craft supplies and have some fun.
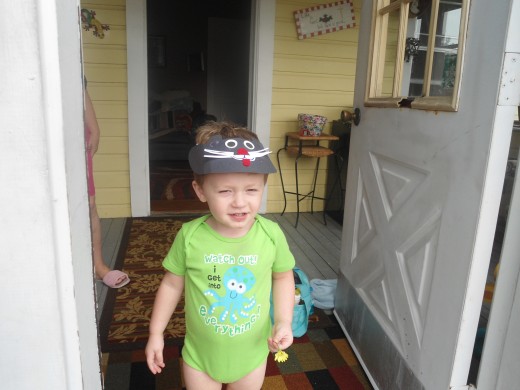
Baby grandboy in his visor
Our children who are so captivated by video games, computer games, ipods and other electronic devices have choices about what they can do each day. It should come as no surprise that they still like to create their own projects at home and at school. Creating something out of 'nothing' is a very satisfying experience. It becomes a kind of 'art' when it is completed. Using templates is another way to have fun. Creating these tools gives you the chance to optimize learning experiences.
Templates can spark creativity
Using templates requires use of a number of skills: problem solving, following directions, cutting, printing, or, cursive writing. If you are making the templates for use around a topic, 'things at the beach', for example, then learning new things will be another benefit of using templates.
This is one more way that we can provide an interesting and fun way to display new information or to make a sign or a card. Kids will think of many ways to use them.
It is suggested that you make them for the children to use for each of these projects. Make about five or six and the children can share.
As children use these patterns you have made for them, they begin to add interesting creative touches to their individual pieces. The idea behind them is not so that everyone will produce the same product but rather it provides a guide for those who feel a bit intimidated by art in any form.


....a Visor
Little kids find great fun in creating their very own visor.
You need:
- template
- card stock
- craft foam
- scissors
- markers
- colored pencils
Give each child a template to trace. After tracing, they can cut out their own brim for their visor.
Now, if you want a more durable visor, craft foam available at Target, Michael's, and other such stores, is suggested. For classroom teachers one way these were very helpful for the youngest children was this: at the beginning of the school year, I wrote each child's lunch number on the visor for the cafeteria manager to use at lunch time.
Card stock can be used instead of craft foam.
To make the band for the child's head so it can be worn, measure the child's head and cut out a strip to attach to the visor. It is suggested that you do this step.
After the visor brim and the strip to hold it on the head have been made, the children can decorate. If you are making for a specific function, then give the desired directions.
The children will want to wear them all day...be prepared for that. FUN brightens up every day!
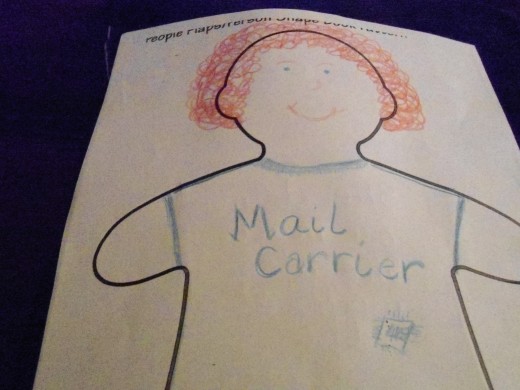
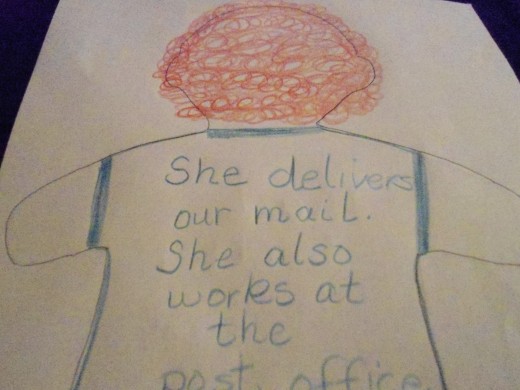
...shape Book
Children can make people shape books. Or, they can make 'stand alone' people .
You need:
- template
- card stock
- scissors
- markers
- colored pencils
You can make shape books for almost any topic. Make apples, pumpkins, puppies, kitties, trains, cars, letters or numbers...make one for whatever your child is learning.
Trace, color, cut out, decorate.
You can teach your children about important people in your community by making community workers. Children can decorate the front and the back of their workers.
...pop up Card
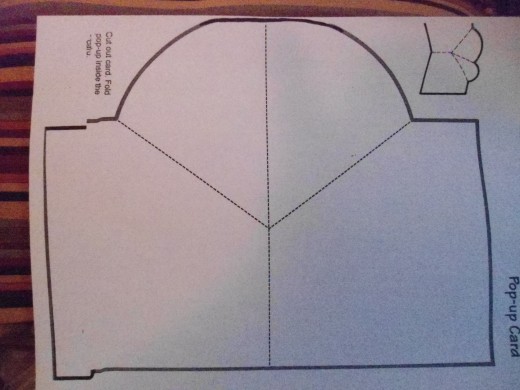

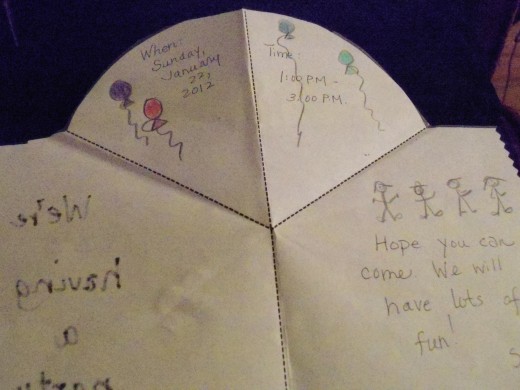
...a Card Wtih a Little Something Extra
You need:
- template
- colored pencils
- markers
- scissors
You will need to help the children with the folding process.The pop up section can be folded in to the actual card in several ways; experiment with the way you like best.
This is a really cute little pop up card that can be used as a card or to display information on a topic.
A Fun Activity for Little Ones
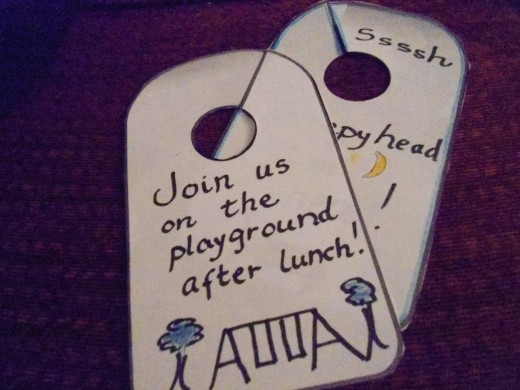
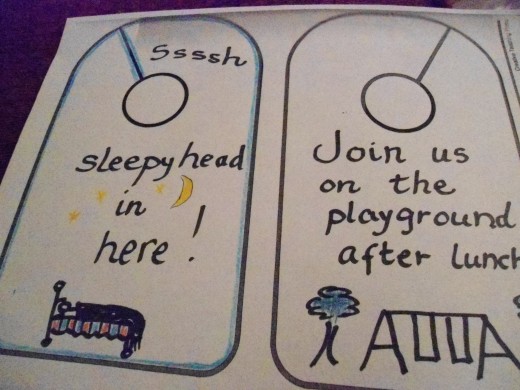
...doorknob Hangers
You need:
- card stock
- craft foam
- scissors
- markers
- colored pencils
This one was always a favorite with my children. Making and decorating doorknob hangers is easy, fun, and creates a product that can last longer than the time it takes to make it.
Both sides of it can be decorated so it is reversible.
This can be for a topic that is currently being studied or children can pick the topic they wish to display on theirs.
These are simple, easy activities that you can do for fun and for learning experiences as well.
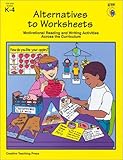
Perhaps you can give some of these suggestions a try. If you are creative, you probably have already come up with some of your own. The actual templates I used are from 'Alternatives to Worksheets' by Creative Teaching Press.
The opportunities to create with children are many and varied. Using templates is a way to develop a child's natural artistic ability. Soon no pattern will be needed. They will be making creations all on their own. Kids will also enjoy making cutouts to use for many purposes.
Tip
If your children are not old enough to do the tracing and cutting out, then you do it for them. Practice the words with them some each day.
There are many activities you can make to do with sight words including: word searches, puzzles, fill in the blank, and bingo such as the one shown. Available for purchase are many ready-made products but those leave out the element of the children making their own cards.
Cutouts for sight words...
Sight words are those important first words that children need in their toolbox as they begin the new adventure of reading. Making recognizing and learning them fun is a way to present them to your children with ease.
What to do:
Find a shape or create a shape you wish to use.to make sight word cards.
- Trace the shape onto card stock or other stiff paper in order to make patterns for your children to use as patterns to trace and cut out their own.
- Provide card stock and pencils for tracing.
- Then have a cutting out party.
- It is suggested that you do a few each day.
- On another day, write words to learn on the cards.
- Laminating them will allow use of them for years.
- One of the favorite activities we did with the cards (when we used the 'foot' pattern) was to place the feet all over the house so that the kids could go through and pick up the ones they learned. Lots of laughter ensued as they did this.
mini-booklets
These little fun booklets can be made using the designs you have already chosen for your children to use.
- Select a shape and a piece of large, light-weight poster board if you want more than three pages in your booklet.
- Place the shape on the poster board, trace around it.
- Then, place the shape next to the shape your just made, so that it is touching, trace around it.
- Continue in this way till you have the desired number of pages for your booklet.
- They are ready to cut out.
- For cutting out the tricky spots, you may volunteer to do the cutting.
You can use these for writing little stories, steps in a process, for a collection of drawings, a mini-sticker booklet, or as your children decide.
Children are eager to do hands-on activities especially when they are dong them with you. Have fun creating with your children.
Cutout bears, hearts, or other designs
Making cut outs for fun is another way to capitalize on a learning experience without making it seem like work. Consider using some of these activities for use with your children.
- As you did for the sight word cut-outs, select or create a template and make patterns for your children to make.
- These can be made on white copy paper or colorful construction paper.
- On their little bears or hearts (pictured) or your design of choice, children can write messages to give each other, to you, or to mail off to a family member who is out of town.
© 2012 Patricia Scott


