How to Photograph a Flower's Pistil

If you have a camera, a macro capable lens, a tripod, an electronic shutter release, love flowers and are interested in portraying them in unusual ways that are not only beautiful but also intriguing then you have the makings for a great and easy photographic project which you can do at home.
You won't have to be an expert in photography in order to do the project well but you will need to be very familiar with some techniques and have the proper gear. Plus you need to carefully arrange the set up or scene, set up your gear, be familiar with life size ratios and proceed to do your shoot.
First let's us understand the parts of the flower that will be your main components in the creation of your images;
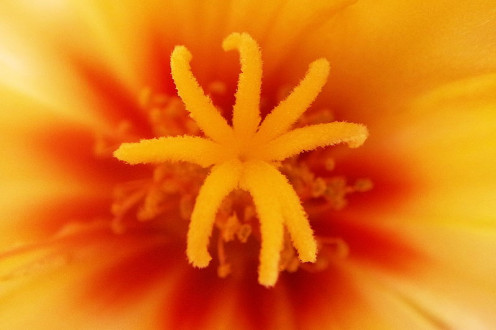
"the female reproductive part of a flower. The pistil, centrally located, typically consists of a swollen base, the ovary, which contains the potential seeds, or ovules; a stalk, or style, arising from the ovary; and a pollen-receptive tip, the stigma, variously shaped and often sticky.
There may be a single pistil, as in the lily, or several to many pistils, as in the buttercup. Each pistil is constructed of from one to many enrolled leaf-like structures, or carpels. The carpel is a single megasporophyll, or modified seed-bearing leaf. A pistil then may be composed of one carpel (simple pistil), as in the sweet pea, or of two or more carpels (compound pistil) partially or completely joined, as in the mustard (two carpels) or lily (three carpels)."http://www.britannica.com.
The first thing that needs to happen is for you to secure the use of a spot where you can photograph and that this space can be darkened. Next you need a table or other stable platform where you can mount your subject.
You will need to place a dark board right behind the subject. This is to focus all of the audience's attention on the subject. You will also need to set up at least one light source at a 50 degree angle to it. In a layman's terms, place your light source where the 10 or the 50 setting would be on a watch.
Preferably you should also have a reflector opposite the light source. This is used to reflect light back unto the subject.
Prepare you camera gear with the macro lens or a macro filter. This set up should be sitting on a tripod and you camera's shutter should be released or triggered via an electronic release. At the magnifications usually need to make good macro photos any movement, even the slightest, will be apparent in the final images.
Once you are set and ready to take your photographs, then it's time to place a pre-selected flower subject. You should use flowers that are fresh and have a wide center opening; Lilies, for example, are great while roses are not.
The pistil and stigma need to be clearly seen with the naked eye and you need to focus in close without having petals and other parts of the flower interfere with the flower's interior which is where you find our particular subjects.
Place the flower on a base that is not too tall. Ideally it should be full of sand so that you can insert the stem into it and this keeps the flower still.
Avoid having anything in the room that creates an air flow such as fans or air conditioning. Also avoid setting the flower until you are almost ready to begin recording images since most photo lights are strong and your flower can begin to wilt rather quickly. A good technique is to have a fine mist sprayer with water and spray a fine mist on the flower seconds before you capture its image.
Try to record images of one type of flower at a time and use various different flower varieties of different colors. This will help you evaluate post-production, which colors record better on film or on a digital sensor.
Reds work very well but so do most solid colors. I am emphasizing the use of bold colored specimens since you cannot completely prevent some of the color hues from the petals from showing up on your images. But these color hues add charm and interest and it's nice to have them present.
Although the project is done best in a studio setting, if you come upon nice specimens in the wild or even your backyard, you can still do the shoot. However, since wind can and probably will make your flower sway, it is suggested that you stabilize it with a support.
There are basically two ways that work well. One is to place a light tent or a square white cardboard structure which opens at two ends (top and bottom) on top of the subject and photograph it through a pre-made opening.
Another easier method is to make a stake. Take a piece of wire that is not too thin and at one end twist and create an open loop. Insert the flower stem through the loop and insert the straight part of the wire into the ground.
You can also weld or glue a small alligator clip to the loop and use it to hold your flower in place. This works better than using just a wire loop but sometimes it tends to cause some damage to the flower stem, although if the damage is not too serious, the plant will often recover from it.
Once you are done you can enlarge the photographs and mount them as fine pieces of artwork, since this is what they truly resemble. There are also many photography related publications that will be open to having your images submitted to them as well as many nature and gardening ones.
")

- 25 Beautiful Macro Photography Shots | Smashing Magazine
Macro photography is the art of taking close-up pictures that reveal details which can't be seen with the naked eye. For example, while we can see the fly on the wall, our eyes aren't equipped to make out the fine details of the hairs on it's face. T
© 2012 Luis E Gonzalez