Fresh Vegetables | How To | Store | Hot Water Blanch | Microwave Blanch | Freeze

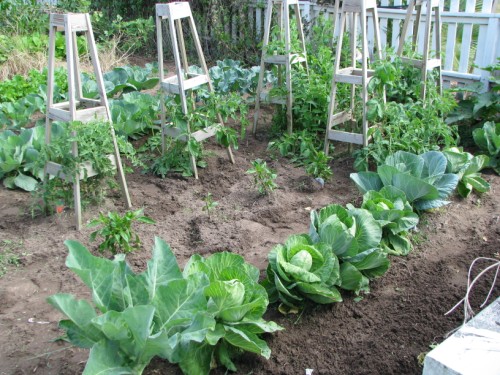

You don’t need a garden or labor intensive canning equipment to save a plentiful supply of vegetables for year round use.
Taking advantage of the seasonal peaks in vegetables and fruits allows you to purchase cheaper and store for off season when prices are much higher, or when the produce is no longer available.
Even a microwave makes freezer preparation a snap. Some vegetables don’t even need to be hot processed at all before freezing.
People love to eat vegetables and most can’t wait until the seasonal harvest to enjoy them until they run out.
Whether you grow a garden or not you can still reap the benefits of a seasonal harvest and stock up a supply to last throughout the year.
The secret in saving vegetables is to obtain the freshest and to process them before they become over ripe. Remove the stems, bad areas and wash them thoroughly to remove bacteria and possible pesticide residues. A large colander and drain board will make this task easier.
For those who didn’t grow up in a household that canned foods, the idea of buying all the pots jars and supplies and then taking the time to learn how to do is probably never going to be on the to do list. Others may have tried and ended up with not such a successful encounter and decided store bought was far easier to deal with.
Then for others all the horror stories of pressure cookers exploding and food poisoning, “no thanks not my cup of tea”, as some might say. The fact is even canning can be done safely without incident.
Freezing foods is probably one of the safest methods of preserving. It has the least risk over traditional canning methods. Even if you over or under blanch the vegetables, they will still be safe. Much safer than using the hot water bath method to the exact time period, in order to prevent spoilage from improper sealed tops on glass canning jars.
If you are just not in to all of that, a large pot to boil water, a bag of ice, a few kitchen utensils, and some freezer bags is all you need to save a large batch of vegetables. It even can be done in a microwave!
Now we’re not talking the freezing of cooked left over’s. This is taking fresh vegetables using a process called blanching. Blanching is where the vegetables are placed in scalding water for around 5 minutes and then quickly cooled in ice water.
Unlike cooking the vegetables and then freezing the blanching process stops the maturing process and locks in the color, essential vitamins and nutrients.
The ice water then quickly cools the vegetables down to stop the cooking process. You will want enough ice on hand to continue to have ice cubes floating on top of the water throughout the cooling process. One large bag of ice generally will last, unless you are doing a bushel basket of vegetables. One bag last us for a 5 gallon bucket of tomatoes.
The blanching process can be accomplished by filling a pot about half way with water and then bringing it to a rolling boil. Carefully add vegetables to prevent splash out. A slotted spoon or screen scoop will be needed as the same water can be used for several batches.
The micro wave process is very similar except the vegetables and water are added to a freezer/boilable zip lock bag at the same time leaving about a 1” of dead air space at the top for expansion. A short section in the middle of the zip lock bag is left unsnapped to let steam escape.
Each bag is done independently, ideally in a micro wave proof tall bowl like a large Pyrex measuring cup to keep it up right and then micro waved to the point the temperature reaches 190°.
You will need to experiment with a bag filled with water testing the time and temperature settings on the micro wave in order to know when the 190° temperature is reached.
Use either a temperature probe with the micro wave or frequently remove and test with a cooking thermometer. Leaving the vegetables in longer will begin cooking; leaving it in shorter will not complete the blanching process.
The entire (very hot!) bag is removed holding both sides keeping the hands and arms clear of the escaping steam. The bag is then plunged directly into the ice water that is at a depth to where the zip lock top of the bag will just stay out of the water but the vegetable part is submerged to prevent any of the cold water from entering the top.
The microwave process was studied by Dr. Gertrude Armbruster of Cornell University which concluded blanching in this manner kept 99% of the vitamins and nutrients with the vegetables instead of taking them out of the water see an article at. http://www.chron.com/CDA/archives/archive.mpl/1986_253001/microwave-blanch-veggies-to-preserve-flavor-vitami.html
After cooled the bag then can have the excess air pushed up and out sealed labeled and placed into the freezer.
The same microwave process can be used in a covered dish, removing after the temperature hits 190° and then placing the vegetables in the cold ice water just like the pot blanching process. Vegetables can be stored in freezer bags or freezer containers.
This process of course will not keep the vitamins and nutrients as the zip lock bag process, but probably will still far exceed store purchased vegetables in nutrient content.
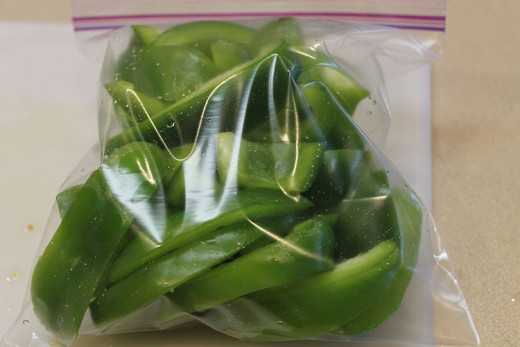
For vegetables like peppers we just wash slice them up and freeze directly in a zip lock back. Cutting them in slices allows us to quickly grab a few slices out of the bag and break off (still frozen) in our mixes and sauces as they are being cooked.
If we are out of season from the garden we will watch for peppers on sale in the store and purchase several to stock back up in the freezer. Just three large green peppers will fill a quart size zip lock bag and will last us for well over a couple of months.
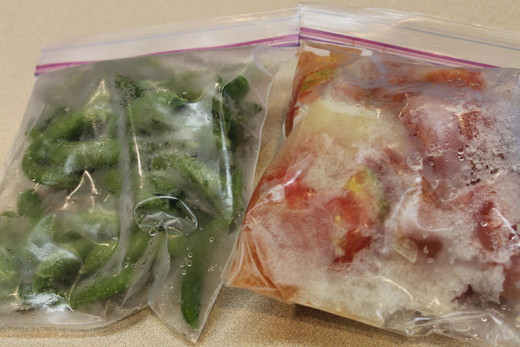
We blanch sweet corn, green beans, snap peas, and tomatoes. A quart size zip lock bag is perfect for a couple, it allows a good serving for each without pondering on any left over’s.
If in question if your favorite vegetable can be processed in this manner just “Google” the vegetable followed by “how to freeze”. You may be surprised on just what can be blanched and frozen, even such vegetables as egg plant, squash and okra can be processed in this manner.
For tomatoes, the blanching process allows the skins to be easily removed, which is needed before freezing. We wash whole ripe tomatoes and then ease them down into the boiling water to prevent splash out. A large slotted scoop will be needed so the whole (hot tomato!) doesn’t roll off as you remove and place them into the ice water.
We generally will blanch tomatoes for five minutes; you will know exactly how long it takes to blanch after the first couple based on how easily the skin removes. After they are cooled the skin should begin to slide off as they are picked up.
A paring knife will quickly clear off any remaining skin, then core and quarter before adding them to a freezer container or zip lock bag. Always clean off the plastic zipper part and squeeze up and out as much air as possible before sealing and freezing.
We like to use these when cooking up a stew or other recipe requiring tomatoes. No need to thaw out either, meaning if we decide we want more we just pop out an additional bag or two.
Blanching times can range from 2-5 minutes based on the size of the vegetable. A small stock of asparagus should be blanched 2 minutes up to 4 minutes for thick stocks. Green beans 3 minutes, and whole ear corn up to 11 minutes.
Again just “Google” your vegetable and add “blanching” to see the various recommended blanching times. Create a log in the back of one of your favorite cookbooks for reference for next year so you don’t have to repeat the microwave temperature test or blanching times used on different vegetables.
To freeze a plentiful crop of fresh fruits use a “Flash Freeze Process” Clean core and drain slice fruit and lie out on a large cookie sheet to where the fruit does not touch and then place directly into the freezer. After frozen place in freezer containers or zip lock bags label and place back into freezer before they begin to thaw.
Flash frozen fruit works great to grab a few slices out to make a smoothie or add to Sunday morning pancakes.
Living in Texas our grapes come on and ripen over several weeks. It is right in the middle of July where it’s just too hot to process anything in our outdoor kitchen.
We simply pick and place directly into gallon size zip lock backs and place them in the freezer. This allows us to accumulate around 40lbs of grapes that we can later pull out in the fall and process into juice, jelly or maybe even a jug of wine. They come out just like they were freshly picked.
Stainless Steel Drain Board (pictured) is courtesy of Cottage Craft Works .com


")
