New Ideas for Pumpkin Carving


Ideas for your Jack O Lanterns in Fall
Its always amazing to me what people come up with and jack o lanterns are no exception. The "canvas of a pumpkin" seems to be really inspiring to some and you can really go all out in not just your design but in in layers in your carving of a pumpkin. There are surely many resources out there, but Martha Stewart is just on place to go to get ideas for taking your pumpkin carving a step further. From what I have seen, it is just amazing what you can do with the right templates, tools and tenacity! I don't think it is as hard as it looks at first blush, so why not give it a try?
You can get patterns and pumpkin templates by doing a search or looking in local magazines and books for ideas. There is some carving by color out there now as well, and this process seems to have an extra great effect. Basically, the idea is to go beyond the regular cut outs of a pumpkin, to a scraping off, carving off just the outer layers of a pumpkin, so that the light from within shows through. Its really rather beautiful!
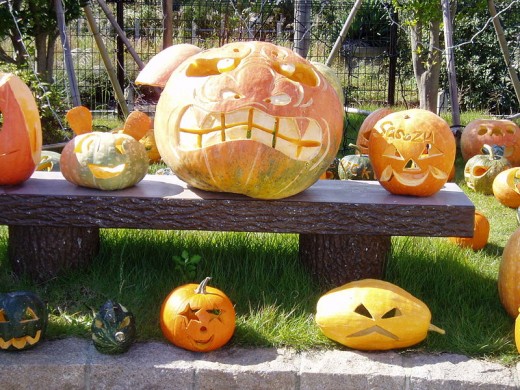
Some Fun Ideas
Some Tools for Pumpkin Carving you may not have thought of!
We have always used sharp knives for carving, but why stop there? You can use other tools that you may not have thought up for your pumpkin carving. Especially for those effects that include layering, which take advantage of the whole skin of the pumpkin for different and neat effects. Its like adding different hues, shadows and designs to your pumpkin design. I would add, that using tools in the best condition, for instance nice and sharp will give you better designs and safety even as you have fun with your gourds this fall.
Sharp Knives of different sizes
Mellon Ballers and Scrapers
Miniature Saw
Keyhole Saws
A Hole Cutter, can use different sizes
Linoleum Cutters
Power Drills
Wood Gouge
Power Saw (as seen in the video, no children should do this!)
Awls
Needle Tools and Pins
Cookie Cutters of different shapes
I think everyone at least has a few cookie cutters around, and you can just put them on the inside of the pumpkin, lay the pumpkin on its side, and push the cookie cutters through to get great shapes quickly. Hopefully this has inspired you to try some new things! Please see my links for templates and designs with intricate instructions if that is something that you benefit from having.
Try out your hand at making some pumpkin creatures or critters like owls or other animals. You can carve out words or messages in your pumpkins. One woman gets ideas from old tombstones. How about dressing up your pumpkin once its done with its own costume? You can be inspired from all kinds of arts and designs around you if you only keep your eyes open. Some even paint their gourds and pumpkins as a different approach. The only rules are there are no rules in this case, and to have fun!

Very Basic Pumkin Carving techniques
Some just think simple is better, and I tend to agree very often, especially when we are working with children and pumpkin carving. You don't want to overwhelm them with an extra difficult or lengthy task.
1. Cut a hole at an angle in the top of your pumpkin so you can have the lid sit back on it nicely.
2. Scoop out all the flesh of the pumpkin, retaining the seeds if you like to brown those with some salt for a later snack!
3. Have your design or idea in place of what you want to do. Prepare to do that part, and if it includes using a template, then apply that now.
4. Carve out the design, your personalized features for your pumpkin! This is where the real fun begins. If you have a child with a short attention span, you can bring them in at this point, but don't forget to share with them all the other hard work it took to get to this point.
5. Decide on a lighting mechanism for your pumpkin. Some use candles and tea lights. Some use flameless tea lights that you can find at Hallmark Stores, or Wal Marts, Targets, or Lowes or Home Depot I would imagine. If you have a small set of white lights, you can wrap them around something like a vase or jar then insert that into your pumpkin.
6. One last thing that has helped us in warmer climates, was to give our pumpkins some time to "breathe" while we are waiting for Halloween to arrive. You can leave the lids off your pumpkin, to give them some sunlight and air during the days, so they don't mold and mildew then cave in on themselves later. Its so discouraging to see a lot of work go to waste this way. Usually it only happens once though, and then you know to avoid it in the future.
Happy Pumpkin Carving and don't forget to take pictures. I have never regretted taking any pictures.
Martha Stewart helps David Letterman with a Pumpkin
Click this link for neat ideas and templates
- Pumpkin Carving, Decorating, and Patterns - Martha Stewart
Holiday ideas from Martha Stewart on marthastewart.com. Our best cookie recipes, menu ideas, crafts projects, decorating tips, and more for Christmas, Halloween, Thanksgiving, Easter, Fourth of July, and all your favorite holidays.