How to Design Your Own Digital Surveillance System

Digital Surveillance System: An Overview
Need of Digital Surveillance System
There is no better proof of an event or incidence that has been seen by one's eye. That's why people say "You have to see it to believe". Unfortunately, not enough research has been done on paranormal activities helping us to be able to be virtually present anywhere at the place of our choice. There comes the advantage of today's technology: "An electronic Eye", i.e. the concept of digital surveillance. Although, there are many applications of digital surveillance, we will be primarily discussing about its security application.
How Digital surveillance compliments Alarm system
Almost all of us have Alarm panels installed in our premises to prevent an unwanted intruder. Also, most of these alarm panels are connected to alarm monitoring companies, by means of telephone lines or some kind of internet connection. This connection triggers an alarm at the monitoring company when an unwanted intrusion takes place in the protected premises. Basic purpose of doing this is that, one responsible person / company should be aware of an alarm generated by an unwanted intruder and consequently take action on that. Main problem here remains the delay between, alarm generated, alarm communicated and action taken, because of geographical distance between the protected premises and the monitoring company. This delay goes as an advantage to the intruder. All professional thieves now know that there is an average delay of approximately twenty minutes between the alarm generated and action force from the monitoring company to reach the premises. And these thieves take advantage of this delay. Just imagine a scenario where alarm is generated and monitoring company is able to remotely view your premises and record the event along with sending an action force to the premises. Catching of thieves will become so easy. This concept is nothing new, but basic aim of this article is that you can implement this system yourself at your premises without spending huge amount of dollars.
Home Automation
Another off-shoot of this system is Home automation, as now you have a bi-directional communication / control of your premises in view of exchange of information, e.g. you are on vacation and you don’t want outsiders to know that nobody is in house for 10-15 days. You may occasionally hop into a internet café, log into your home computer, select a light switch on the screen and click it “ON” and the your light point in the living room is “ON” or turn on the TV. Of course home automation is not our subject of discussion today and you may click below if you need further information. You may write to us also and we may help you in implementing this further.
Home automation systems.
Be creative and try to build your own home automation system. It will not only make your home more comfortable but will improve safety & security and save energy.


Lens Selection
Focal length of the Lens
Type of lens that you select for your camera, decides what kind of angle i.e. what kind of coverage you are going to get from your camera. Focal length of the camera is the factor which decides the angle of the view of camera. Larger focal length will provide smaller angle of view and hence bigger the size of the object on screen. This is true vice versa also. This is illustrated by the fig. below.
Above figure shows that if the lens’s focal length is large an object will cover most of the TV screen making it look big but the angle of view will be smaller. Similarly, if the lens’s focal length is small an object will cover small part of the TV screen making it look small but the angle of view will be larger.
Ambient and varying light conditions
Second criteria that requires the right lens collection is the ambient light condition. If the camera is out door, obviously the light condition will vary during the day and hence the picture quality will vary. E.g. when the sun comes to an angle where it comes right in front of the camera, camera will hardly be able to see anything. It is like shooting a picture from your still camera looking towards the sun. Even if you want to shoot a picture looking towards a bright light source, you will keep the shutter of your camera closed as much as possible. It’s the same thing in this scenario. But here we call it opening or closing of iris instead of shutter.
There are two types of Lenses available:
1) Manual iris
2) Auto iris
As the name suggests, If the camera is installed in such a way that it is required to look towards a brightly lit area or to be precise, camera has to look towards the light source, we can select a manual iris lens and adjust it to this light condition. This is when the light condition is not varying.
If the light condition is varying like sun light, auto iris will be the right choice where the closing and opening of iris is automatically adjusted based on light condition.
All cameras don’t support auto iris lens. So we must ensure that the camera that we are using can be connected with auto iris lens. There are 2 types of auto iris lens available:
1) DC signal driven
2) Video signal driven
You must check the camera as to what kind (or both) of signal the camera provides and select the lens accordingly.
Lastly, there are two types of camera mounting standard available: ‘C’ mount and ‘CS’ mount.
Just be sure that your camera and lens are compatible with respect to their mount standard.
Manual and motorized Zoom Lens
Earlier we saw how the appearance of the scene varies with the type of lens used with respect to its focal length. Lenses are available where this focal length is variable by means of a knob and the focal length can be set to a desired setting.
This can be manual or motorized. With motorized zoom lens it is possible to focus on an object by a press of a button or click of a mouse. We will discuss about it in detail when we talk about PTZ (pan tilt zoom) camera and digital video recorders.
Camera Selection
Types of cameras: CMOS and CCD
There are mainly two types of security cameras available CMOS (complementary metal oxide semiconductor) and CCD (Charged coupled devices). Both have got their own advantages and disadvantages and it is not correct to say that one is better than the other.
Electronically, CMOS cameras consume less power but the images produced by them are slightly less sharp than CCD, not because it cannot be made sharper but making them sharper is more expensive and the manufacturers are trying to cash on its cheaper cost and miniaturization. So CMOS cameras are more useful where less power is to be consumed and miniaturization of camera is required. On the other hand, CCD technology is more suitable when acquiring sharp picture is important where it can be made with less complex manufacturing process. Hence in general CMOS cameras are less expensive than CCD cameras. Ultimately both these types of camera give out a signal known as 1V peak to peak composite video signal. And as long as display device (TV, monitors, DVRs etc.) can accept this signal we need not worry about the technology how this signal is achieved.
Selection criteria with respect to resolution and lens
Second most important thing about a camera to be decided is its resolution. They are available like 330 TV lines, 420 TV Lines, 540 TV Lines and so on. Obviously, higher the resolution, costlier the camera. Resolution may be interpreted as the number of dots (also known as pixels) that can be uniquely displayed on the TV screen. So, more the number of dots better will be the quality of picture.
Another point that needs to be decided is, camera's sensitivity to light that is measured in terms of "Lux". Lesser the value of lux, better the camera will be able to view in low light condition. It is specified as 0.1 lux, 0.5lux etc. Since, it easier for black and white cameras to see with good resolution in low light conditions, many manufacturers design cameras in such a way that they show color images in good light conditions but turn black and white in low light conditions. Scene illumination is measured in Foot-candles (FTCD).
PTZ (Pan Tilt Zoom) Camera:
This is very intelligent mechanical-electronics integration, giving very advantageous results. Camera is mounted on a dual motor platform which is controlled by 2 motors, one for horizontal movements (panning) and the other for vertical movements (tilting). These motors are controlled electronically from the control room helping us change the direction and hence the angle of camera. Normally tilt angle is available from 0-90 deg. And pan angle is available from 0-355 deg.
Similarly, camera is provided with a motorized zoom lens by which we can focus on an object and have full control on lens from lower focal length to larger focal length. Range of focal length that a lens can provide varies from lens to lens and is the main factor deciding the price of the lens.
This whole unit is controlled by a micro-controller device which has many advantages. Firstly, instead of controlling all these functions by individual wires, serial differential communication protocols (like RS485 or RS442) are used so that 2 pair twisted or 1 pair twisted cables are sufficient to be laid for all the functions. Another major advantage being, it makes the whole unit intelligent and hence it is possible to create presets i.e. create a few points for PTZ camera and so that the camera always follow those points at a defined interval. E.g. first point may be far end of the gate, then turn by 45 deg. And zoom on an internal door and so on. PTZ cameras are specified for this feature as 64 presets or 128 presets etc. 64 presets means, 64 such points may be programmed.
Since these units now have become intelligent, protocols between PTZ cameras and the control room have to match. These days, Digital video recorders specify the make and models of cameras that can be controlled by the DVR. In case your DVR doesn’t specify a particular model that you are going to use, very often these cameras come with their own keyboards for configuring as well as controlling the cameras.
IP (Network) Cameras:
So far we discussed about cameras which give 1V p-p Composite video signal as final output. Expansion of these cameras is IP or network cameras where video to TCP-IP conversion is implemented within the camera and hence these cameras can be directly connected to an Ethernet switch. They are designed to act as video network servers. Just provide them with an IP address suitable for your network and they are ready to be used on your standard computer. Software are available to add DVR capabilities for these cameras.
These cameras are nothing but a video network server built into a standard camera.

A new innovation in IP Cameras
IP Cameras with SD RAM and Bi-directional Audio
With time innovative companies keep coming with new ideas. Recently many companies have revolutionized the concept of IP cameras by adding SD RAM and WiFi features in them. You don't need to connect these cameras to any DVR and the recording takes place in their inbuilt SD RAM. You may view the recorded video footage either through your laptop via WiFi or using smartphones. Not only that but you can pan or tilt these cameras by giving commands either through your browser or through your smartphone.
Cable Selection
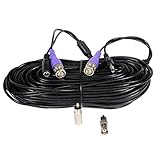
Mostly co-axial cables are used for video signals of these cameras which are available in various standards like RG59, RG6, RG11 etc. you need to select a cable mainly based on the distance that the cable is going to cover. RG59 is suitable up to 100 mtrs. and RG11 can go up to 800 mtrs. These cables are basically classified with respect to the signal loss that takes place within the cable as they travel to a particular distance and their characteristic impedance. E.g. it is 75 ohms in RG59 and 50 ohms in RG11.
Latest development in this field is to use standard network cable CAT5 instead of co-axial cable by means of using a “BALUN” (balance-unbalanced load). Using CAT5 cable for video application becomes very useful in today’s environment where structured cable is gaining too much importance. (Of course topic of structured cabling is beyond the scope of this discussion, but we can understand the advantage of using CAT5 cable for video application)
Power Supply
There is no hard and fast rule as to what value of power supply a camera should have. Various manufacturers use different voltage for different models. Most common being 12V DC. But 24V DC and 24V AC are also being used as standards.
Similarly current requirement also varies from model to model. As we discussed earlier, since CMOS camera consume less power, they are available with power consumption as low as 50 M.amps at 12VDC.
Power cable termination on camera is normally through a DC2.1mm plug but again there is no hard and fast rule about it.
It is normally recommended to use regulated linear power supply rather than SMPS power supply as linear power supplies are cleaner especially in view of tiny voltage ripples.

Digital Video Recorders
Finally, we have reached the heart of the digital surveillance system, i.e. digital video recorder. Mainly in the market, 2 types of systems are available. Standalone DVR and the PC based ones. Selecting a DVR on this criterion is actually a matter of choice. Stand-alone DVRs are meant for just this application and are dedicated for surveillance system whereas PC based DVRs are available either as PCI cards or USB based. Of course, USB based DVR have their own limitations because of speed restriction on a USB port.
Whether the DVR is stand-alone or PC-based, their selection criterion is the same. Some of the main features that we need to go through before deciding a DVR are:
1) Frame rate: If the DVR under consideration is 4 channels DVR and the frame rate is 20 FPS (frames per second), then each camera will get 20 /4=5 FPS. This will not be real-time but just sufficient for standard security applications. But the same FPS of 20 will be unusable for 16 Channel DVR as per camera FPS will be 20 / 16.
2) Again, DVR specs. Should also mention whether this FPS is only for displaying camera pictures or also for recording. It may be the case that the display FPS is more than the recorded FPS. In that case, although you will see a better display the recorded picture might be quite a broken one.
3) You might be using a high-resolution camera but if your DVR doesn't support high resolution then actually you are wasting your money on having a high resolution and hence highly-priced camera. The video image resolution is normally available as 320X280, 640X420, etc.
4) Motion detection sensitivity: How sensitive is the DVR, to detect motion. This becomes very important when DVR has to record in an event of motion.
5) Masking of a part of the screen: Whether it is possible to mask/unmask a part of the screen, so that motion in that part is ignored by the DVR.
6) User-friendliness of overall use of software, especially playback features. How fast you can find an event of interest will depend on whether the play-back search scheme of the DVR is effectively made or not.
7) Another important point to consider is whether the DVR uses hardware video compression technique or the software video compression technique. The hardware technique is more efficient and at the same time costlier.
8) Password protection: Normally good software will have multi-level passwords where the administrator should be able to configure various users with defined level of authority.
9) What kind of networking features it provides. TCP/IP has its advantages that it is more efficient but the webserver concept has the advantage that it doesn't require software at the remote end but it is relatively slow.
Remote Watch:
Any DVR that supports TVP/IP or web server based networking can be viewed over LAN or Internet or Intranet.
Firstly, the DVR needs to be configured for a fixed IP address which will be decided by your network. Once the IP is defined, you should be able to view the cameras / recorded pictures over the LAN just by typing the IP address of DVR in the address bar of your internet explorer (In case of video webserver) or by running a special software application provided by DVR (In case of TCP/IP application)
To view it over the internet, your router on the network is to be told to communicate with DVR whenever a valid attempt is made on a particular port number. This port number is configured at the DVR end. If we define that port 1000 is for video images in DVR software, then the router has to be configured so that all the data on port 1000 should be directed to the DVR IP address.
Almost all the routers have this facility and they are known by different names like, pin holing, port forwarding or creating virtual server, etc.
Dont forget to browse thru these incrideble products
Amazon has some great products to build your own digital surveillance system.
Digital surveillance and point of sale solutions
We are a Wellington, New Zealand based company incorporated in 2002. We provided digital surveillance, Access Control and Point Of Sale products and have vast experience in executing turnkey projects in the field of electronics security, Point Of Sale solutions and IT Support.
- Digital surveillance and point of sale solutions
Morris Salsym NZ Ltd. was incorporated in 2002 by a few qualified engineering professionals having more than 20 years of experience in security industry. We expanded in 2004 into additional fields like Point Of Sale and IT Support.
My security camera recorded this video during a storm in wellington
Our New Range of Cameras
We have just received these analog and IP cameras. Please watch this video and email us if you have any query.

Check This Range of IP Cameras from Geovision

Geovision Web server and Team Viewer
Geovision digital video recorder software with active web server and team viewer on the same machine has always created problem for me. So today I decided to test it thoroughly.
If Geovision's HTTP server is kept as default i.e. 80 and team viewer is installed, connectivity to web server outside the LAN will not give any problem but if you try to connect the server within the LAN using LAN IP address, Team viewer will block it. I tried it today.
Also, it will be more effective to use remote desktop provided by Geovision instead of using a third party remote desktop like team viewer etc. for seam less operation of Geovision.


