Maintaining Your Pearly Whites After A Professional Teeth Bleaching

Don't Let Your Investment Fade Away
According to the Academy of Cosmetic Dentistry, 96% of adults believe an attractive smile makes a person more appealing to the opposite sex. Perhaps that’s why thousands of people every year are opting for in-office whitening procedures from their dentists. But after shelling out anywhere from $400-$1000 for the procedure and the take-home touch up gel, you want to make sure your investment doesn’t fade back to yellow before you have time to enjoy your pearly whites.
Maintain Your Pearly Whites
After the in-office procedure is done, there are several things you can do to maintain your bright, white smile.
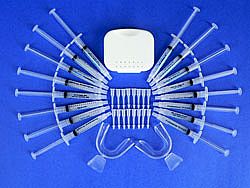
Bleach Storage
The main ingredient in the bleaching gel, hydrogen peroxide, stays most effective if you store the bleach syringes in the fridge.
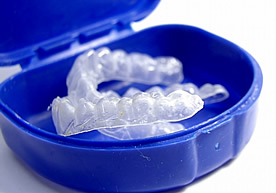
Keep your trays in a cool, safe place, too. Your dentist should have provided you with a case when he/she gave them to you. Leave them in the case so they stay clean between uses.
Pre-Bleaching
Before putting the bleach trays in your mouth, be sure you clean your teeth as best you can. This means a full brush as well as floss. The cleaner your teeth are, the more efective the bleach will be.
You'll want to rinse out your trays as well, making sure you dry them thoroughly to make sure the bleach stays in place once it's placed in the trays.
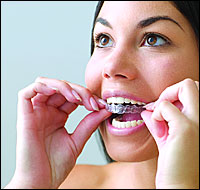
Effectively Placing The Tray
Before you put any bleach into the trays, make sure you know which tray goes on which arch. It is sometimes difficult to the untrained eye to determine if the tray is for the upper or lower teeth, and it can get messy if you're fumbling with the wrong tray.
When you're applying the gel, it is only necessary to apply it to the part of the tray that will be on labial, or outside part of your teeth. It is a waste of bleach putting it in a place no one but your dentist will see.
You'll know you applied the right amount of gel when a small amount squishes over the edges after placing it on your teeth. If no gel squishes out, you'll need to apply more the next time you bleach, but if a lot aquishes over the sides, you'll know to apply less next time.
Some of the syringes are tricky, and pressure inside the tube will make the gel start squirting out as soon as you get the cap off. If this happens, pull back on the plunger to force some of the bleach back in the tube.
As you're applying the bleach to the tray, use the tip of the syringe to evenly spread the bleach around. Don't just squirt out blobs and think it will spread out when you get it in your mouth. You will most likely end up applying too much, and waste gel. Having excess gel sitting in your mouth can also irritate your gums, so it's important to apply just the right amount.
Now that the bleach is on the tray, as you place it in your mouth, touch the tray to the back of your teeth first so you can slide the tray on without smearing the gel all over with the front of your tooth.
Once the tray is fully on, gently press on the front of your teeth to evenly distribute the gel. At this time, it is appropriate to wipe off any gel that has squished out of the tray. You can do this either with your finger or a washcloth, but using a paper product will result in a disintegrating mess that gets stuck in your mouth. Make sure whatever you use to get the gel off will not rip apart when it gets wet in your mouth.
Removing The Tray
It won't hurt you to leave the tray on longer than your dentist instructed, but it's not making your teeth any whiter either.
When you remove the tray, be sure to rinse it out thoroughly. Use only lukewarm water; really hot water can warp the plastic mold and affect the way the tray fits on your teeth. It's also a good idea to gently brush the mold with your toothbrush. A recent study showed athletes that didn't sanitize their mouthguards had an increased incidence of cavities because they were allowing the dirty mouthguard to sit on their teeth for several hours at a time, repeatedly. You don't want to go to all the trouble to have white teeth and then end up with ugly cavities.
You will also want to brush your teeth because there will be bleach residue leftover. It doesn't hurt to give your at-home bleaching efforts a little boost by brushing with a whitening toothpaste. You can buy a professional formula product like Rembrandt Whitening Toothpaste, or go with something a little easier on the pocketbook like Crest Whitening Toothpaste.
Eating After Bleaching
After an at-home bleaching session, you should avoid eating foods that could stain your teeth for at least 48 hours. "No-no foods" are those that have a strong color that could transfer to your teeth, such as: red wine, coffee, chocolate, beets-a good rule of thumb to remember is the darker the food, the stronger the staining potential.
Even after the requisite 48 hours is up, you should avoid drinking dark foods like coffee and red wine. If you cannot avoid drinking dark beverages, drink them using a straw so the liquid isn't passing over your front teeth on its way into your mouth.
Don't Over-Do It
You should set up a regular schedule for when you bleach your teeth e.g. the first of every month. But, you want to be sure not to bleach too much. Hydrogen peroxide can dry out teeth the same way it can dry out hair. Too much bleaching could lead to sensitive teeth.