Backyard Wedding Photography Tricks

Simple Tools to Improve Your Wedding Photos
I learned some of these backyard wedding photography tricks while shooting my sister's wedding; some of them I'd already known from my prior photography experience. I'm definitely not an expert or a professional, but I think that the images I captured during the ceremony and reception will stand the test of time.
If you, too, are an amateur photographer who wishes to capture the wedding of a friend or family member, or if you just want to learn some basic tricks to improve your skills in general, the information included here should help you out.
For more information, check out my other site: How To Take Good Wedding Photos.
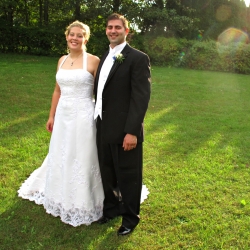
Trick 1: Take TONS of Pictures - You'll Never Have Enough
Click thumbnail to view full-size


These are just a few of the thousand pictures we took.
A digital camera allows you to capture every angle of the wedding.
My Wedding Photo Camera - I Love My Canon!
For information, check out my Canon s95 review.
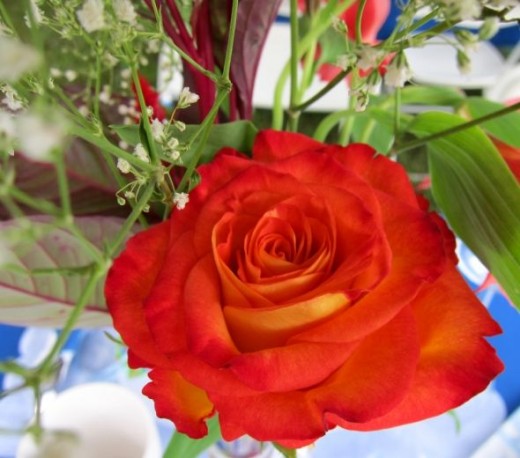
Exposing wedding photos correctly (that is, making sure the aperture and shutter speed work together to get the right balance of light and dark) is tricky. On the one hand, you've got the bride in a blindingly white dress; on the other hand, you've got the groom in a black tuxedo.
If you're using a DSLR, and know how to adjust the shutter speed and aperture, you can solve this problem manually. If you're using a point and shoot camera, the trick is to capture several different exposure levels, because it's hard to see on a small screen whether the exposure is optimal. Usually a point and shoot will take a "sample" exposure reading when you press the button halfway down. Try pointing the camera towards different areas of the scene you want captured, pressing the button halfway to get an exposure reading, then adjusting to frame the picture you're trying to get.
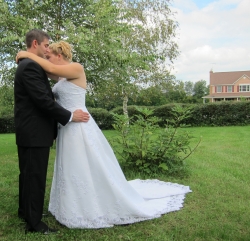
Trick 3: Pay Attention to the Background
Some Things Aren't Easy to Cute
As you can see from this photo, I wasn't paying attention to the background, and I got the neighbor's house in the picture. There's nothing wrong with the house; it just kind of interrupts the sentiment of the image.
During the wedding ceremony and reception, you'll be taking plenty of in-the-moment pictures; for these, the background won't matter quite so much. But for the staged wedding pictures, you'll want to create as perfect a scene as possible. Adjust the position of the coupe and angle of the photo until you're happy with the results.
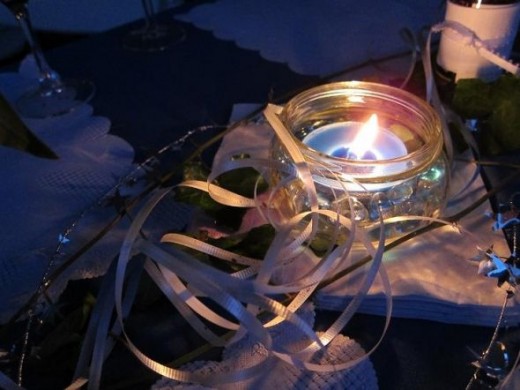
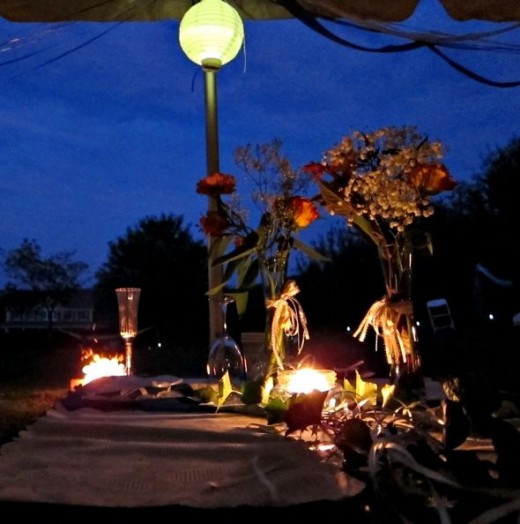
Trick 4: Never Use the Flash - Other Options are Much Better

(I know this isn't a wedding photo, but that's because I didn't use the flash during the wedding!)
This is a personal pet peeve of mine. Photographs taken with a traditional flash almost never look good enough for you to actually want to display them. You'll get red-eye, or weird reflections, or too-sharp differences in light and dark areas that can't be fixed in post-processing. If you've had a lot of experience with photography, there are trick you can use such as bouncing light off of surfaces to capture a picture in low light settings. However, just letting the flash have its way is not a good choice.
To get good photos in low-light situations, follow these tips:
- Decrease shutter speed. You'll need to make sure that your subjects stand very still.
- Increase aperture. Note there are limits to this option.
- Use other light sources. Setting up light sources to illuminate your subjects is a great way to get night and shadow shots. Flames and candles give off an especially good light.
- Use a camera with a good low-light setting. This is one reason I like my Canon s95; it's good at taking pictures in low light. You still want to minimize movement and involve some sort of light source.
Don't Forget a Big SD Card - Most Cameras Don't Come With Them
An 8GB Transcend card was plenty big enough for me to shoot the entire wedding ceremony and reception, along with some high definition video. If you're worried about having enough space, especially if you're going to shoot a lot of video, consider a larger card (or several smaller ones).


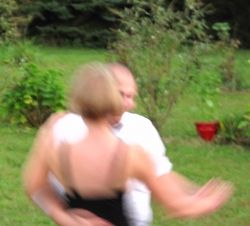
Trick 5: Manage Motion During Activities
Get Good Action Shots
As with any type of photography, the pictures that aren't planned are often the most interesting ones. However, this often means taking photos while your subjects are in motion, which can lead to blurry pictures if not done right.
To protect against this, make sure that your camera is good at handling action shots by testing it beforehand (this photo was not taken with my camera, which has better motion control). You can also focus on taking action shots in high light situations, such as early in the afternoon or when strong artificial light is present. Finally, getting your subjects to pause briefly in the middle of an exciting activity can yield good results.
If you think that all of the photos you receive from a professional wedding photographer look exactly like they looked coming out of the camera, you'll be surprised to learn that this often isn't the case. Especially when lighting conditions aren't ideal, a photographer will make a lot of adjustments to pictures to make sure that the best possible image is presented. In fact, adjusting photographs can often take much longer than the actual photography.
Of course, you need to have good photos to start out with; it's very difficult, for example, to correct a blurry picture. However, a little bit of editing using special software can go a long way. In the image on the right, I've increased the saturation, increased the brightness and contrast, and used the Dodge tool to brighten the bride's dress.
Which Is the Best Trick? - Vote Here!
Did you learn something new? Or is there something you want to make sure other people pay attention to?
My favorite trick, or the one I didn't know before is...
Or just say hello :)