Elbow long gloves

The opera season just started and I always wanted to wear long gloves, so I started shopping for a pair. If was harder than you could imagine.
I didn't find such products in shops so I had to order them online and apparently I have freakishly long fingers for my size so after I returned a few pairs I decided to try to make a pair to fit me.
The process was more fun than I expected so I will show you how to make your own.
For this project you will need:
- A pair of leggings
- Scissors
- Chalk
- Thread and needle or a sewing machine
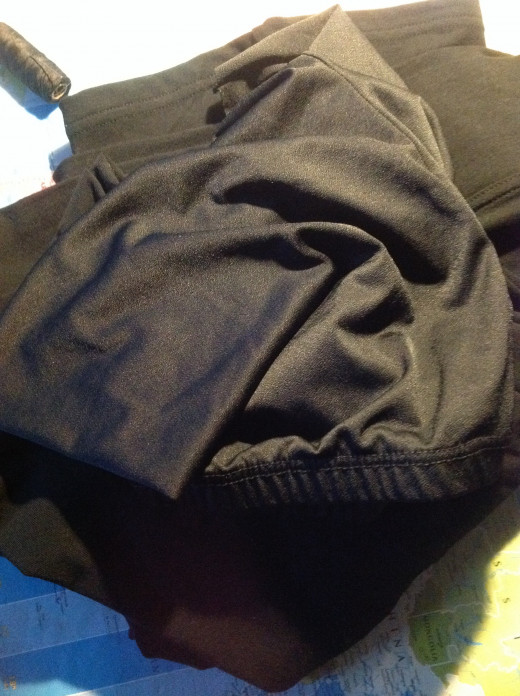
Using leggings that you don't use anymore or a new pair will give you the appropriate material for the gloves and you get an extra advantage of using the bottom trim too so it will be less sewing for you.
First you have to decide what side you will use, some of them have a shiny side and a mate side.
Measure the length of your arm by sliding the legging on your hand and mark the length with chalk leaving an extra 3 cm.
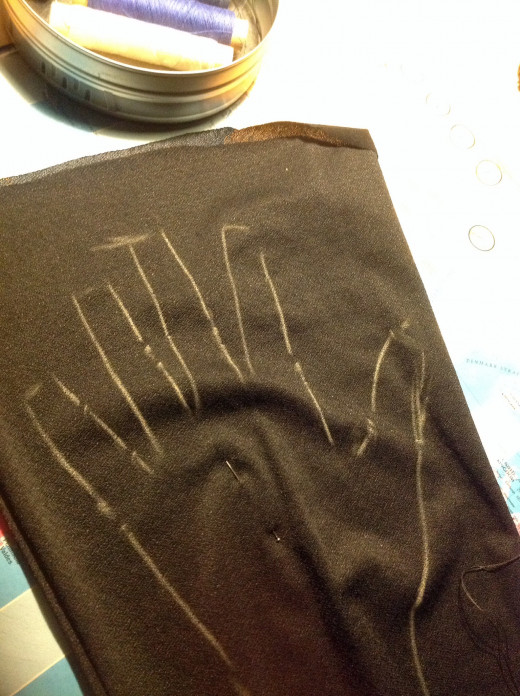
After cutting the material, pin it on the middle so it will stop sliding off in every direction.
Before drawing you should test how elastic is this fabric, this will give you an ideea how tight you can actually make the gloves
Spread it on a straight surface and put your hand and arm flat on top of the fabric. Spread your fingers leaving about 2-3 cm between the finger tips.
Once you have finished positioning your hand draw the outline with chalk.


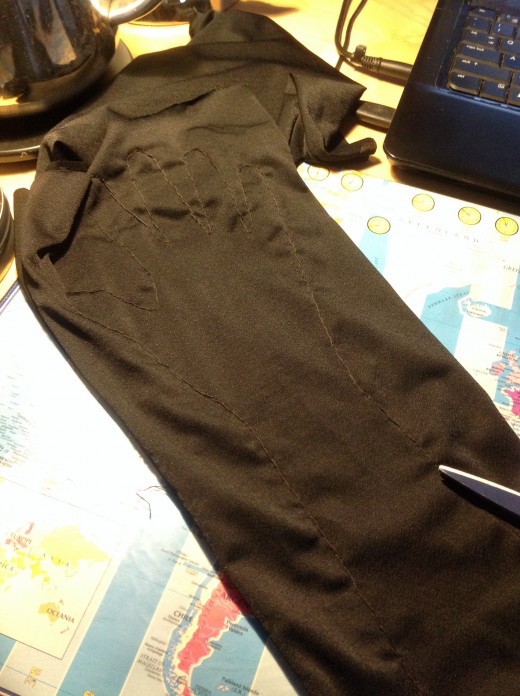
Start sewing on the chalk marks. I used the thread and needle method.
I agree, using a sewing machine is a lot easier but I an unable to use the electric one we have right now. Although I am not a technophobe that machinery is just too much for me.
Once the glove is sewed you can remove the pins.
After sewing the outline of a glove carefully slide your hand inside it to make sure it fits. Caution should be used right now as the stitches or the fabric could tear. To take it off grab each finger tip of the glove and carefully slide off one finger at a time.


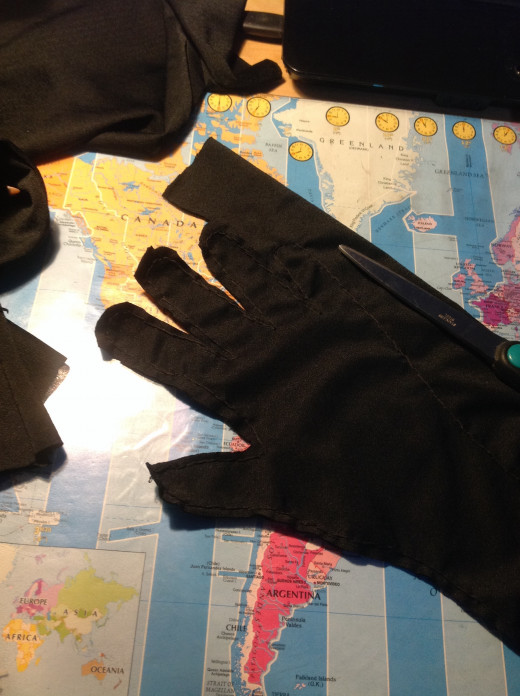
Trim the excess fabric leaving a border of 0,5cm around the first stitch
Apply the second stitch. If you are using a sewing machine, it would be wiser to sew it before you cut.
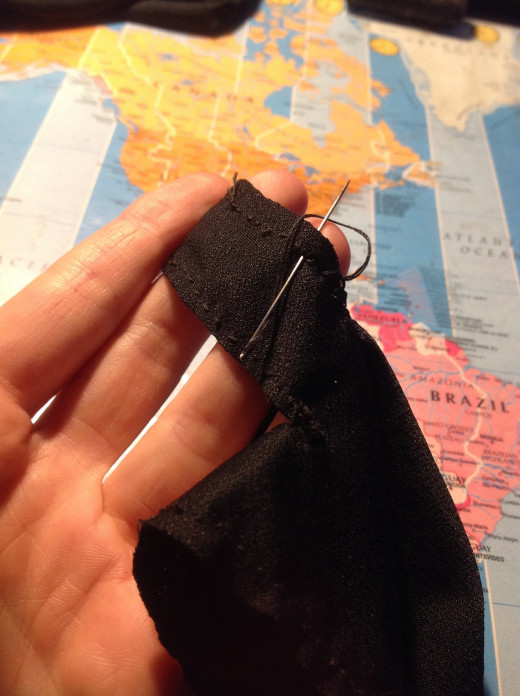
I used a tight stitch, extremely resistant and slim so it doesn't change the appearance of the glove. you can see in the second photo the steps of the stitch I used. Pass the needle through the fabric and then through the loop of thread, once you pull it will tighten on the edge of the material.
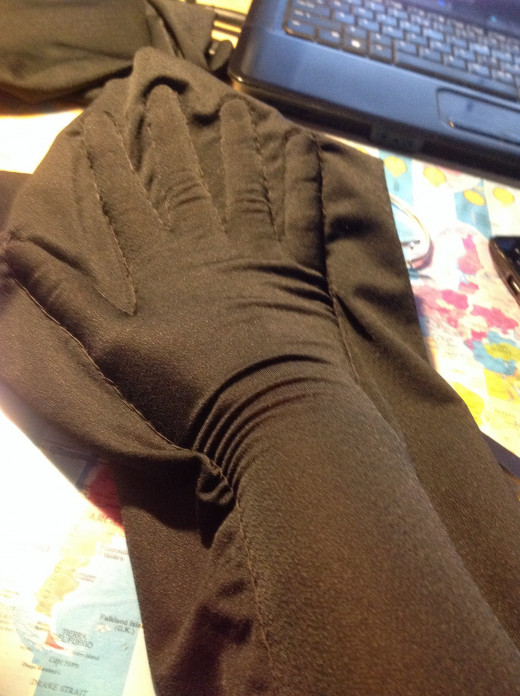
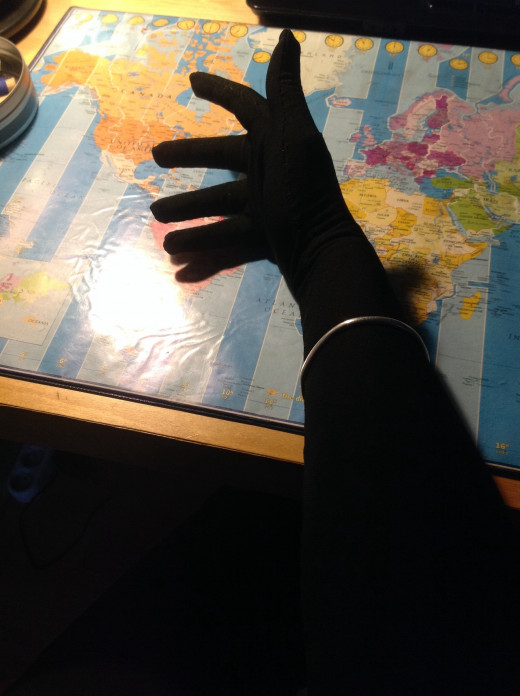
Once you are done turn the glove inside out, for the fingers use the bottom of a pencil to pushout the fingers....And there you have it a nice pair of gloves. Enjoy!


