- HubPages»
- Technology»
- Computers & Software»
- Computer How-Tos & Tutorials
Build a new PC with an unlocked Intel Pentium G3258 for $300

The new Intel Pentium G3258 has been getting some attention within the PC build crowd for being an unlocked dual-core processor for only $70. On top of that many motherboard manufactures have released BIOS updates to their non-z motherboards allowing overclocking at a very affordable price. So I decided to create a simple budget build to check the performance of the G3258 paired with a cheap non-z motherboard on stock cooling. In this article I will outline my experience of buying PC components, dealing with mail in rebates, shipping and building the PC. I also plan to write a second article which outlines overclocking and benchmarks of G3258 CPU on stock cooling.
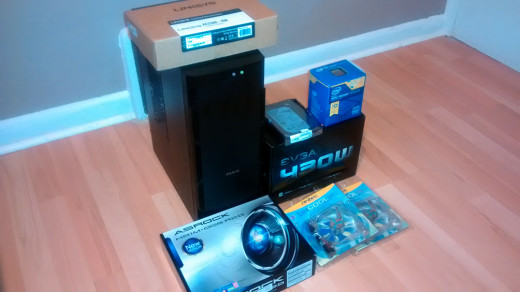
Buying PC Components
I'm in Canada so I purchased all components from NCIX and DirectCanada, I overpaid a little on some parts in order to take advantage of the free shipping being offered at the time. NCIX allows price matching so I pricematched the ASRock H81M-DGS from $73.79 to $64.99 on Newegg and the Zalman ZM-T1 Case from $31.99 to $29.57 on DirectCanada. I didn't buy the Zalman ZM-T1 case directly from DirectCanada because NCIX had an additional $10 mail in rebate (MIR).
UPDATE: If you use headphones, I recommend a better case the sound quality from the front audio jack on the Zalman ZM-T1 case is okay but not that great.
PCPartPicker part list: http://ca.pcpartpicker.com/p/WMM6NG
CPU: Intel Pentium G3258 3.2GHz Dual-Core Processor ($70.95 @ DirectCanada)
Motherboard: ASRock H81M-DGS R2.0 ($64.99 @ NCIX) + $20 MIR
Memory: Kingston 4GB (1 x 4GB) DDR3-1333 Memory ($43.99 @ NCIX)
Storage: Seagate Barracuda 1TB 3.5" 7200RPM HD ($57.79 @ DirectCanada)
Power Supply: EVGA 430W 80+ Certified ATX ($30.00 @ NCIX) + $10 MIR
Case: Zalman ZM-T1 MicroATX Mini Tower Case ($29.57 @ NCIX) + $10 MIR
Wireless Network Adapter: Linksys AE2500 802.11a/b/g/n ($9.99 @ NCIX)
Cooling: 92MM Case Fan x2 ($8.10 @ DirectCanada)
Subtotal = $315.38 CAD ($288.97 USD)
Tax = $41 (13% HST)
Total = $356.38 CAD ($326.52 USD)
MIR = $40 CAD
Mail Expenses = $2.71 + $1.13 + $0.15 = $3.99 CAD
Final Total = $320.37 CAD or $293.54 USD
You can get far better deals in the United States, I'm just converting from Canadian funds to US to show you the approximate prices as of September 2014. In the province I live in we also have a fairly high tax rate of 13% on most purchases. I'm guessing a similar PC Build can be bought for $250-$275 in the United States if you take advantage of online deals, mail in rebates and pricematching.
Shipping
It took a little over a week to get most of my items, except the RAM which was backordered and took nearly 2 weeks. Half the items came in through Post Canada and the others were shipped via Purolator. Shipping is always a pain to deal with, if you have a choice of buying all the components locally in one location, I would strongly advise you to do so. However it is extremely hard to match prices without buying at different times during different promotions. Online deals are also often better and have far better savings, especially if you can get free shipping. Furthermore you need a vehicle and gas prices are not cheap these days.
One major issue with shipping is if you are not at home when your item is being delivered, you may have to pick it up from a specific location or it may even be shipped back depending how many delivery attempts a shipping service offers. Another problem is that when you order many things at once from the same place, you will not necessary get everything at the same time. Many items will be shipped separately and may arrive on different days. Finally returns are extremely inconvenient if an item is defective, you often have to ship it back at your own expense sometimes you will get a refund for this other times you will not.
Fortunately I didn't really have any issues with any of my orders, despite many items coming on different days and the RAM being backordered for a little while. To avoid missing shipments I always closely watch shipping tracking and stay close so I do not miss a delivery.
Mail In Rebates
I paid $356.38 in total with $40 coming back to me as mail in rebates after spending exactly $3.99 to mail out the 3 rebates. Mail in rebates are sometimes a hassle to do, they require you to register your product on a website, fill in your information, print and sign documents, print an invoice, print shipping information in some cases and to cut out the UPC/Barcode from the product box. All of this then needs to be placed into an envelope and addressed to the appropriate place, you will also need to pay for postage. You need to be careful and follow the directions of the MIR exactly, or you will risk not getting your rebate.
Another issue with MIRs is that they are time sensitive, you often get only 30 days to mail them out, after this you wait 4-8 weeks or sometimes significantly longer. In most cases you will end up with either a cheque or a prepaid credit card for the value of the MIR in your name. Many people prefer the cheque option, unfortunately it's not always offered. You will more than likely end up with a prepaid credit card. Personally I actually prefer the prepaid credit cards, because in Canada technically they do not expire and there are no fees on them. One downside is that they cannot be reloaded, meaning you cannot add funds to them. But the reason why I find them useful is I often spend close to their value on online purchases but often have a small amount remaining, I then use the credit card for various web services or online offers that require a credit card without any risk.

Building the G3258 PC
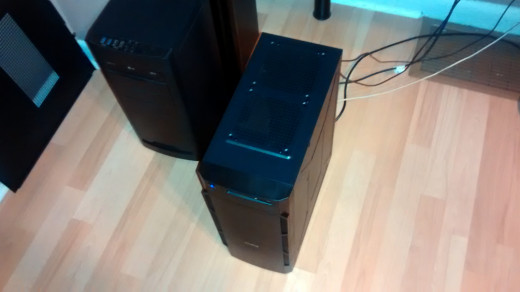
Once you have all the components it is time to start building. I first took the Zalman ZM-T1 case and took out the side and front panel. The case quality is not too bad, it's light, has plenty of space and fan options and only cost me $20 after the MIR.
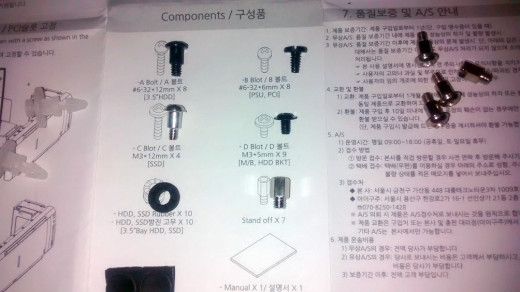
I noticed that in the manual the A and C bolts are drawn completely different then how they actually look. The case also included 2 extra shorter thumb screws for the side panel, I later found out that once the power supply is in the default thumbscrew at the bottom is too long and will not screw in completely. Clearly a minor design flaw, but looks like they provide the solution with the additional shorter thumb screws.
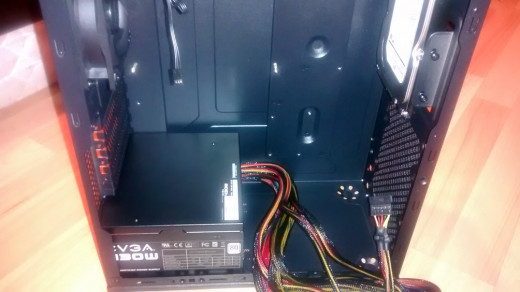
I took out the side hard drive cage and mounted the hard drive first, it uses 2 side A bolts and 2 front A bolts mounted inside the rubber stands. I've never seen this type of hard drive mounting design before, but it seems to have worked. I then attached the power supply to the bottom.
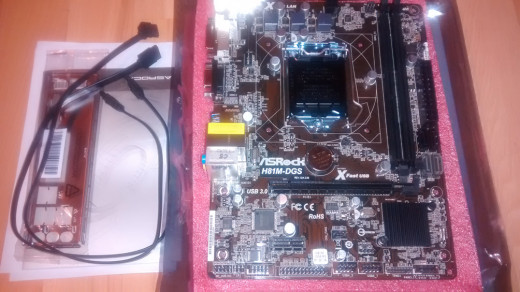
I got lucky with the motherboard BIOS version, the ASRock H81M-DGS R2.0 from NCIX was already flashed with P1.20, had it been version P1.00 it would have required an older Haswell non-refresh CPU to properly flash and support the G3258. Here is a list of what CPUs and at which version this motherboard supports: http://www.asrock.com/mb/Intel/H81M-DGS%20R2.0/index.us.asp?cat=CPU
I took a risk, but it paid off. You need to always make sure your motherboard will support your CPU or at the very least that you have another CPU on hand that will work for flashing the BIOS.
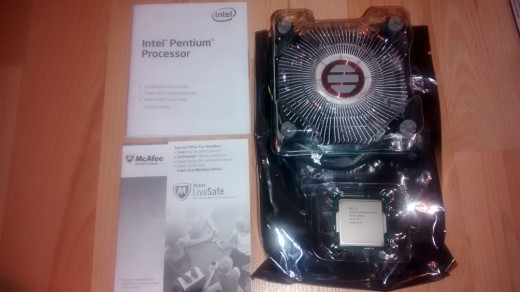
This is the Intel Pentium G3258 with the default CPU Cooler/Heatsink, by default the heatsink already has thermal compound applied.
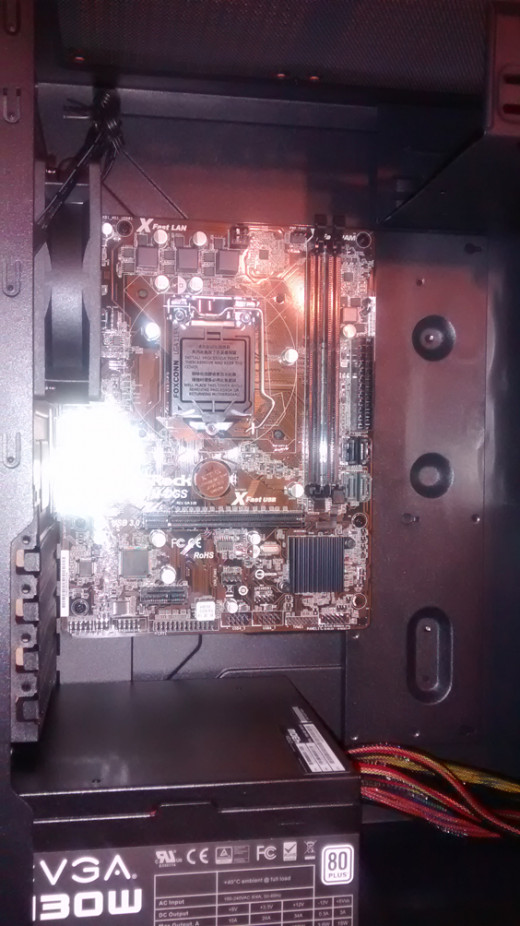
After I placed the standoffs I attached the motherboard faceplate, and inserted the motherboard inside the case so that output connections fit each corresponding faceplate spot. I then screwed in the motherboard. I only used 5 of the 6 mounting holes, because the case didn't have a normal 6th standoff hole at the right bottom. I believe it may use the plastic standoff, but because I wasn't 100% sure and the manual didn't specify I didn't bother with it. The motherboard was fairly secure with 5 screws.
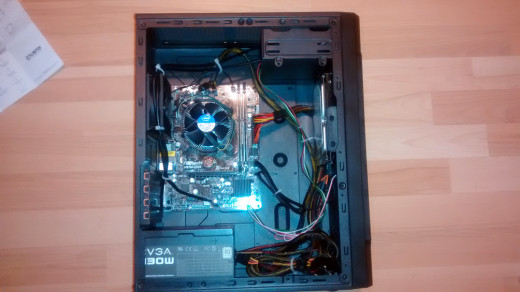
I then installed the CPU inside the motherboard, you open the latch, carefully place the CPU inside aligning it as per instructions and close the latch. In this motherboard the CPU protector comes off automatically once the latch is closed. The heatsink is installed on top, it will clamp into the motherboard on top of the CPU. I highly recommend carefully reading instructions and watching a few instructional videos for this part as it is the most important one and difficult to describe in text alone.
Finally I attached all the connectors and did some minor cable management with some zip ties, nothing too fancy but good enough to allow sufficient airflow, this case doesn't allow the other side panel to be removed so cable management options are limited. The RAM was late so I installed it last. I decided not to install the 2 additional fans I have bought at this point, but I plan to do it in the future.

The computer booted on first go, I installed Windows 8.1 and flashed the BIOS via USB to the latest P1.30 BIOS. I also briefly tested overclocking at 3.8GHz using the included 3.8GHz profile, the CPU was stable at 55-60 C during prime95 load benchmarking. Keep an eye out I plan to write a follow up benchmarking and testing overclocking more thoroughly.
The performance of the G3258 even at stock 3.2GHz as a basic desktop machine running Windows 8.1 is very good so far. I even tried TF2 on 1920x1080 with the Intel integrated and it's playable at 40-60 fps on medium/high settings.
Feel free to leave any comments or questions.