How to Burn a DVD with Aimersoft Video Converter Ultimate

What is Aimersoft Video Converter Ultimate?
This is a remarkable program that allows the user to very intuitively take a movie file on their computer and convert it to a format suitable for burning to a DVD or viewing by any means necessary. The program itself recognizes over 50 video formats including .MP4, .WMV, .MOV, .FLV, .AVI, .MKV, .MTS, .MPEG, .M2TS, .3GP, .WMA, .VOB, .OGG, .FLAC, and .AAC. Depending on your needs, the program can also decide for you which format would be best for your particular electronic devices such as iPods, Android phones, PSP, Xbox 360 etc. and convert it for you in one click. If you have purchased videos or audio from iTunes, Amazon, or any other source of DRM-protected content this program will also remove this so that the user can enjoy it in any way preferred. The program also contains several DVD menu templates to help create a professional looking DVD for your family or friends!
Burning Your First DVD
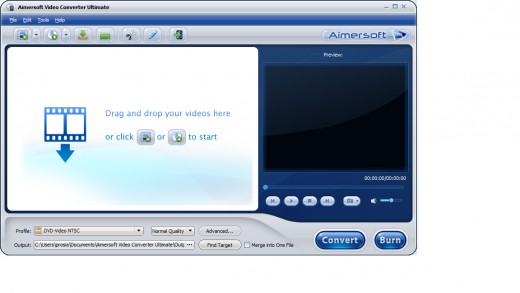
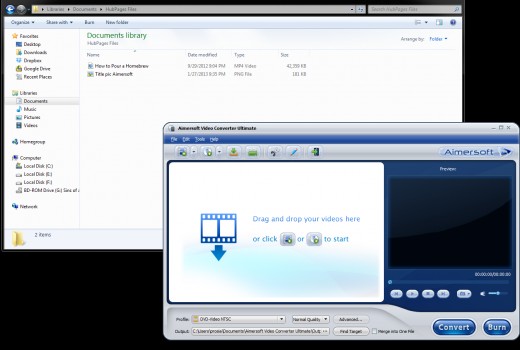
After loading the program you will see this initial screen. It explains that you can simply drag your video file from your file folder to the program in order to begin. Here you see I've opened Windows Explorer to a folder containing a personal video made on my cellphone in the .MP4 format.
Step 1
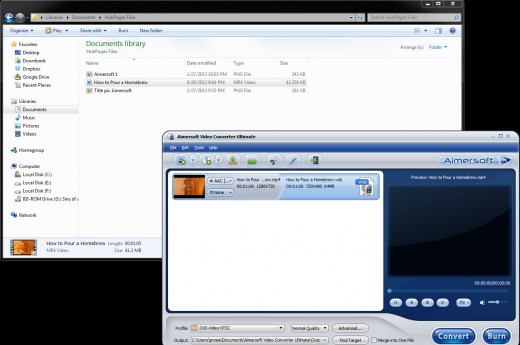
Next I've dragged the .MP4 file to the Aimersoft window. After a quick processing window you'll see the file along with some extra details about formatting and sound. You will also see several options available in both menus near the top, and drag-down menus near the bottom. There is also an area to preview the movie to the right to make sure you didn't record the video sideways like I did (Oops!)
Step 2
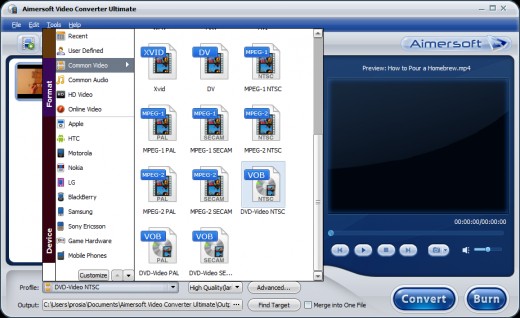
Now there are lots and lots of possibilities as far as formats and conversions go, but for simplicity and ease I only change one option before I click the big "Burn" button. There is a dropdown menu that says Profile near the bottom that you'll want to click and under the tab "Common Video" choose "DVD-Video NTSC" which will give use the proper format for most North American DVD players.

Step 3
Once you've chosen the output format you can feel free to check out any advanced settings you'd like as well as choose a path for the output file if you will be simply converting the file and not burning it in one step. Click on the burn button to bring up this window and just a couple of more options until we're set to start the conversion process. Choose between the available layouts for your DVD menu screen and add any title information that you'd like. Hit next when finished.
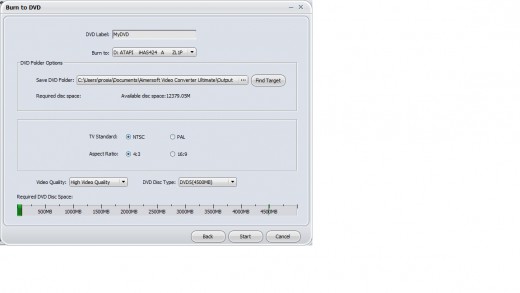
Step 4
This screen can look a little overwhelming at first as it has the most options of anything we've seen yet, but really very little need be done here. Change your DVD label if you like, check that you have the required disk space for the conversion, check whether you have the standard NTSC 4:3 ratio television (most North American sets) or PAL ratio, and then look to the last couple of options. Here you should choose which type of actual DVD media you are using (4.5Gb or 8.5Gb version) and select the highest video quality that you can fit on your disc. You will be able to see how much space your video is taking up by looking at the green fill bar at the bottom. If the bar goes past 4.5Gb and turns red you'll have to choose a lower setting until the entire bar is green. With most movies you should be able to select the highest setting, but some movies would simply be too large to store on standard DVD media at their highest setting. From my personal experience, however, I have noticed very little difference, if any, between the high setting and medium setting on my standard definition television. I have even burned one movie on the low setting and felt it to be very close to the higher settings as well. When you have finished selecting your options, press start to begin!
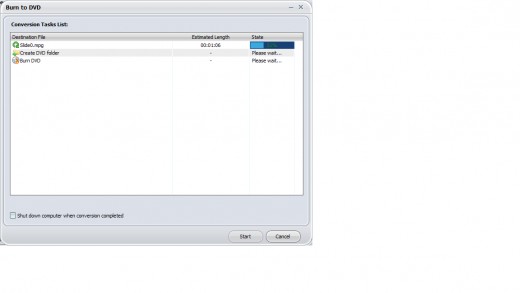
Step 5
Here you will see the program's progress in converting the video (Step 1), creating the necessary folders (Step 2), and finally burning your movie to the DVD (Step 3). Make sure you have inserted a blank DVD into your drive before the program begins burning the files. Once the process has finished the program will automatically eject your disc and you are then free to watch your movie at your leisure!
Final Comments
As you can see this wonderful program provides a quick and easy platform for converting and burning movies to a DVD in just a few minutes. Whether you are a seasoned computer veteran or a complete newbie I believe that you will find a solution to your needs with this program. I routinely use the program for all of my DVD burning needs and have found no reason to change to another! If you have any questions feel free to leave them in the comment section!


