- HubPages»
- Technology»
- Internet & the Web»
- Social Networking
How to Create a Custom Twitter Background

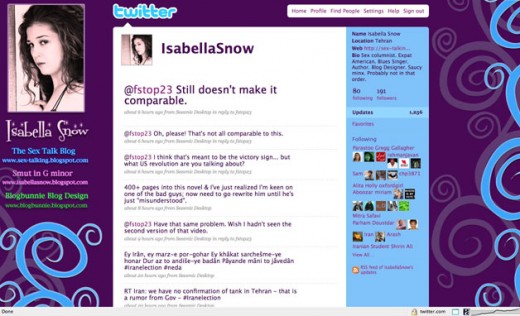
Twitter comes with several background options and some of them are pretty nifty, but if you'd really like to snaz up your twitter profile, you ought to consider making your own. This is much, much easier to do than, say, creating a custom blog design, because your Twitter background is just an image. It isn't possible to include links or other widgets, which makes it relatively easy for any layperson to do. The image you see below is my own Twitter background, which I made in Photoshop. You can use the same program, or something similar, such as Elements or perhaps even some type of free, opensource software. Before I get started, let me just say that if you'd like to Follow Me on Twitter, be sure to send me an @ reply so I know to follow you in return!
Step one: Choosing your background size.
You want to make your twitter background a size that will render properly on any screen resolution. Therefore, you'll want to make it big, even if you've only got a small screen yourself. My own Twitter background is 1440 px wide, but some people recommend going as large as 1600 for those people with mammoth screens. It's entirely up to you, but I wouldn't recommend going smaller than 1440 px. Width wise, mine is 1700, and it's really much larger than it needs to be. I'd recommend 800px. So, to make a long step short, I'd recommend starting out with 1440px x 800px and see how that turns out.
Step two: Colors and fonts.
As with any website, you want to choose colors that will not put your reader off, or make it difficult to view your text, etc. Once you've chosen your colors, you can then go into Twitter's control panel and match your sidebar and text with the background you've created.
Step three: Mind the Middle!
Your background image needs to take into account the approx 760 px of space that will be in the center of your screen. This is the area your tweets will show up in -- anything your background contains in that area will go behind it, so make sure you work around it.
Step four: Design your page!
I recommend using a photo, as it makes people feel more comfortable with you. You want your twitter background to serve as something of a business card -- let people know who you are and what you're selling as soon as they view your page. My background includes my photo, my name and three site urls. It also includes a bit of decoration, but not so much that it will give people a headache. Don't overdo your background with gaudy images or tiling; it will put readers off.
Step five: Upload your image!
When you're pleased with your image, test it out on Twitter by loading it up as your background image -- do not tile it, as that was the point of making it so wide to begin with. Do not be discouraged if it's not perfect the first time, I had to play with mine 3 or 4 times before I was happy with the results.
Notes on Tiling:
If your background isn't large enough to fill the entire screen, it may be tiled. This effect looks great with some images, and crap with others. In fact, some of the tiled images I've seen have really hurt my eyes and put me off reading the person's content. You don't want your background to be too busy.


