RPG Maker Quest Creation Tutorial

So you want to make a RPG game, have a great idea in mind, but are not sure where to start. That's fine! The best part about using RPG Maker is having a wonderful community of people to help you. That is why this article is aimed towards a brief tutorial to help new users get a hang of the basics. In this section of my tutorial series I am going to show you how to create a quest within the program. Let's get started!
First Steps
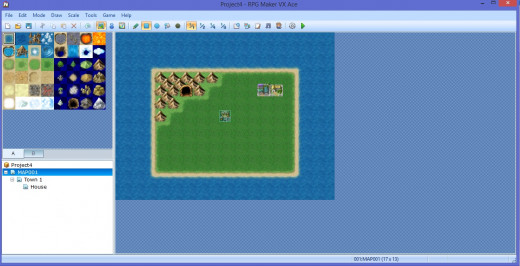
By now we should already have a standard map going. Nothing too fancy, just a basic place for the main player to walk around and explore. If you don't already have a map, go ahead and create one now. If you are unsure on how to do this relate back to one of my other tutorials, or look on YouTube for a quick guide. Once you have a place for your character to start out in we can get started.
Take a look at your existing, or newly created map. Think about where you would like your first quest to be. Inside a building? Out in the open? Anywhere is fine, so be creative! I will put my first quest inside my town next to a building. Now that we have a spot in mind let's actually get the ball rolling.
- Click Event Editing Mode (F6 is the keyboard shortcut) and double click on the spot you have chosen.
- In the new window look at the lower left corner where it says, "Graphics" double click on that. This will be where we choose the person who gives our hero their quest.
- A long list of various graphics will appear, scroll through it and choose whoever you want. I chose Actor 3 the old man.
Look slightly lower where it says "Trigger" here we can choose how to interact with our new person. Personally, I believe action button is the easiest way to go with this, but feel free to choose whatever you are comfortable with.
- Now double click under contents, a new window should appear.
- Click show text, it is under tab one, and the first choice listed.
- Write in the text you want for the quest. For my example game I went with, "Would you like to help an old man out?" Be sure to preview and make sure you text fits correctly in the box, than hit OK.
- Now double click under contents again (under the new text we have) and this time we are going to pick show choices.
By default the box comes up with choice 1 as yes and choice 2 as no, while choices 3 and 4 remain blank. You are allowed to edit the words and write in whatever you want yes and no to be, but to keep this simple I left it as is. On the side of the bar it says "when cancel" this means when you cancel the conversation, but don't make a choice, what do you want it to choose by default? It automatically chooses choice 2 for you, which is no. To keep it simple let's keep that how it is.
- Press okay.
- Double click under no in the contents page.
- Click show text and add a response for when the hero declines the quest givers offer. For my example I used something like, "Oh, sorry to bother you."
- Now double click under the yes in the contents page.
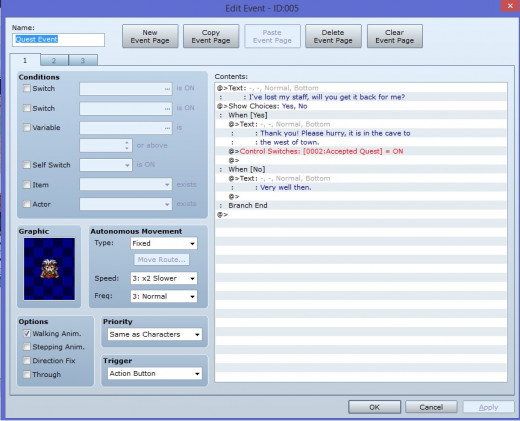
- Once again, choose show text. This text will be the actual quest text, so make it good! I went with something simple, "I lost my staff in the cave to the west of town, could you get it back for me?"
Make sure the text fits in the box and remember to preview before hitting okay. For my example map I've place a cave to the west of town, however you might not have a cave at all on yours. Just make sure your quest makes sense to what you already have available to you and the hero.
- After you hit okay, double click under your yes text in the contents page. When the new window appears look for Control Switches. It is under tab 1, and Game Progression.
- Another window will appear, press the three little dots next to the blank one.
This will bring you to a new window. In this window you can choose a number as your switch and write in a little note so you can remember what the purpose of the switch was. Since I already had something in the number 1 slot, I clicked under 0002.
- Click 0002, and look down at the bottom of the window where it says name. Give the switch a name that you can understand and remember, for this purpose I wrote in "Accepted Quest."
- Click apply and hit OK.
- Make sure the operation is on and then press okay once more.
See photo below this is what the first events page should look like.
New Event Page
Now we will have to create a new event page. We want to do this whenever we work with switches to create a smooth transition. If you are unsure where to find the new event page, look towards the top, there are several buttons listed, the first one named "New Event Page."
- Create a new event page.
- Reassign the graphic for your quest giver.
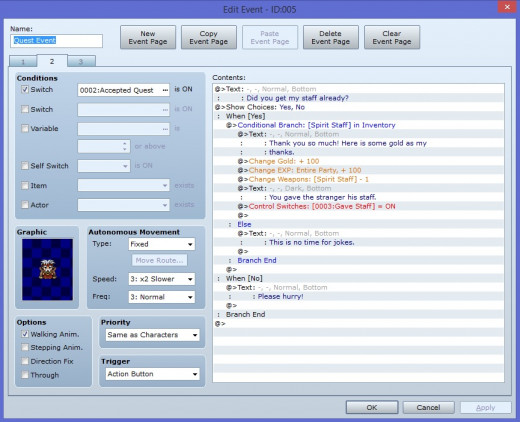
- Click the box under conditions called, "Switch."
- Click the three little dots, than choose your switch, for me I had to choose, "Accepted Quest."
- Double click under contents page and add more text. This text will recognize the fact the hero has already accepted the quest. I'm going to make it a simple question along the lines of, "Finished already?"
- Double click under the text in the contents page and choose show choices once again.
- Keep the same settings as before, "Yes" as choice one, "No" as choice two, and cancel is a default for choice two.
- Double click under no in the contents page and choose show text, now we add a text the quest giver will say when the hero hasn't done as promised yet. I added, "Get my staff!"
- Once you are finished with that, double click under yes response in the contents page.
- Choose Conditional Branch - tab 1 under flow control.
This will bring up the conditional branch window. Within this window is four tabs, each tab has a unique purpose. Feel free to explore each tab, but for the purpose of this tutorial we only need to look at tab 4.
This part is tricky if you decided to make your quest slightly different from mine. However, it is not a problem and you should be able to follow along and still understand what to do.
- Click tab 4.
- Click weapon and look at the drop down menu.
Here you can choose any weapon you want to use as a representation of the quest givers missing item. Since my quest is about finding his staff, I choose the spiritual staff under option 53. If you went with an item/armor piece click one of their bubbles instead, and then choose whatever you want.
- Once you have chosen your quest item, make sure "Set handling when conditions do not apply" is check marked, and "Include equipment" is check marked, then press OK.
Set handling basically means it will use your no response when the hero returns and does not have the item. Include equipment means the game will also check the hero's equipment for the item, just in case he decided to equip it, or use it on a party member.
- Look where it says else now, double click in the contents page under that and add some text (the else here means our hero does not have the item.) My text is, "This is no time for jokes."
- Double click under no choice now and choose show text and add a response for no, mine is "Please hurry!" Press OK.
- Now double click before else, but still under condition branch and choose text once again. This text means the hero actually has the quest item so add something like, "Thank you so much here is some gold as a reward."
Since we are giving the hero a reward in this example, let's go ahead and get that set up now.
- Click under the text and choose change gold - tab 1 under party.
- Make sure increase is marked (that means the hero will get more gold) and click where it say constant. This is the amount of gold your hero will get, write in whatever number you want. I went with 100g. Press OK.
- Double click under that and choose change exp - Tab 1 under Actor.
- Keep fixed marked, and keep entire party chosen. If you ever want just one person in the group to get the exp this is where you would click the drop down menu and change it.
- Keep increase marked, and right whatever amount of exp you want to give the hero for the quest in the constant. I went with 100. Mark where it says, "Show level up" this means if the player levels from the exp gain, it will show us his level up message. Press OK.
- Now double click under the exp chance in the contents page and choose change weapons - tab 1 under party.
- This time we want to mark where it says, "decrease" because we are getting rid of the quest item. Under constant we want that number to be 1.
- Use the drop down menu to find the staff (number 53) and then press OK.
If you went with a different item it is still just as simple. Look under Party in tab 1 and it has "change armor" "change items" and such as options as well. You would just choose that instead and still follow the same steps.
- Double click under the change weapon in the contents page.
- Choose show text, and add a text that says, "You gave him the staff" and choose dim background. This will come up as a black background that is just stating the action that took place. Press OK.
- Double click under show text and choose control switches.
- Click the three dots for the new window and now choose 0003. Name this new switch however you want, I made it a simple "Gave Staff." Make sure it is on then press okay.
See photo below, this is what the second event page should look like.
Third Event Page
- Create new event page.
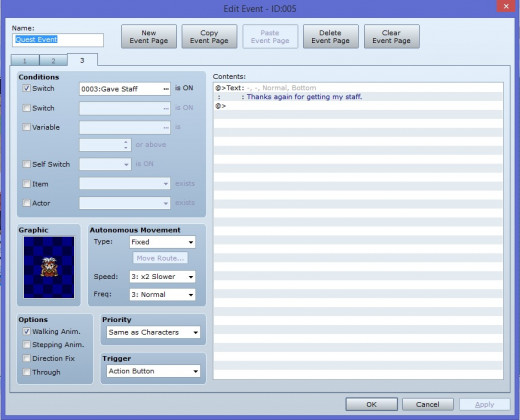
- Check mark the switch box, and choose 0003 Gave Staff (or whatever you named yours.)
- Reassign the graphic.
- Double click contents page and add text, this text is to recognize you gave him the staff, I made mine a simple "Thanks again." Press OK.
- Now at the very bottom of the events page press apply and okay. We are almost done!
See photo below, this is what the third event page should look like.
New Map and Finishing Up
We have the whole quest portion out of the way, great! However, now we need to actually put the quest item somewhere in the world for the hero to retrieve. Since my quest mentions a cave I have setup in the west, I am going to place my quest item there. If you don't have a cave, but want one, look over my map tutorial and you should be able to figure it out from there. If not feel free to ask! Here is a quick rundown to get you started:
- Right click under MAP001 (or if you renamed it right click that.)
- Choose new map.
- Name the map cave, or whatever you would like.
- Create any height/width you want, mine is 17 wide 30 high.
- Change tile set to dungeon.
- Press okay, which will bring you to the new map.
Now design it however you want. Just make it look like a cave and make it something your hero can walk around in. Once you are done go into event editing mode again.
- In event editing mode (F6) right click where the entrance/exit will be. Choose quick event creation, and select transfer. Click the three dots and choose where you want the hero to transfer to when leaving the cave, for me it is MAP001. Now click a spot on the map you want him to appear at. Press OK. Do this for leaving the cave and entering the cave.
Now go back to your new cave map and take a look inside. Where do you want the item to be sitting at? I made it something simple, I choose the end of the cave, and place it inside a chest. To do that follow these instructions:
- In event edition mode right click where you want the quest item to be at, go to quick event creation, and choose treasure chest.
- When the new window appears select weapon (or whatever your quest item is under) and find the staff, which is number 53. Then press okay.
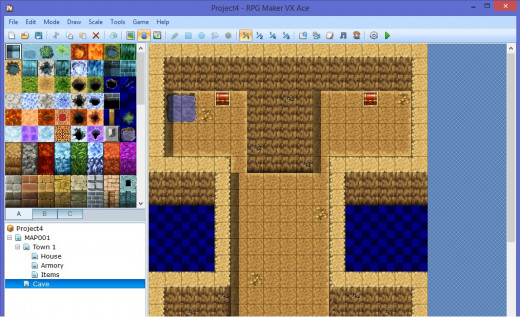
See photo below for example picture of cave map.
That's it! Now if everything is working properly your hero should be able to get the quest, leave town, go inside the cave, and retrieve the item. Right now it is a very simple quest just to let beginners get the basics. In the next tutorial we will go over monsters and adding them inside the cave.