The Cryptocurrency Wallet for Newbies

For those that are new to cryptocurrency, certain terms and tools might be a little confusing at first. This article will tackle on the very basic of tool that you will be using if you plan to enter the world of cryptocurrency. That is, the cryptocurrency wallet.
Here, you will learn about the basic functions and features of the wallet as well as some basic troubleshooting.
The table below are the top 30 cryptocurrency coins as well as their official website. You can download the wallet application from there.
Coin
| Coin Official Website
|
|---|---|
Bitcoin
| http://bitcoin.org/en/
|
Litecoin
| https://litecoin.org/
|
Peercoin
| http://www.peercoin.net/
|
Nxt
| http://www.nxtcrypto.org/
|
Namecoin
| http://namecoin.info/
|
Quark
| http://qrk.cc/
|
Worldcoin
| http://worldcoinfoundation.org/en
|
Megacoin
| http://www.megacoin.co.nz/
|
Primecoin
| http://primecoin.org/
|
Feathercoin
| http://feathercoin.com/
|
Novacoin
| http://novacoin.org/
|
Infinitecoin
| http://infinitecoin.com/
|
Dogecoin
| http://dogecoin.com/
|
Zetacoin
| http://www.zeta-coin.org/
|
Netcoin
| http://netcoinfoundation.org/
|
Devcoin
| http://devcoin.org/
|
Tickets
| https://github.com/LotteryTickets/LotteryTickets
|
Anoncoin
| https://anoncoin.net/
|
Terracoin
| http://terracoin.org/
|
Freicoin
| http://freico.in/
|
Copperlark
| https://copperlark.com/
|
Earthcoin
| http://getearthcoin.com/
|
Ixcoin
| http://www.ixcoin.co/
|
Cryptogenic Bullion
| https://cryptogenicbullion.org/
|
BBQcoin
| http://bbqcoinfoundation.org/
|
Goldcoin
| http://gldcoin.com/
|
AsicCoin
| http://asiccoin.biz/
|
Memorycoin
| http://memorycoin.info/
|
Fastcoin
| http://www.fastcoin.ca/
|
Sexcoin
| http://www.sexcoin.info/
|
The first 30 Coins on coinmarketcap.com as of January 2014
I have used the Netcoin [NET] Wallet as an example in all the screen shots. It is no secrect that I am a Netcoin supporter and that would like the coin to grow more.
1. Download the wallet from the site. The links are available at the table above.
2. Extract the .zip file. Some wallets are available on different operating system like linux / unix, windows and Mac OS X. For this example I will be using windows operating system. The files are extracted at C:\
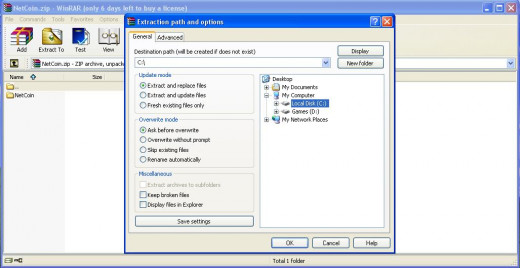
2. After extracting the file, go to C:\Netcoin directory. You will see a bunch of files in the directory. The file that we are after is the .exe with a (Name of the Coin)-qt. In this example it is the Netcoin-qt.exe. All wallet applications seem to have adapted the (Name of the Coin)-qt format to easily identify the wallet program. Click on the qt program to launch.

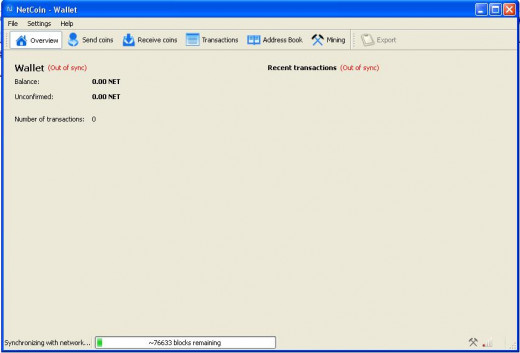
3. The first thing that you will see is the image below after you have launched the program.
The Overview tab will give you information about detailed transaction history and the amount of of coins that you have in your wallet.

4. The wallet will then begin to synchronize with the network as you can see in the image below. The status bar after the words "Synchronizing with network...". It will tell you exactly how much blocks you need to download. This synchronization process may take a very long time depending on how big is the data in the network.
It is very important that you let the whole download finish. Once everything is updated, The "Out of sync" status will be come "Updated"
The second tab is the send coins. As the name implies, you use this to send your coin to another address. That will be on the "Pay To:" field. You can chose to put something to help you identify to whom are you sending the coin in the "Label" field. Mostly it is left blank. And of course the amount that you will be sending. Some transactions has fees involve and some does not have a fee at all.
The "Add Recipient" Button at the lower left of the tab is used if you wish to send coins to more than one. Just press it as many as you can. Make sure that the amount will not be over your total number of coins.

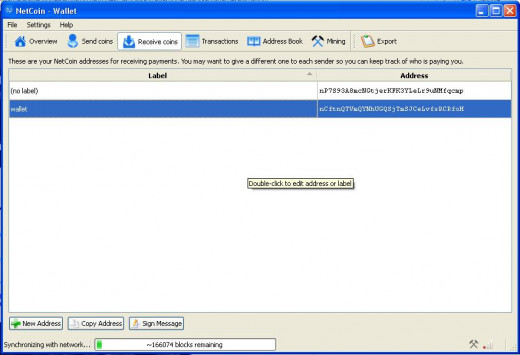
The Receive coins tab holds the record of all your coin addresses that people will you to send you coins. As you can see, you already have a default Address and you can add more if you wish to have more than one. Later I will show you how this can be done.
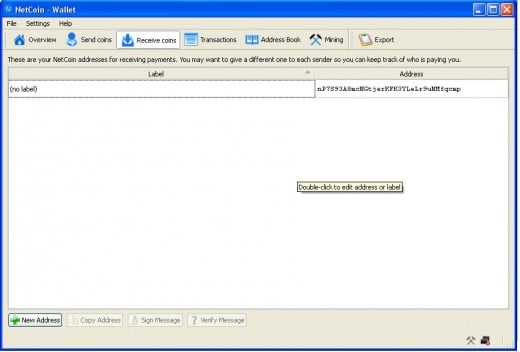
How to Create a New Address
1. Click on the "New Address" button found at the lower left of the wallet.
2. Another window will appear like you see below. You can choose to put anything in the Label field or you can leave it blank. For this example I used the Label "wallet". You do not have to worry about putting anything under Address. It is automatic.
3. Press "Ok" to create a new address or "Cancel" if you changed your mind and would be happy to use the default address
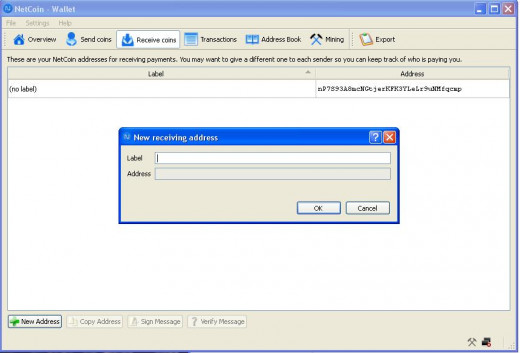
4. Now a new address is created. You can create more if you wish.
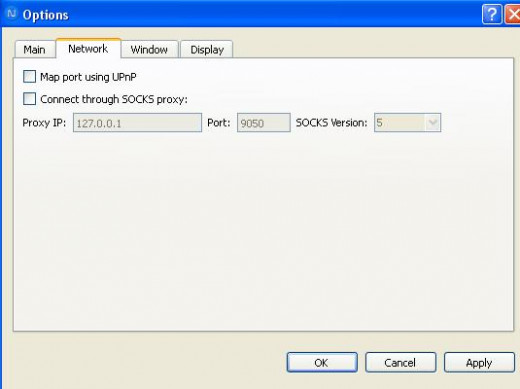
If you are having problem synchronizing your wallet with your network, you can uncheck the "Map port using UPnP" check box and try again.
I hope that this simple tutorial was educational for everyone who is interested in crypto currencies as we enthusiasts believe that it is the future of money.
People will soon be aware of its advantages and we as be cautious of its disadvantages.
Comments are welcome below.


