January 2019 PC Build of the Month

Hello everyone. Will here with GR8 Tech 2Day and today, I will be bringing you my build list for my upcoming January 2019 PC build. This build will actually become my content creation rig that I will be using primarily as my system in which I will prepare blog posts/articles and my YouTube videos. I’m really looking forward to this build and am excited to bring this to you guys. So, without further delay, let us take a look at the parts I have chosen.
I have recently been primarily using my Intel system for everything including gaming, day-to-day Internet browsing and research, and content creation/video editing. That Intel system is an i7-8700K system overclocked to 5GHz with 16GB of G.Skill TridentZ RAM clocked at 3200MHz. The system also includes a GTX 1080 Ti inside of the be quiet! Silent Base 801, powered by the be quiet! Straight Power 11 1000-watt power supply. The 8700K is cooled with the be quiet! Dark Rock Pro 4 CPU cooler. I’ve wanted to be able to render videos while completing other tasks or just outright gaming. Although the system can handle quite a bit of multitasking, it is not ideal when trying to game and render videos. So, with that, this was a prime reason for my decision to build a dedicated editing machine. So, what does this system contain? Let’s find out.
AMD Ryzen 5 2600

First up is the processor. Now, this isn’t a Threadripper or even an 8 Core, 16 thread CPU but it is an AMD processor; the AMD Ryzen 5 2600. The AMD Ryzen 5 2600 is a 6 core, 12 thread processor that comes with a base clock of 3.4GHz and can boost to 3.9GHz. The Processor offers an L1 cache of 576KB, L2 cache of 3MB, and an L3 cache of 16MB. It is an unlocked processor which will allow us to overclock if desired and is built on the 12nm process of the AM4 platform; a part of the Pinnacle Ridge line. There is an included AMD Wraith Stealth cooler to dissipate the 65-watt TDP but I still recommend getting an aftermarket cooler. The processor can reach a maximum of 95 degrees Celsius. Maximum memory supported by the processor is 2933MHz of DD4 RAM in dual channel configuration. The Ryzen 5 2600 was released on 4/19/2018. This will be a decent little processor for my light video editing purposes and light gaming.
Noctua NH-L9a-AM4
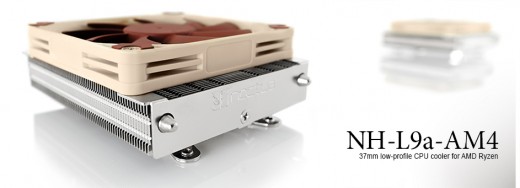
Cooling the CPU, since we will keep it clocked at just 3.8GHz, will be the Noctua NH-L9a-AM4 low profile CPU cooler. The NH-L9a-AM4 is the AM4-specific NH-L9a low profile cooler. The cooler is designed for AMD Ryzen-based home theater PCs and small form factor PCs. The cooler is just 37mm in height and is therefore ideal for extremely slim cases. Due to its small footprint, Noctua says it provides 100% Ram and PCIe compatibility and easy access to near-socket connectors even in tightly packed mini-ITX motherboards. Noctua has a custom-designed and patented “SecuFirm2” mounting system for this AM4 socketed cooler which makes installation a breeze. The cooler comes with a highly optimized NF-A9x14, 92mm fan that supports full automatic fan speed control via the PWM connection. This allows the cooler to run exceptionally quiet at all times. Having used this cooler in the past, I can say that this will cool the Ryzen 5 2600 well enough for a small overclock at a constant 3.7-3.8GHz. However, I will probably leave the CPU at stock until I obtain a slightly larger cooler that should provide a little more adequate cooling as Noctua does not recommend overclocking any processor with this cooler.
ADATA XPG Z1 3000MHz DDR RAM x16GB

For the RAM, I went with the ADATA XPG Z1 model clocked at 3000MHz and in 2x8GB modules for 16 total GB of RAM. This RAM is not on the ASRock QVL for the selected motherboard but I feel it will work just fine at the highest supported speed of the motherboard and processor at 2933MHz. Time will tell obviously but I have reason to believe it will work just fine given I have the same RAM installed in my daughter’s Ryzen system and it runs just fine at 2933MHz. This RAM has CL16-18-18 timings at 1.35 volts. I am obviously going to try and lower those timings as well.
ASRock AB350 Fatal1ty Gaming-ITX/ac Motherboard
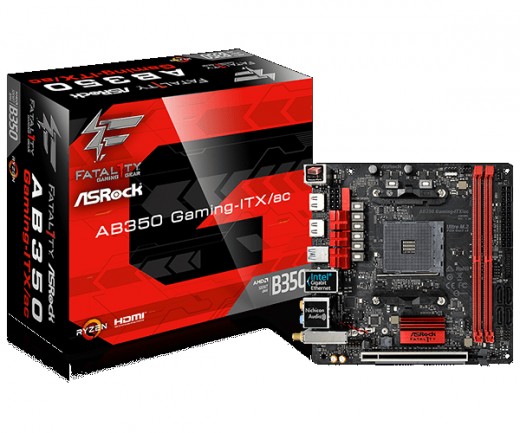
The motherboard chosen is the ASRock AB350 Fatal1ty Gaming-ITX motherboard. I chose ITX because I want this system to be low profile and not take up much space. The ASRock AB350 Fatal1ty Gaming-ITX motherboard chipset is the B350 chipset which is the midlevel chipset but will allow overclocking. The VRM is just a 3+2 phase so, overclocking capability is slightly diminished but will handle a 6 core Ryzen processor just fine at around 4GHz. The Fatal1ty motherboard supports 2 DIMMs of dual channel DDR4 memory up to 32GBs total memory at up to an overclock of 3466MHz though I will stick with around 2933MHz. The motherboard offers integrated 7.1 CH HD audio via the Realtek ALC1220 audio codec. The board comes with Intel Gigabit LAN 10/100/1000Mb/s and also features Intel 802.11ac WiFi module supported dual-band connectivity (2.4/5GHz). There is a single PCIe 3.0 x16 slot for the graphics card. For storage options with this board, there is a single M.2 PCIe Gen3 x4 and there are also 4x SATA3 connectors for up to 4 SSDs. There are 2 connectors for case fans and a connector for the CPU fan. There is also an LED header and one of the case fan headers can be used for optional water pump fan connector. There is also 1x USB 2.0 and 1x USB 3.0 header.
PNY 120GB SSD and Seagate Barracuda 4TB HDD
Click thumbnail to view full-size

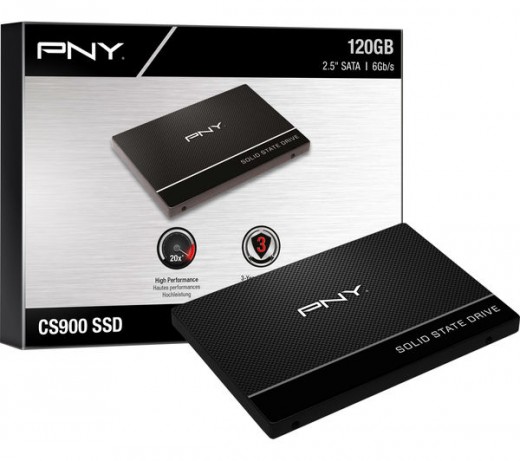
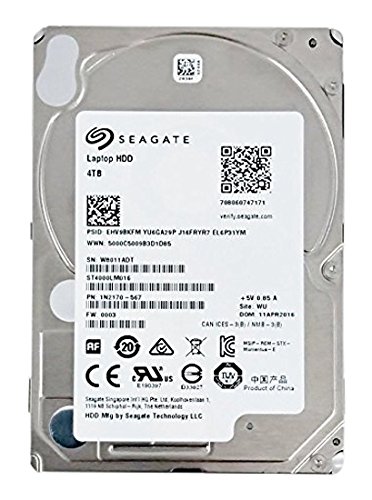
For Storage, I chose the PNY 120GB SSD for the operating system only and potentially Sony Vegas Pro 15. The PNY SSD is a nice balance of price and performance coming in at around $25 with a maximum data transfer speed of up to 490MB/s with a maximum read speed of up to 515MB/s, and a maximum write speed up to 490MB/s. For my mass storage, I went with a 2.5inch Seagate Barracuda hard disk drive. Yes, it is a 5400RPM drive and it is basically a laptop drive but again, I wanted to keep everything small in this build hence the 2.5inch SSD and HDD. This will not blow you away with its speed but for a 4TB drive, the price was right and will offer adequate storage of video files.
PowerColor Red Dragon RX Vega 56 Graphics Card
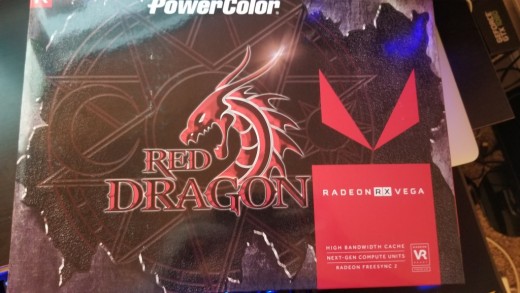
For the graphics card, I went with the PowerColor RX Vega 56 Red Dragon card. This card is one of the better Vega 56 cards available on the market. The card comes with a base core clock of 1177MHz with up to 1478MHz boost and a memory clock of up to 800MHz. The card has 3584 stream processors with 56 compute units. The Red Dragon Vega 56 is a PCIe 3.0 card, supports DirectX 12, and comes with 8GB of HBM2 memory. This is a 3 fan dual slot card measuring 305mm x 140mm x 4.18mm with 2 DisplayPorts and 2 HDMI ports. The recommended minimum power supply is 650-watts and the card is powered via an 8-pin and a 6-pin PCIe power connector. This card is a really nice card and offers pretty good performance. In my time spent with this card, I have managed to get the core clock to 1620Mhz and the memory clock to 950MHz stable.
EVGA SupoerNOVA G1+ 1000-watt 80+ Gold Certified Modular Power Supply
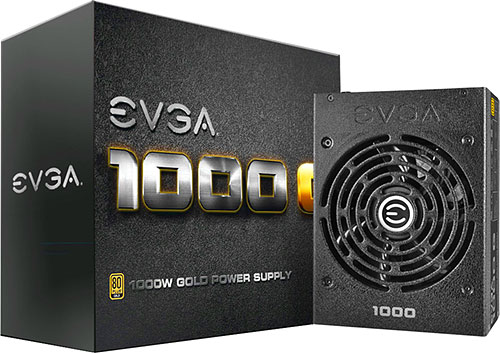
Powering this system, I went with the EVGA SuperNOVA G1+ 1000-watt 80+ Gold Certified, fully modular Power Supply. This power supply is fully modular and will provide more than enough power for this build. The PSU offers over voltage protection, under voltage protection, over current protection, over power protection, and short circuit protection and offers a 5-year warranty from EVGA.
Phanteks Enthoo Evolv ITX Tempered Glass Case
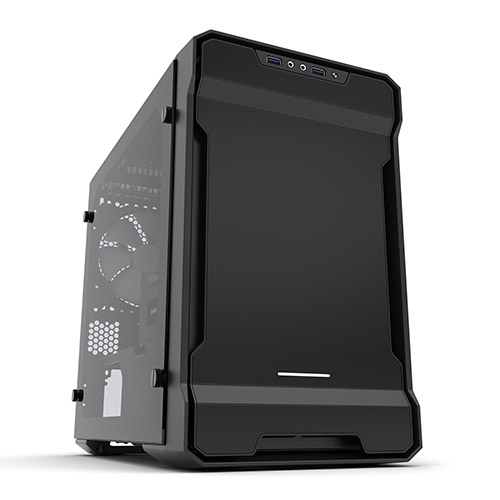
Finally, housing this system, I went with the Phanteks Enthoo Evolv ITX TG mini-ITX case. The Phanteks Enthoo Evolv ITX tempered glass edition case boasts that it is big on features and small in size while being budget oriented. The case measures 375mm x 395mm x 230mm and will support full size PSUs and graphics cards up to 330mm in length so, both our power supply and graphics card will easily fit within this case. It is a beautiful and sleek case and comes with a single 140mm fan preinstalled in the rear of the case.
Phanteks Enthoo Evolv ITX Build by Hardware Canucks
Conclusion
So, there is the parts list for my upcoming video editing and content creation PC. I look forward to putting this build together and using it in the future. Thanks for stopping by. Leave comment below and let me know what you think. Don’t forget to vote in the poll and share with your friends. Thanks again for stopping by and I hope to see you next time. Thanks.


