Fantasy Art Drawing: How To Draw A Warrior
Step One: Drawing Warriors From Basic Shapes
Warriors are part of any fantasy world in some shape or form, they represent the good and sometimes the bad, although mainly they fight for the good side, killing dragons and evil creatures and wizards, they can be huge muscle bound heroes or skanky looking wimps, but equally they are usually hard as nails.
Within this warrior drawing tutorial I will go over first drawing a classic warrior type through a few examples (Same format as all of my fantasy drawing tutorials!)
Or you could see the Youtube 4 part video playlist of this same Warrior Drawing too
So here we go, step one,
A classic warrior type is an overly muscular male figure(Although there most certainly are woman warriors...something for a later hubpage perhaps!) that typically carries a big weapon(oh er missus!) either a swrod or an axe and they usually look angry looking like most of Boris Vallejos warrior paintings, so we want to capture that physique in our preliminary sketch.
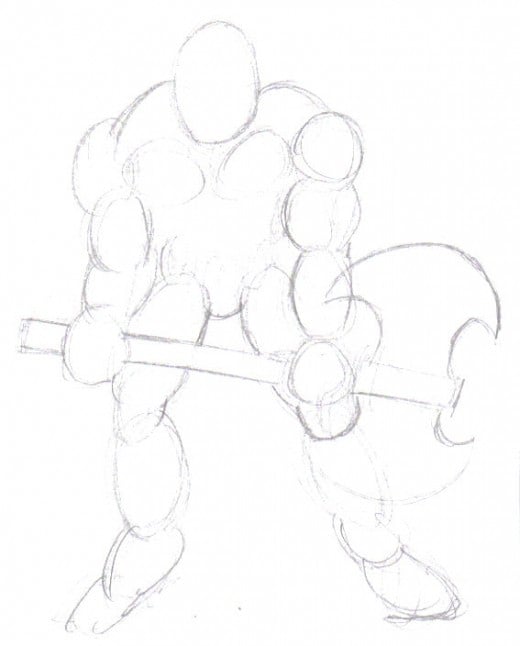
Below I have drawn a basic sketch of our initial draft drawing with circles and cylinders to give you an idea of the body structure as a whole.
Try to draw as light as you can, if you make a mistake, don't panic just have an eraser to hand to rub out mistaken pencil lines.
Sketching The Warrior With Circles And Cylinders Stage 1
Step Two: Building On Top Of Your Basic Draft Warrior Drawing
I always try to make the second sketch better by improving on the basic sketch, to show a progression and some more detail, a lot of the design elements come in quite early on, because I had an idea for this warrior drawing before I put pencil to paper.
Other artists who tackle a warrior drawing go the Conan route were they hardly wear anything, but I just can't help myself and like to draw armour and other details as I believe you can still see the muscles and stuff even when they wear armour.
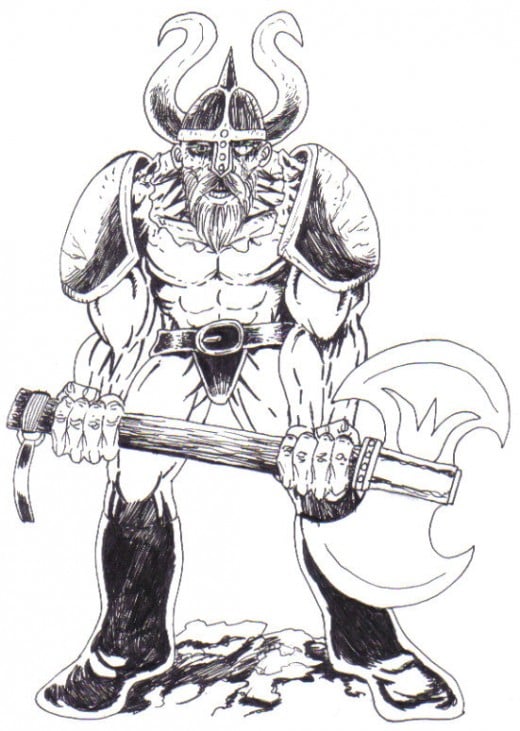
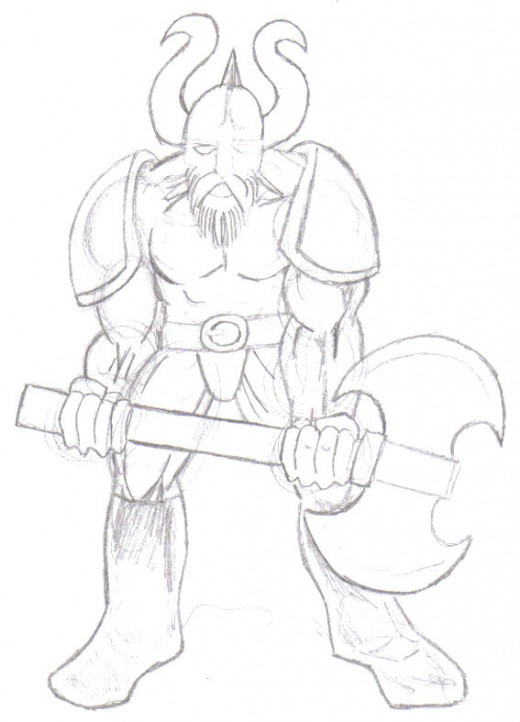
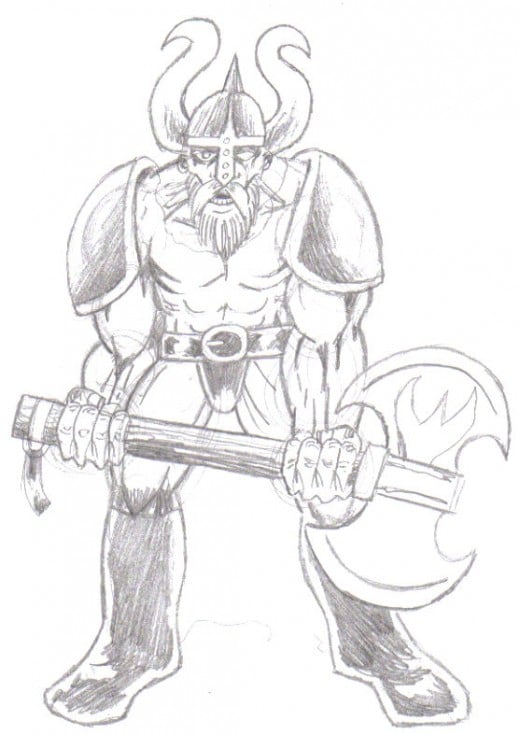
I worked on the head giving the warrior a beard and a horned helmet and massive armoured shoulder pads, see the drawing below, as most of the inititial circles and cylinders have been erased to clear up this drawing.
Add Darker Lines To Bring Out The Warrior Design Structure Stage 2
Step Three: Shading The Warriors Dark Parts And Adding More Details
At this stage(which is my favourite step I might add!) drawing in the details of the face, on the helmet and the hands and other parts, you can really see the drawing coming together here, by shading your warrior you are enforcing the light source and bringing this character out of the shadows and placing some kind of form upon your drawing, which is important, no matter what style you draw in.
This step is the best as you can shade your warrior or whatever drawing you have done and it is now ready for inking.
Darken Everything On The Warrior Ready For Inking Stage 3
Step Four: Ink Your Warrior And Erase Any Pencil Lines
Ink on a pencil drawing just works so effectively for me that I use it pretty much all the time, although sometimes it's a shame to lose the graphite work you have built up with just your pencil, but it makes your work stand out more when you ink with a nice black ink roller pen or something similar.
Enforce textures with a fine line black pen by the use of many different techniques such as cross hatching, which is useful for shading, see the final inked drawing below and how it stands out against the white of the page/paper background.
Inking a drawing is mainly from my comic book hobby, I'm so used to inking all of my drawings, that I sometimes know that a drawing may not need a run through with ink, but I do it anyway.
See also Drawing Fantasy Art for more drawing tutorials and inspiration.
Coming Soon - How To Draw Knights
Inked Warrior Drawing Stage 4
