Raising Mealworms to Feed Your Pets

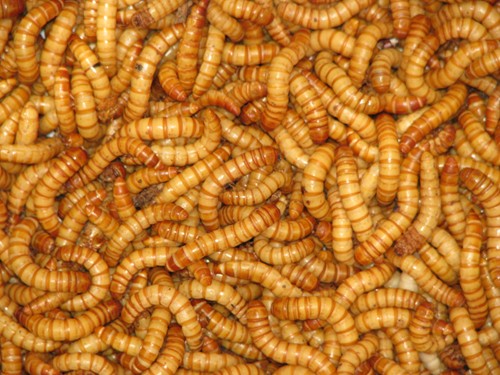
Mealworms
Mealworms are the larvae of the darkling beetle species Tenebrio molitor. They have four stages of life; egg, larva, pupa, and adult. The larvae are used to feed birds, fish, reptiles, and exotic pets. Although they don't have the best nutritional value and have a lot of chitin in their exoskeleton, they can be gut-loaded and dusted to make them better insect feeders for pets.
* Gut-loading is simply feeding them nutritional foods prior to feeding to them to your pet.
Setting Up
Setting up to raise mealworms is very easy and it doesn't take much effort or supplies to be successful. There are very complex systems all over the Internet with screen-bottomed containers or multiple containers for each stage of life, but they aren't necessary. Getting started should be kept very simple. Upgrades are always possible later once the colony is established.
Supplies:
- Container with a lid
- Oats (rolled oats, not packaged oatmeal)
- Mealworms (a couple dozen is a good start)
Poke some holes in the lid of the container to allow air in. Mealworms require good ventilation and doing so helps prevent mold from growing. Mold is a sign that there is too much moisture.
Add some oats to fill the container halfway. This allows the mealworms to dig around in the oats and keeps them from trying to escape through the air holes.
Add the mealworms to the container, put the lid on, then place the container in a dry, dark area.
The mealworms will eat the oats and grow then transform into pupae then into beetles. The beetles will breed then lay eggs and the cycle starts all over again.
Keeping It Simple
The simplest way to setup a colony of mealworms is to use the container the oats come in. Pour half of the oats into a ziplock storage bag to save them for later use. Poke some holes in the top of the container the oats come in. Add the mealworms to the container then store in a dry, dark area. This way is very simple and inexpensive and will quickly get the colony started.
Upgrading
As the mealworm colony grows, larger or multiple containers may be necessary to keep the colony healthy. Some people move the pupae to a new container to finish out the metamorphosis into beetles. This allows them to not be disturbed by the active larvae and sets up another colony as well. Once the beetles emerge, they will begin to breed and lay eggs in the new container.
Multi-drawer Sterilite containers are good for this purpose. Screen can be hot glued into the bottom of the upper drawers to allow the newly-hatched larvae to fall through to the drawer below. Cat litter boxes or other Rubbermaid or Sterilite containers can be used in the same way. Use your imagination and creativity - the possibilities are endless. We use the plastic containers that we have left over from the croissants we buy from the bakery at the grocery.
Gut-Loading
Gut-loading can be accomplished by feeding higher quality foods than the regular oatmeal. Keeping the mealworms in dry dog or cat food and adding unsalted sunflower seeds to it is one way. There are foods available at some big box pet stores for gut-loading crickets that can be used as well. Baby cereal is another. Try different things you have on hand until you find something that works for you.
Maintenance
Mealworms can get most, if not all, of the moisture they need from the foods they eat. They are very proficient at extracting moisture from their food. Adding a small carrot or potato slice can provide additional moisture and help with gut-loading. Be sure to check for mold on a regular basis.
Mealworms produce a dust-like dry waste as they consume the oats (or whatever other grain) in their container. Eventually, all of the oats will be consumed leaving nothing but dirt (mealworm poop) behind. If you're lazy, you can wait until all of the oats are gone, but it's probably a good idea to add more before they are.
Pour the contents of the container, mealworms and all, through a sieve, strainer, or colander over another container. Shake it until all of the dirt falls into the new container. Add some more oats (or whatever you're using) to the old container then dump the mealworms, pupae, beetles, and remaining oats in.
Set aside the new container for couple weeks or so to allow any eggs to hatch out then sift it again to separate the larvae from the dirt. Add the mealworms found to the other container or to a new one then discard the dirt.
Remove any dead mealworms or beetles from the colony on a regular basis. The beetles have too much chitin to be of any use as a feeder, but the dead mealworms can be fed to pets that will consume dead insects.
Of Interest
We find it interesting to look in our mealworm colony while we're doing maintenance to find any pupae. We place them in a new container with some oats to wait for the beetles to emerge.
Some people place the pupae in a small paper cup inside a new container. The pupae are kept in one place and the beetles crawl out of the cup once they emerge.


