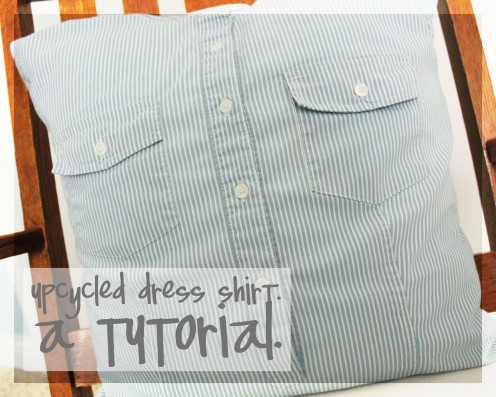
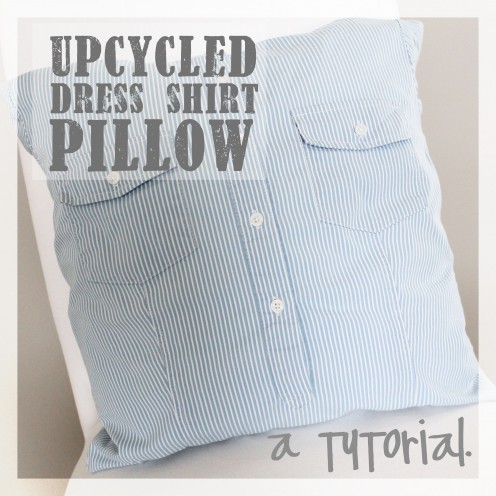
A Tutorial for Creating an Upcycled Dress Shirt Pillow

Upcycled Dress Shirt Pillow
Believe it or not, I worked as a compliance officer at a brokerage firm for almost six years before staying home with our kids. Needless to say, this job did not always fuel my desire to create and use my hands, but this job was a great job for me. I learned a lot in a field I never would have studied on my own.
I wore dress shirts and dress pants every day of the week. Now, well, I wear yoga pants and jeans every day of the week. I have a basket of dress pants in my car right now waiting to go to a resale consignment shop, but I have found it hard to part with a few of my favorite dress shirts and pants. Pathetic, right?
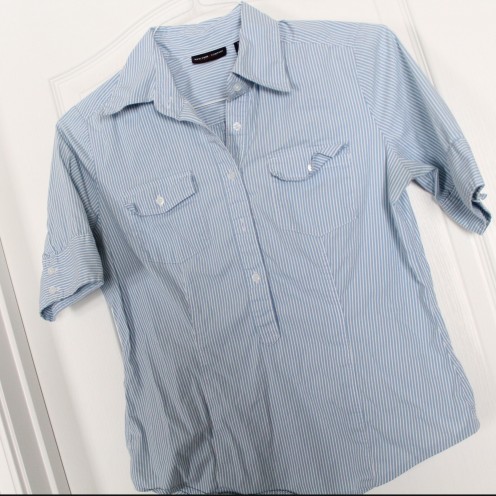
This blue and white striped double pocketed shirt was one of my all time favorites. Not sure why, but I wore it a lot. The shirt does not fit quite right anymore (maybe the result of having a baby), but I could not part with it.
Solution? Hold on to it forever in the form of a pillow.
#1.
Click thumbnail to view full-size


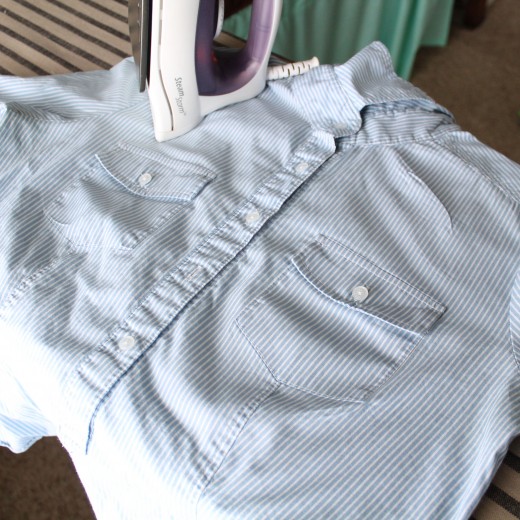
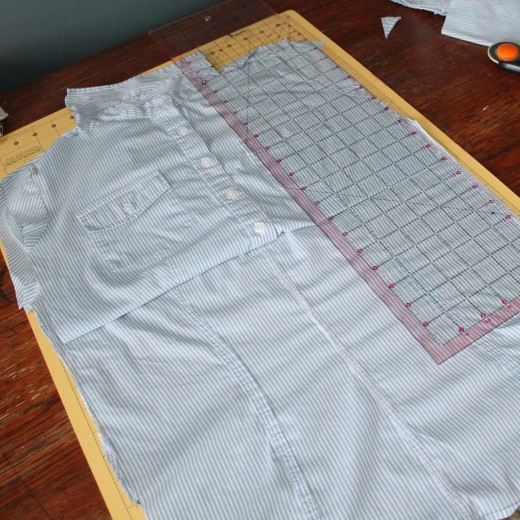
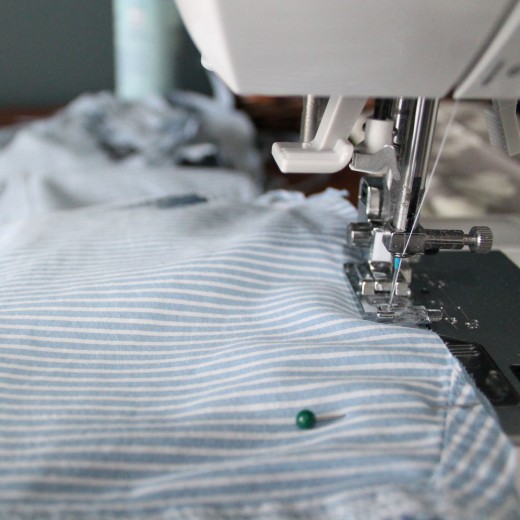
#1. Prep the dress shirt.
Dress shirts have curved lines and puckers in places I would not expect. As a result, upcycling a formal shirt can be a bit tricky. I had to tell myself that getting perfectly straight lines and right angles was probably not going to happen cutting up a shirt that had curves and puckers designed to fit a woman's body. In other words, this is another project where the perfectionist in you may become a bit flustered.
Before cutting up your shirt, be sure to double check that your old pillow or pillow form will fit inside the shirt. This will ensure your shirt is large enough for the pillow you are going to cover.
- Button up all the buttons on the dress shirt.
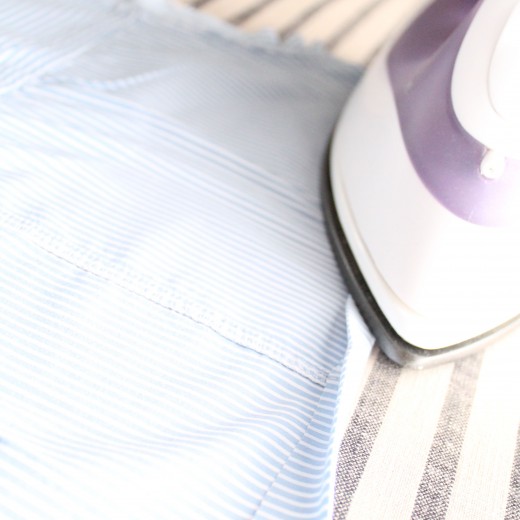
- Iron the dress shirt.
- Cut right up the seams of the dress shirt on both sides.
- Cut through the shoulder seams.
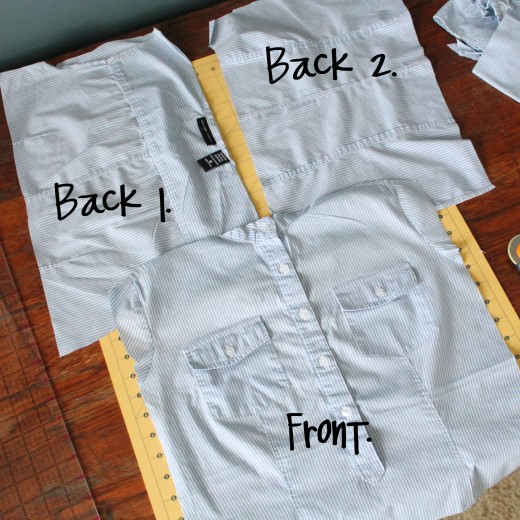
The shirt should now be two separate pieces. You have the front of the shirt and the back of the shirt.

#2.
Click thumbnail to view full-size


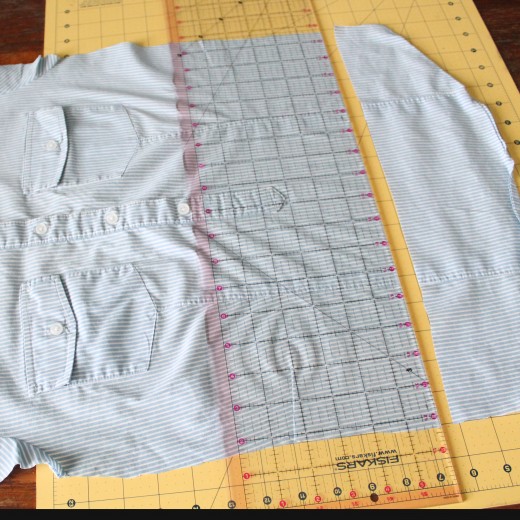
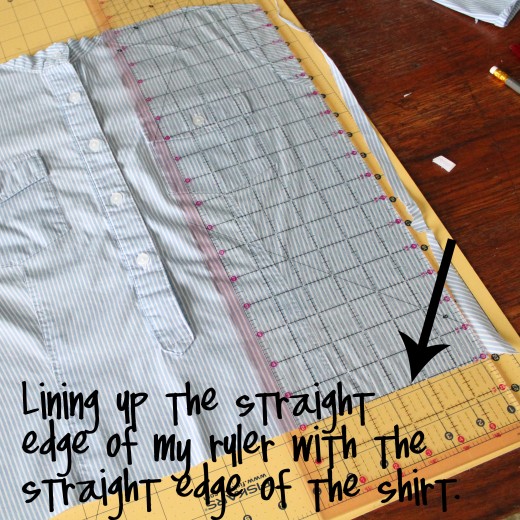
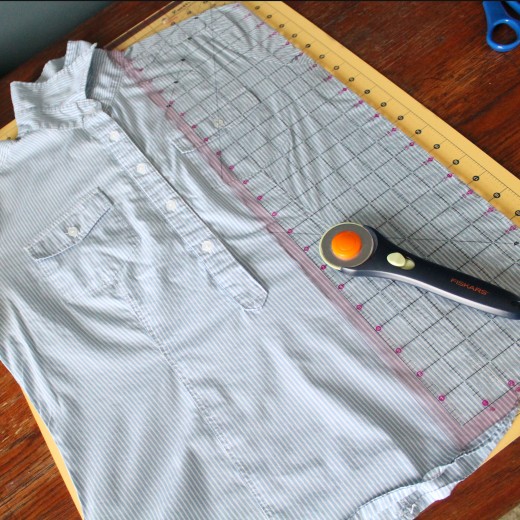
#2. Cut a square out of the front of the shirt.
You can put the back piece of the shirt aside for a bit. We are just going to turn the front into a perfect square. In order to create a perfect square, you have to create a straight edge. Then you use that straight edge as a baseline for the other sides of your square.
Here is how I created a straight line.
- Find a point in the shoulder of the shirt where a few seams meet. This point should be on both sides of the shirt. Drawing a line between these two points will create a straight edge for you to use as a baseline.
- You can draw a straight line between these two points and then cut it with scissors. Or, like you can see in the picture, I lined up a ruler between the symmetrical points and cut a straight edge using my rotary cutter.
I measured my pillow form and it appeared to be 16 inches square. To allow for seam allowances, I wanted to cut my shirt into a 16 1/2 inch square piece of fabric. I always use quarter inch seam allowances.
- Using the straight edge at the top of the shirt, I measured 16 1/2 inches down. I made a mark with my fabric pencil in two places. Marking two places ensures another straight line.
- Cut another straight edge at the bottom of the shirt.
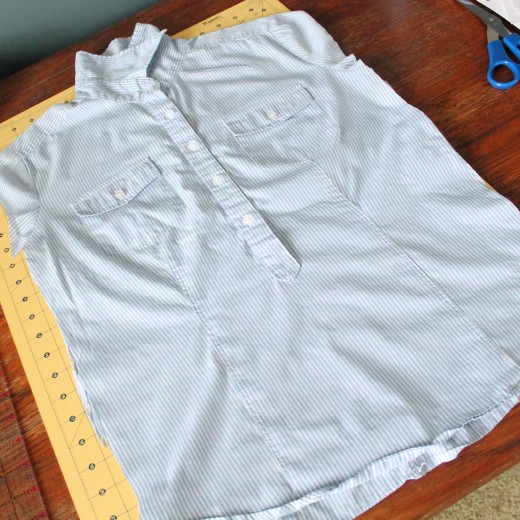
The top and bottom of the shirt should both have straight edges now. Next up, we need to trim down the sides.
- Using the bottom as a straight edge, I used my Fiskars ruler and trimmed up the sides. You can see in the bottom of the picture that I lined up the ruler with the straight edge on bottom. This guarantees a 90 degree angle.
- I used the grid on my cutting mat to cut the sides down until they were 16 1/2 inches apart.
- If you don't have a cutting mat, measure 16 1/2 inches from one side to the other, and cut down the front of the shirt. (the same method we used when marking the fabric 16 1/2 inches down from the top of the shirt.)
Do you recycle regularly?
#3.
Click thumbnail to view full-size


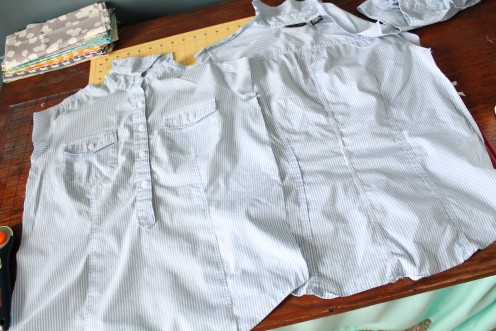
Hem the pieces for the back.
Click thumbnail to view full-size

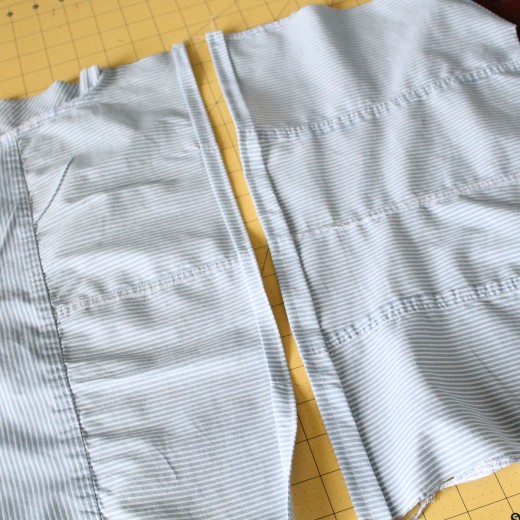
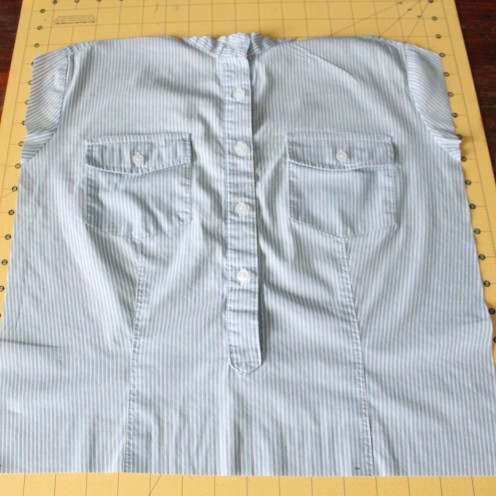
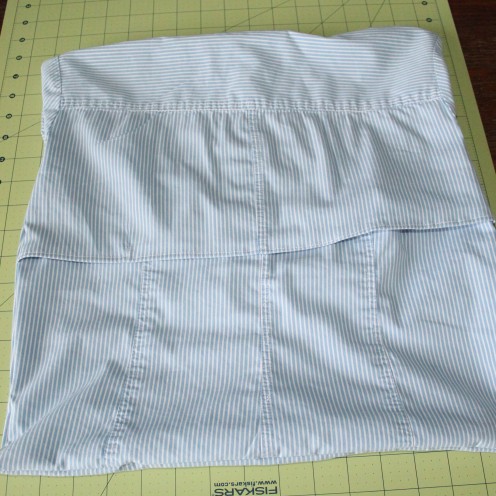
#3. Cut the pieces for the back.
To create the back of the pillow, I used the same process I used in this hub. I used a simple envelope pillow cover. HOWEVER, Preston was looking over the finished pillow and said "why didn't you just insert your pillow through the buttoned up shirt?" Silly me. I hadn't even thought of that.
I didn't need an envelope opening because I could have simply sewed on the back side of the pillow, unbuttoned the shirt, and slipped the pillow form in through the opening.
Using this method, all you need to do is cut out another square the exact same size as the front, lay the right sides of the fabric together, and sew all the way around the pillow. Be sure to unbutton the shirt first. Slip the form in and button the shirt back up. Easy!
If you are like me, though, and sometimes like to make the projects a bit more complicated, the following are some instructions on making a simple envelope pillow.
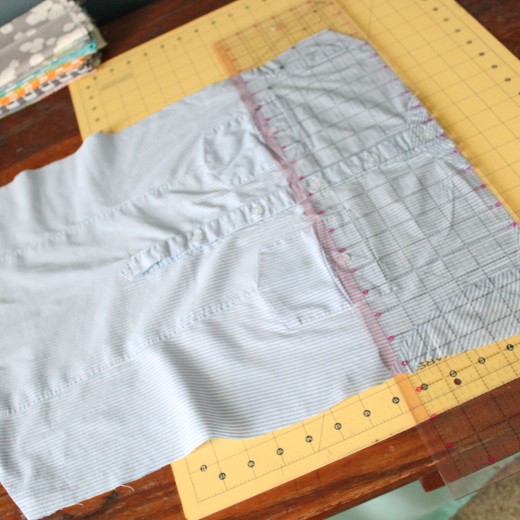
- Fold the front of the pillow. Fold it about two thirds of the way down. (About 10 to 12 inches of the front should show.)
- Using the folded front of the pillow as a template, lay it on top of the fabric for the back of the pillow. Cut around the template.
- Do the same thing a second time. Using the folded front of the pillow as a template, lay it on the remaining fabric for the back and cut around it again.
You should end up with the front fabric and two pieces for the back. Each piece for the back should be about two thirds the size of the piece for the front.
Now is a good time to hem the two pieces for the backing. This gives the pieces a great finished look. I usually fold the fabric over twice, iron the creases, and stitch a straight line right through the fold.
#4.
Click thumbnail to view full-size


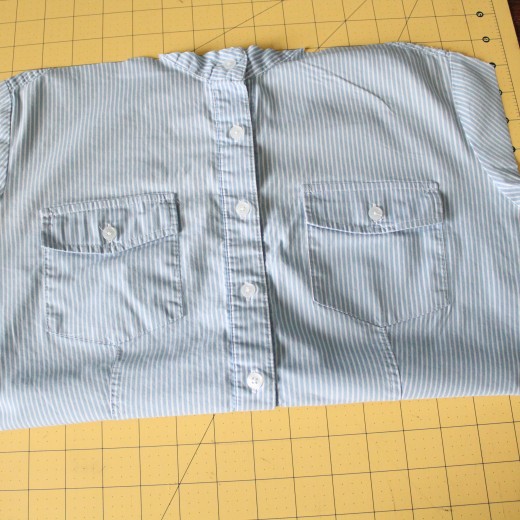
#4. Sew the pillow together.
Now to the fun part. Time to sew the pillow together. We need to lay the pieces on top of each other so all the right sides of the fabric are together.
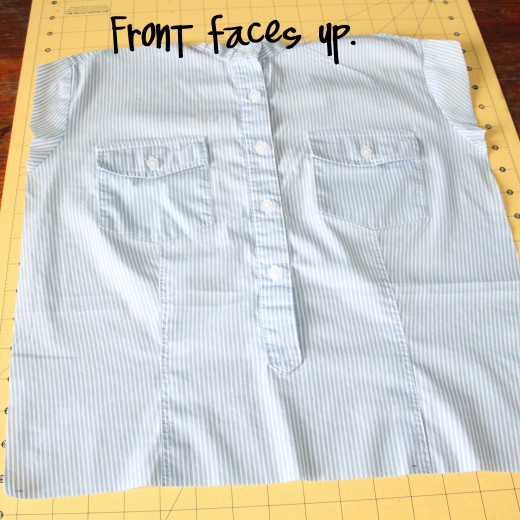
- Lay the front of the pillow on the table FACING UP.
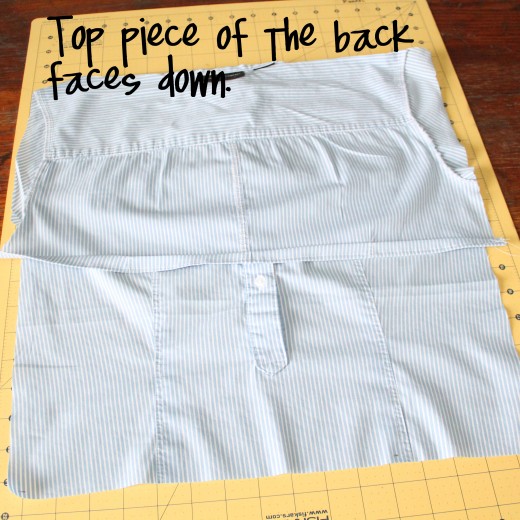
- Lay one piece for the back FACING DOWN.
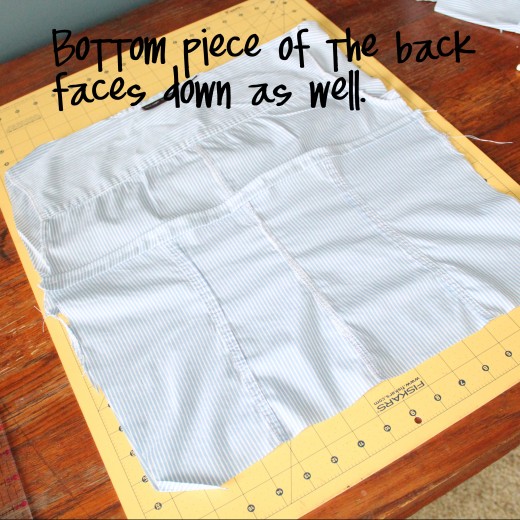
- Lay the second piece for the back FACING DOWN as well.
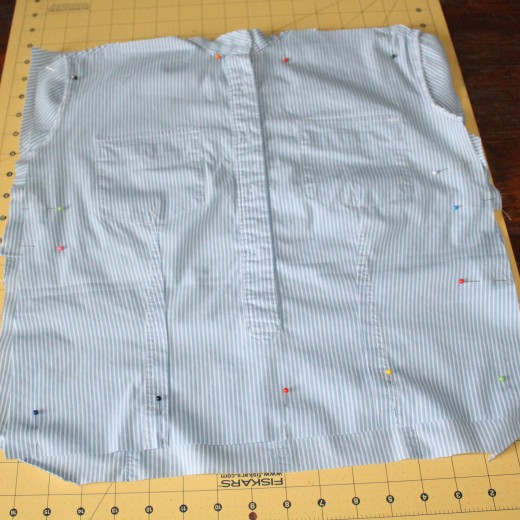
- Pin all the layers together.
- Sew around the entire pillow using a quarter inch seam allowance.
- Flip your pillow right side out.
If you happen to stuff your pillow, and it is not as fitted as you would like, you can always sew around the pillow a second time and make your pillow smaller.
Pillow Form


Finished!