Art Lesson: How To Make Flowers From Childrens Hand Prints

A childs hand-print made into flowers

Hand-print art project: an adorable keepsake
There are some things that us parents and Grandparents love to have as reminders of our children growing up. A favorite thing most of us love to keep are art crafts done with our children's hand-prints. This favorite craft of mine is an art lesson with a pot full of flowers made out of child's hand-prints and their thumbs. It's very easy to do and would make a great craft to do with your kids on a rainy day, as a gift for Mothers Day, as a lesson in a classroom or even as a Sunday school craft.
I recently taught this craft at free art Saturdays at the Sun Gallery where I work, and the kids and adults alike enjoyed making these adorable flowers. Below I will give you instructions on how to make your own flower hand-prints, step by step. It's very easy and will be a beautiful lasting memory of your child for years to come.
What you will need to do your hand-print art project
I've also done other fun crafts with kids hand-prints, but this one was extra creative because the kids also used their thumb-prints to make the flower petals. What you will need to do this craft are:
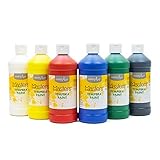
- 3-4 colors of tempera paint (you can use acrylic paint but it takes longer to dry) You will need green and any other colors you want to use for the flowers - yellow, red, pink and blue are good choices
- Thick construction paper. You can use printer paper also but it will wrinkle up a little
- A 1" foam brush or 1" regular flat brush
- Marking pens if you plan on doing the middle of the flower with marker instead of a thumb print (you can also use oil pastels or crayons for this part)
- A Sharpie if you plan on writing out a poem or personalizing your artwork
- Paper plates for the tempera paint
- Paper towels and/or nearby bucket of water (or sink if it's close)


Step by step instructions for making flowers out of kids hand-prints
Besides doing this craft at the Sun Gallery, I also did it as a craft for our Sunday School. We made these for Mothers Day but you can also do this craft year-round. I put some butcher paper on the table (newspaper would be fine too) For the first step, prepare and have your materials at hand because it goes pretty fast - and you will want what you need at hand (excuse the pun!)
- Brush on the green tempera paint to the child's hand and cover well. You don't need a lot of paint. Brushing it on is better than letting them put their hand in a plate full of paint because they will have too much paint on their hands.
- Guide the child's hand to where you want the hand-print. If you're going to put a pot under the print make sure you leave room for that. We did both - some kids added a pot and some did not want to.
- Press their hand firmly down and rub on the top of their fingers for a good print. Then lift the child's hand straight up and away from the print. Have them wash the green paint off now.
- Put the hand-print art in the sun or use a blow dryer to dry it.
- After the print is dry, have the kids sit down and get ready to do the petals. There are 2 ways you can do this next part. They can either color the flower middles on with oil pastel or markers - or they can make the flower middles with their thumb print. Don't let them press their thumb all the way down - just the tip of their thumb makes almost a perfect circle.
- Have them wash their thumb between colors or the colors may get muddy. Let them make their 5 petal flower with whatever colors they want, pushing their thumb print around the flower middle to make the petals. For smaller kids you will need to guide their thumbs to make the petals. Even older kids may need a little help with this part.
- They are done now with their flower print plant and can wash their hands. After the print dries they can either add grass at the bottom with marker or paint, or draw a pot under their flower hand-print sitting in the pot. I let my kids use special craft paper to draw their pot out - then they cut and pasted it under their hand-print. They can also use construction paper if they want to cut their pot out of one color.
- Now have them personalize their card or drawing with their name and date. Make sure the date is on the front because that's one of the most important parts!
Child's hand-print flower art in a "pot"


")


