Candy Cane Christmas Wreath Craft (Kid Friendly)

The Final Product of a candy cane wreath (DIY for Cheap)

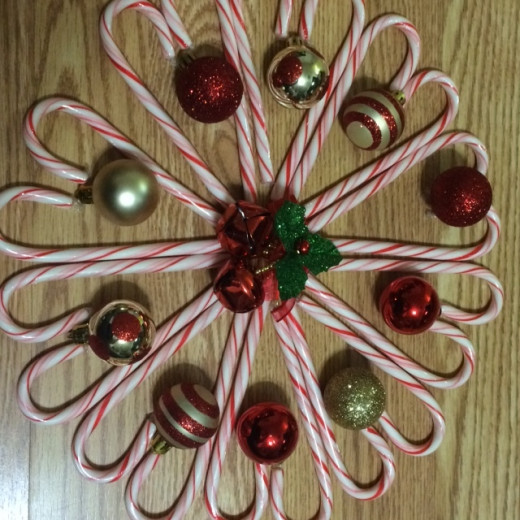
The Candy Cane Wreath (on the Cheap)
Christmas wreaths can quite frankly be a pain in the bum. This is in addition to the cost the homemade wreath will cost. A pre-purchased wreath can take the pain out of making your own wreath, but that personal touch will be taken away. Many of us like to be creative without spending hours trying to get that perfect bow or spending $50 on materials. A nice pre-purchased wreath can cost upwards of $40-$75. A homemade wreath can cost the same amount, but you have to put time and effort into it. Then the kids want to assist. Why are there no wreaths out there that allow children to help, keep away from tedious tasks, and allow us to keep it cheap, after all, Christmas costs a lot of money.
Different Wreath Choices

Materials Needed
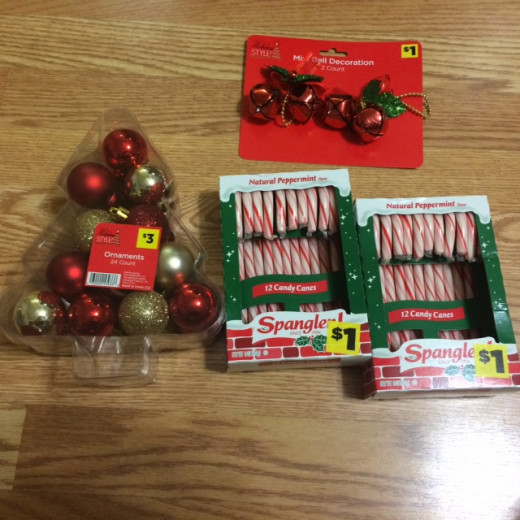
Candy Canes, Ornaments, Materials... OH MY!
What you will need:
-
Hot Glue Gun
-
Hot Glue
-
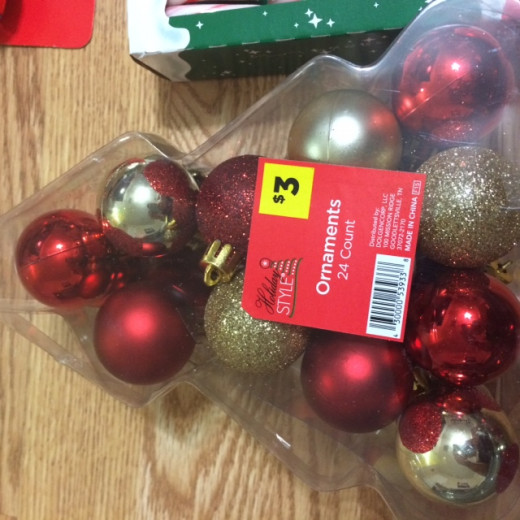
Small Ornaments
-
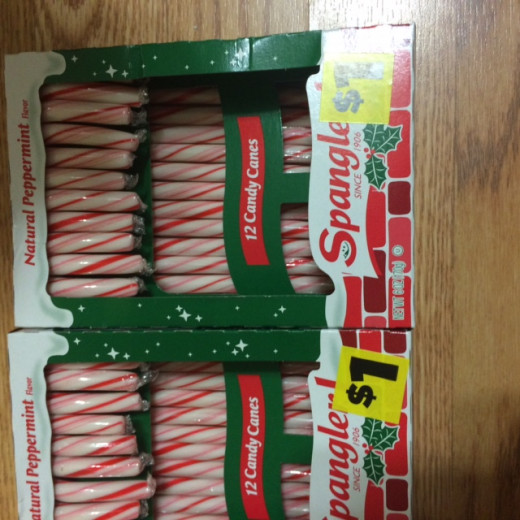
20 Regular Sized Candy canes
-
Ribbon (optional to tie the individual candy canes together)
-
A larger Ornament to match the colors of the Candy Cane Wreath
-
Large Piece of Wide Ribbon to use at the top of the wreath in order to hang the wreath
-
About 15 minutes of time (more if you have children insisting on helping with arts and crafts)
Crafts for Kids this Christmas Season

How to Position the Candy Canes

Step One
Step One: The candy canes can be assembled two different ways. They can be assembled back to back or front to front creating a heart. The best way to assemble the candy canes will be to assemble them back to back. Take two candy canes at a time and create ten piles of two. Each pile will be glued together back to back. This is something the kids can help with. (I opted for two boxes of $1 candy canes from the Dollar General).
Candy Canes in a Circular Pattern

Step Two
Step Two: Now that the candy canes have been assembled in pieces it is time to create a circular pattern. That the back to back candy canes, once they are fully dried, and assemble them in a circle. Put one back to back candy cane and take the next back to back candy cane and create a heart with the outside stem of one of the back to back candy canes. Keep repeating this process until an entire circle or wreath looking structure has been created. Let this dry. Let it stay for 20 minutes. Fill in the gaps with hot glue. Once all the hot glue has dried, clean up the wreath by cleaning up the hot glue.
Step Three
Step Three: Attach the small ornaments in between each set of “hearts” created by the candy canes. Switch up the ornaments if you bought a variety pack. I opted for the $3 pack from Dollar General, cheap but very effective.
Large Bell Ornament for the Middle of the Wreath
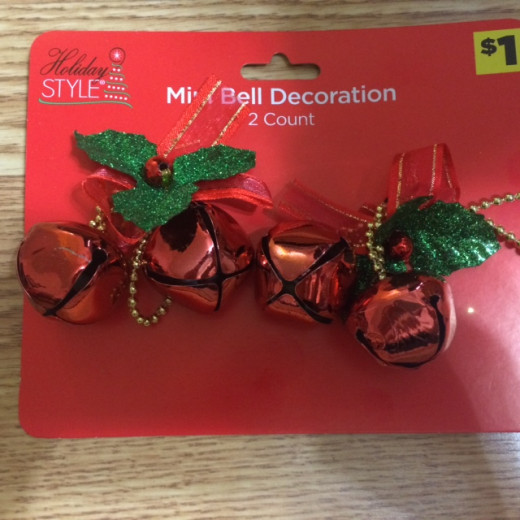
Step Four
Step Four: Attach the large ornament in the middle of the wreath. You can choose whatever theme you want to go with. I stuck with the red, green, red, white, and glitter gold theme. I chose bells to put in the middle of the wreath so they would chime each time the door opened. A pack of these small bells, set of two were $1 at the Dollar General.
Step Five
Step Five: Choose a large wide ribbon to attach at the top of the wreath. This will enable the wreath to have a strong stable ability to hang on any wreath holder. This ribbon can be found for $1-$2 at the Dollar General.
Amount of the Entire Project
All in all this project cost $8 without the hot glue (which most of us crafters have in our arsenal of materials). This is a great project to teach the meaning behind the candy cane in a Christian atmosphere or create projects for the kids when it’s a rainy or snowy day. This is a great project for the kids to create and give to teachers as presents or their bible study teachers.
Final Project

Add some History to Your Craft- The History of the Candy Cane
In Indiana, a candy maker wanted to make sure that those celebrating Christmas decided to go back to the true meaning of Christmas. Within this true meaning, the candy maker incorporated the birth of Jesus, ministry, and the death of Jesus Christ.
- Pure White (Hard Candy) - Symbolize the Virgin Birth
- Form of a J- Represent the precious name of Jesus, who came to the earth as Savio
- Form of a J- It can also represent the staff of the Good Shepard who reached down to reclaim the fallen lambs who have gone astray.
- Hard Candy- Symbolize the Solid Rock, foundation of the Church, and firmness of the promises of God
- Red Stripes- In an effort to keep the candy from being plain, the three small red strips show the stripes of the scourging Jesus received.
- Large Red Strip- blood shed by Christ on the cross so that we could have the promise of eternal life


