Create Out Of The Box Pictures With Photoshop Elements

I use Adobe Photoshop Elements often, not only for resizing,cropping or enhancing my photos, but I also have a lot of fun with it. Photoshop Elements is a much less expensive version of Photoshop and with a little effort I can achieve some similar results.
In this tutorial I'd like to show you how I make an out of the box picture. These are also sometimes referred to as out of bounds photos.
I'll start with my photo of King Neptune.
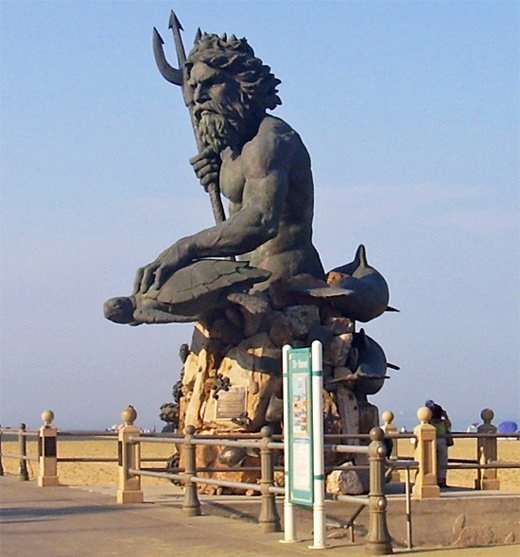
And make the King appear to pop out of a photo.

You can make your children, pets or anything else you like pop out of your photo but I would suggest that on your first attempt you choose something with a simple shape.
I'm using Adobe Photoshop Elements for Mac but I've been told that the screens for Photoshop Elements for Windows are similar so I believe you'll be able use my screen shots as a guide.
Step One
With the photo you've chosen to alter on the screen, choose File from the toolbar on top and duplicate your photo. Now close the original. Now choose Layer and then Duplicate. You will now have two things showing in the layer palette on the bottom right of your screen - background and background copy.
Step Two
Now you'll make the frame. At the top of the layer palette on the bottom right of your screen your should see an icon that says New Layer or Make New Layer. Click that and you should now see something called Layer 1 on the top of the stack.
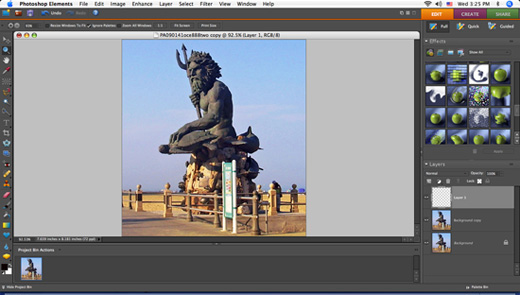
As you can see, Layer 1 is now highlighted in the Layer palette so it is the layer that is active.
Choose the marquee tool from the left side of the screen. Use the tool to make a box around an area of the photo that you don't want to pop out. This will be what is seen on the inside of your frame. Now choose Edit from the top of the screen and select Stroke Outlne. In the Stroke Outline selection you'll see a box that probably says 1 pixel. Change that 1 to 15. Now click on the color area of that box and choose white.
Go back to the top toolbar and choose Select, then Deselect. Now you have a frame.
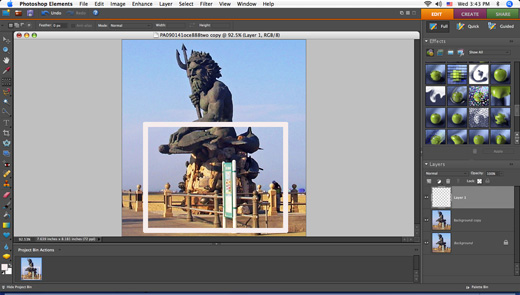
From the top toolbar choose Image and click on Perspective. Now you'll decide how you want your image to appear leaving the box. It doesn't have to come out of the top of the box. You might want it to exit at the sides or the bottom. This is probably the most difficult part of this process the first time you try. Just play around with the perspective until you find something you like, then confirm it with the check mark offered.
Step Three
Now you'll create a background. It's usually best to choose a light colored one. In my example I've chosen one similar to the background in my original photo but you can choose whatever you think will look best. Don't be overly concerned with your choice at this point because you will have an opportunity to change it later.
In your palette area click on the layer called Background to highlight it and make it active. (Be sure it is the background layer, not background copy.) Now find that little icon in the palette area that says New Layer and click it to create Layer 2. Go to the toolbar at the top of the screen and choose Edit, then Fill Layer and choose color from the drop box. Click on it to choose your color.
With Layer 2 still highlighted in the palette box, click on the New Layer icon to create Layer 3.
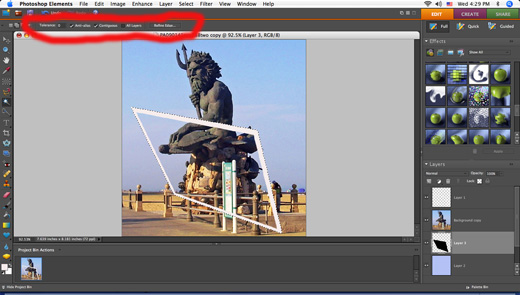
Now click on Layer 1 to highlight it and choose the magic wand tool from the tools on the left of the screen. At the top of the screen below the toolbar you should see an area that I've highlighted in red in the photo below that will allow you to set the Tolerance to 0. Make sure the box marked Contiguous is checked and be sure the Use All Layers box is unchecked.
Click the magic wand on the photo anywhere outside of the white frame and you'll see those little black ants dancing around the edges. Now from the top toolbar choose Select and then Inverse.
Click on Layer 3 in the palette box to highlight it. From the top toolbar choose Edit, then Fill Selection. Choose the color black to fill. Now you'll see a black shape on Layer 3. Choose Select from the top, then Deselect.
Put your cursor on Layer 3 in the palette area and drag it up to the New Layer icon. This will duplicate it and you'll see Layer 3 Copy above Layer 3.
Click on Background Copy in the palette area to highlight it then go to the top toolbar and choose Layer, then Group With Previous. Now on your main screen you should just see the background and the white frame with portions you want inside the box. You'll reveal the out of the box portion next.
Step 4
Now it's time to reveal the out of the box portion of your photo.
In the palette area, double click on the layer named Background. A box will come up that will allow you to rename it Layer 5. It is important to rename it because you are going to copy it and you already have a layer named background copy. Now with your cursor on your newly named Layer 5, drag it to the New Layer icon to duplicate it creating Layer 5 copy. Put your cursor on Layer 5 copy and drag it to the top of the layers stack. Now on your main screen you will see your original unaltered photo.
Click on Layer 1 to highlight it. Click the New Layer icon to create Layer 7 above it.
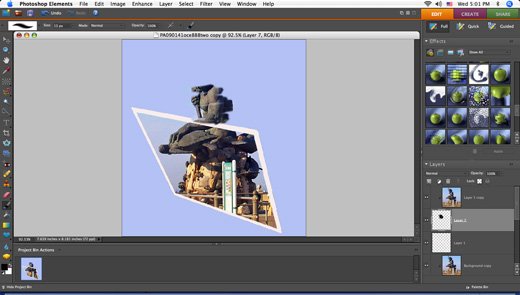
Click on Layer 5 copy to highlight it. Choose Layer from the top toolbar, then Group With Previous. Now on your main screen you will just see the background and the part of of the photo in the white frame.
Make sure that your foreground color is set to black and your background color is set to white.

Click on Layer 7 to highlight it.
Choose the brush tool from the tools on the left side of your screen. Begin to paint where you want the object to come out of the box and you'll begin to see the object revealed. Use the eraser tool to remove parts you don't want. If you erase too much just click back on the brush and paint some more. This part of the process with show you why it's best to choose a simple object for your first try.
Now that you revealed your out of the box subject and erased unnecessary background images you have the opportunity to change the background color if you don't like it. Just click on Layer 2 to highlight it, choose Edit from the top toolbar, then Fill Layer, and choose your new color. Otherwise, just move on to Step 5.
Step 5
Now you'll add some shadows around your white frame to give it some definition and enhance the illusion.
Click on Layer 3 to highlight it.
At the top of the layers palette near the New Layer icon you'll see a place to change the mode to multiply. Next go to the top of the screen toolbar and choose Filters, then Blur, then Gaussian Blur. Move the slider around to give a a little shadow to your white frame edges. If the shadows look too dark, look near where you change the mode to multiply and you'll see a place to change the opacity. Slide it around till you like what you see.
Step 6 (Optional)
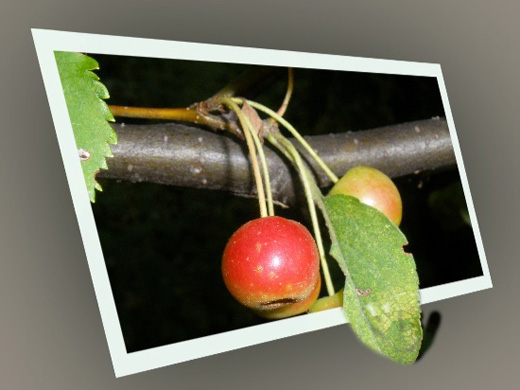
You can use a brush to add shadows to the out of the box subject of your photo. You will determine whether this is needed or not. In my King Neptune photo I did not do this, but if you look at another one of my out of the box pictures below you'll see that where I've added the shadow to the leaf that's popping out it really adds to the illusion.
If you wish to paint in additional shadows, click on Layer 1 to highlight it. Click the new layer icon to create Layer 8. Now click on Layer 8 to highlight it. Use the brush tools to paint your shadows then click Filters on the top toolbar, the Blur then Gaussian Blur and adjust as you please.
Finish
If you think you'd like to make changes you can save it as a PSD file before saving as a JPG.
Now choose Layers at the top toolbar and Flatten Your Image. Save as a JPG .
You've done it. The first time though this process can feel confusing but once you've completed one of these, the reasons for the steps you've taken become clearer and it becomes easier and easier to create these images.
![Adobe Photoshop Elements 2018 [Old Version]](https://m.media-amazon.com/images/I/51AQ4wl7eOL._SL160_.jpg)