History Of Candles And How To Make One

Candle is best described as illuminating device made of a fiber wick enclosed in a cylinder of wax or fatty material. Beeswax candles were used by the Romans, and tallow (animal fat) candles have been made in Europe since the Middle Ages. In the 18th century, spermaceti, a wax obtained from the heads of whales, was introduced for candle making. Since the mid-19th century, ordinary candles have been made from mixtures of paraffin wax, stearic acid (a solid fatty acid), and beeswax. Hydrogenated vegetable oils and other waxes are also used.
The earliest method of candle making was dipping the wick, usually made of flax or cotton fibers, into melted wax or fat and removing it to let it cool and solidify in the air. The candle was built up to the required thickness by successive dippings. Taper candles are still made by dipping, but most candles used today are molded, usually by machines.History
There is no record when the first candle was used although there is reference to candles in the Bible dating back as early as the tenth century BC. Candles came into existence out of the simple need for light. The earliest candles were mainly only available to the wealthy and the most common were made from animal fat. Later on, it was found that burning beeswax and spermaceti (oil found in the head cavities of sperm whales) produced a much brighter flame than animal fat. In fact, the light of a spermaceti candle was so bright that it was used to create the standard measure of light, hence one candlepower.
Candle development
It wasn't until the 15th century that candles were being poured into molds for production. But the real advances came in the early 18th century. The 18th century saw the invention of candle molding machines, the addition of stearic acid to harden the wax, the braided wick, and the production of paraffin wax. Bayberries were also used to produce candle wax. The bayberries were boiled and then the wax was skimmed off and collected. The smell these candles gave off when extinguished was probably what gave rise to the modern scented candles.
The candle's new role
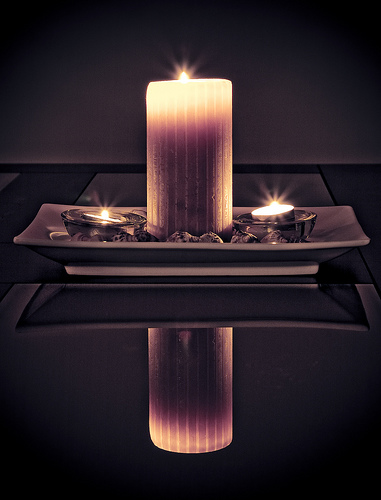
Candles continue to play an important role in households around the world. Though still an emergency source of light, its main role has changed to a source of ambience. The soft glow and captivating aromas produced by today's scented candles help to reduce stress and make our homes a pleasant vacation from the stresses of our everyday work lives. Whether using its light to set the mood for a romantic dinner, or its aroma when relaxing in the tub, candles are a true luxury for our stressed out lives.
How to make a candle?
Here is what you'll need:
- Crock pot or a double broiler
- Thermometer
- Candle wax chips (preferably pre-formulated for candles) or any wax suitable for container candles and any desired additives such as dye, fragrance oil, etc.
- Glass container with a lid (for the candle) suitable for candles; many ceramics and glassware fit the bill for this.
- An appropriate sized pre-tabbed wick (the larger the jar, the larger the wick diameter)
- Essential oils or scented candle oils.
- Food coloring
- Hot glue - from a hot glue gun or a hot glue pot
- Ballpoint pen
- Clothespins
Step 1
Set up the double boiler to melt your wax. Heat the wax in the crock pot or double broiler to 160 degrees. For safety reasons, watch your temperature and make sure the wax does not get too hot. Always use a thermometer to monitor your wax temperatures. While the wax is heating, pre-heat the candle jar in the oven on lowest setting. (This helps the wax adhere to the glass better)
Step 2
When the wax reaches 160 degrees and has completely melted, mix the additives and stir. When mixed thoroughly, add food colouring and stir again. You can add any additives you have selected and mix thoroughly. Add them in the following order:
- Additives such as vybar or stearic acid
- Fragrance Oil
- Dye (this is added last so that you get visual confirmation that everything else has mixed well with the wax) Always keep an eye on the temperature. If the wax gets too hot, it can be a severe fire hazard.
Step 3
Handling the wick is much easier. Apply hot-glue to the base of the wick tab. Press the tab to the centre of your container. Try to place the disk as close to the centre of the candle as possible. The wick should stand straight up on its own. (Don't worry about the wick being perfectly centered, just try to make sure the base is centered)
Step 4
Take the glass candle jar out of oven, pre-heated to about 150 degrees. Using a clothespin, secure the top of your wick as shown, to provide some sort of support to help keep the wick centered while the wax is cooling. Carefully pour the candle ingredients into the jar leaving room at the top so the lid will fit and save a little wax for topping off. (The wax will sink in the middle after the first pour cools and a second pour is needed to level this off. This is called ‘topping off').
Step 5
Let the candle cool to where there is a semi-hardened crust on top. Allow the wax to completely cool before proceeding. This will take six or more hours. Slow cooling generally provides the best results when it comes to container candles. So, don't attempt to accelerate the cooling process. Now take the wick and adjust it so that it is centered in the jar (the crust will hold the wick in place when you adjust it)
Once your candle has completely cooled, you will notice that the wax has sunken a bit in the middle. Melt again the wax that you saved from the previous step, to a temperature of 185 degrees F. We use a higher temperature for the second pour because it increases the adhesion between layers of wax. Re-pour to a level that just barely covers the wax from the initial pour. Going to this level helps hide any seam lines. Allow your candle to completely cool.
Step 6
Once your candle has completely cooled, remove the clothespin and trim the wick to ¼". And your very own custom candle is ready for you to enjoy! If you would like to be creative, try making candles with different containers. You can use porcelain, brass cans, or anything that will withstand the intense heat from the flame. If you are unsure about the safety of the container, just play it safe and don't use it.
Your friends will be impressed with your handy work when you tell them it is one of your "originals"! Learning how to make candles is fun!
Burn container candles only on a heat resistant surface as the containers can break.
Here are some safety meaures you must take when burning candles:
- Burn the candle for no more than four hours at a time.
- Protect from drafts.
- Keep the wick trimmed to ¼"
- Keep away from children and pets.
- Do no move the candle while it is burning or while there is molten wax in it.
- Keep away from flammable objects.
- Never leave a burning candle unattended.
Gel Candles
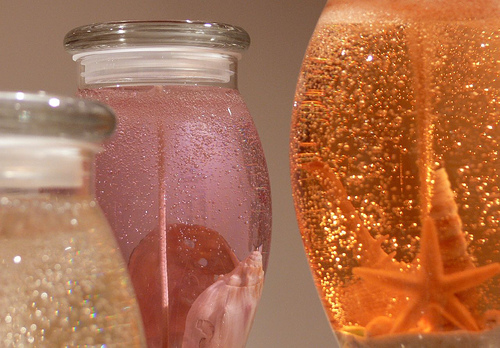
Gel candles are made from gelled mineral oils or gelled synthetic hydrocarbons to produce a transparent candle, often with wax figurines suspended within the gel substance. A gel candle will also contain a thickening agent to make the gel more rigid, and is contained in a glass vessel to hold the shape.
There are some extraordinarily beautiful gel candles available and they are more and more popular as gift items. The figurines within the gel can be anything from seashells to herbs to more personalized specialty figurines like a wedding couple or a person's favourite animal or sea creature.
The gel effect can be reminiscent of those little glass ‘snowballs' that had winter scenes and ‘snowed' when you shook them. The effect can be tinted and glittery or plainly transparent.
Aromatherapy gel candles are a very popular gift. These candles will have some of the actual herbs or plants suspended in the wax, for a nice visual pot pourri effect as well as the aromatherapy effects of the essential oils that are released as the candle burns.
Gel candles will have a cored wick. Cored wicks are generally a paper and cotton mix with a core of tin or zinc to help it remain straight and rigid. To ensure that the core is not made of lead, rub a white piece of paper over the unburned wick. If a pencil-like mark appears, the wick contains lead, and should not be burned.


