How to Animate a Candle


If you have PhotoShop or another program with which you can make duplicate levels, edit each one, and paint pictures, along with another program that can use the layers to create a gif, then you’ll have fun making this candle, and any other animated project. Gifs work well in web pages, and as nifty room ornaments in some social pages.
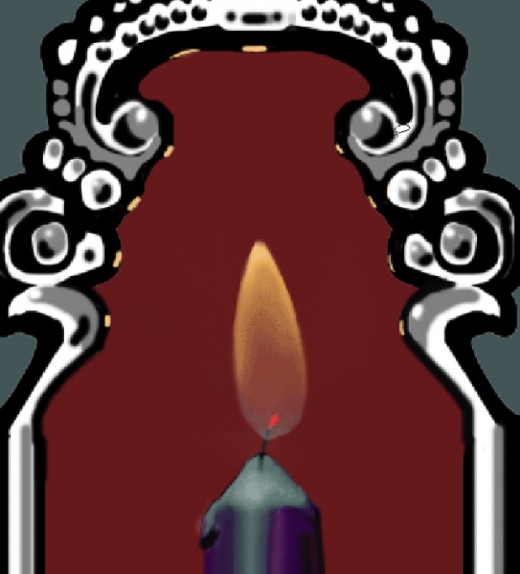
To begin, paint a candle within a silver frame (or gold if you prefer) like the one in Figure 1. On a new level, paint a flame like the one in Figure 2. Put the flame leaning to the left a little bit. On the level that has the flame, paint little dabs of reflected light on the protruding edges of the silver frame, as in the same Figure 2. (For this article, I turned off the background frame to show that the reflections are not part of the background.) Now, copy the level that has the flame and the reflected lights. Highlight the flame, and with your Free Transform tool, grab the upper middle anchor point of the box while pushing the Command Key (the Apple key on the Macintosh). Pull it one click to the right. Pulling on an anchor point while pushing the Command key will help you to skew the highlighted image. This action moves the top of the flame to your right, while leaving the base of the flame the same.
Next, use your smudge tool at a very low pressure and push upward on the flame. This will cause the flame to enlarge itself vertically, but only a little bit. It could also raise the yellow part of the flame higher, or some of the “transparent” part of the flame a little higher, as if hot gases were rising.
Now, move all the reflections in the silver frame on each side of the flame one click to the right, since your flame is moving to the right. On the right side, make those reflections taller and a bit wider. The ones to the left should be smaller. The reflection directly above the flame moves with the flame. The ones on each side of that top one will probably grow and shrink more noticeably than the ones on each side.
Keep making new levels, each time moving the top of the flame a little bit to the right, and a little bit bigger (but imperceptibly) by using the smudge tool. Occasionally, push downward a couple of times. If you are not seeing individual particles or sparks rising from the wick, it will look okay to push downward with the smudge tool, as this will look like the flame is adjusting itself back to normal, after overcompensating for a surge of extra or hot gases.
I did about ten or eleven levels in this sample.
Next, I opened the file in ImageReady. In frame one, I turned on the level that showed the basic candle with the silver frame. I left that frame on for the rest of the levels. For frame two, I turned off the first flame, and turned on the second one. In frame three, I turned off the second flame and turned on the third one, and so on until I reached my last one. This was frame number 13. Then, to create a flame that was blowing in the breeze, I turned off 13 and went back to level 12. Then I did level 11 again. Next, I turned back to level 12, then ended on level 13.
The next thing you can do, is to go backwards, now; use levels 13 through 2, so that there will be no sudden jerks in the flame. This will give you about 42 frames before it restarts from the beginning to give you continual loop of the burning candle.
I didn’t do that. I just created two or three more frames in ImageReady, moving the flame back to the left and brushed in downward a little, just to see if it seemed real enough. And it does, so I left it like that; it just seems like a little jerky flame that’s the victim of air and an irregular wick.
Save the file under the “Save Optimized” option, and then you’re done. Go to a browser, click on “Open File” and open your gif, and enjoy!
")


