How to Draw Wanda, the Fairly Odd Parents Character


You Can Draw Wanda
One of the things I have learned from being a professional artist for almost 50 years is that people think drawing is some sort of magical process. Children are especially amazed at people who can draw.
While it is true it takes many years of practice to be able to draw any subject well, people - yes, even you - can learn to draw a few things easily.
There is really no trick to it. All you need to do is follow along with these steps as I draw Wanda. If you spend some time - even a few minutes each day - practicing and working through this tutorial, you can learn to draw Wanda from memory.
.
Just Follow Along While I Draw Wanda for Fairly Odd Parents...
Now, I know this looks like a lot of different steps to follow but if you go through it a few times, it will become easier every time you go through it.
Here's a few tips to remember when drawing along with me. All drawings are made up of a few simple shapes. This is especially true in Wanda's case. As you follow along through the tutorial, keep this in mind. Concentrate on the shape you're drawing and how it fits into the overall picture as a whole.
OK, get your sharpened No.2 pencil and a few sheets of paper.
Let's begin...
.
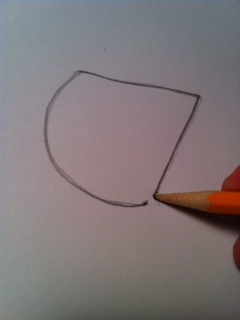
Step 1: Draw the Basic Head Shape
As you can see, Wanda's head is basically the same shape as a slice of pizza or wedge of cheese - a simple triangle with a round side.
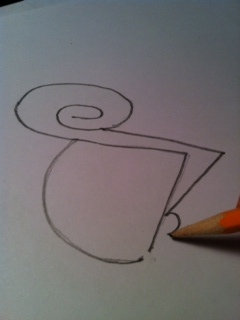
Step 2: Add the Hair Shape
Again, think basic shapes. Wanda's hair can be done in two simple lines.
You can start at the top left edge of the triangle with a curled line that goes around growing into a larger circular shape and ends on the top left corner of the triangle shape head.
Next, draw a second line extending from the right edge of the circular curl you just drew. Extend this line to the right across the top of her head, then make a sharp corner downward toward the small semi-circular ear shape.
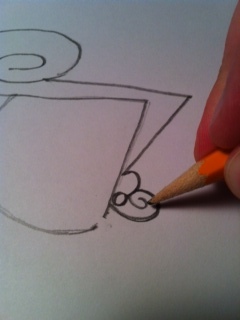
Step 3: Add Earring and Finish the Hair
You should already be able to see the basic shape of her head and hair.
Next, add the earring to the ear - it's just a small circle.
Now draw the curly circular shape next to the ear - this is the bottom curled part of her hair.
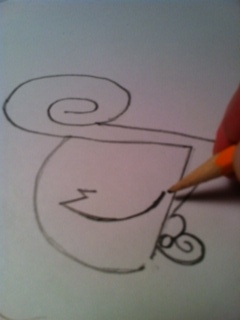
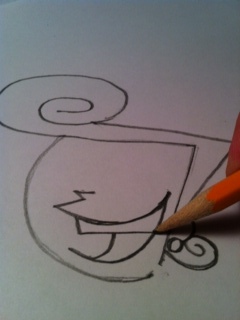
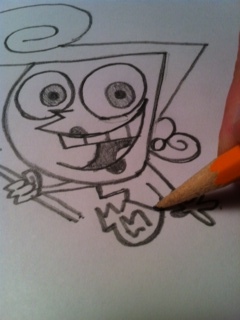
Step 4: Add the Nose and Mouth
The nose and top of her mouth are actually one long line with a zigzag shape for the nose that continues into a curving line for the top of the mouth.
Step 5: Draw the Bottom of Her Mouth and Teeth
How are you doing so far? Stop a minute and check your work. See how it looks. If you're not happy with what you've done so far, it's perfectly OK to start again on another sheet of paper.
Moving on - add 2 more curving lines to make the bottom area of her mouth.
Finish by adding two straight lines that make up the basic shape of her teeth.
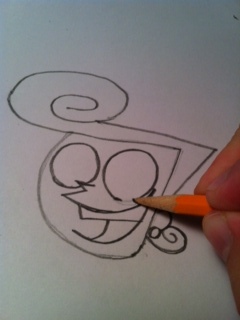
Step 6: Draw the Two Eyes
Before you draw these, look carefully at the circles drawn here. What do you notice about them?
You can see that they are actually different sizes, one is slightly smaller than the other.
When you draw these basic circular shapes, be sure to make the right circle just a bit larger as shown.
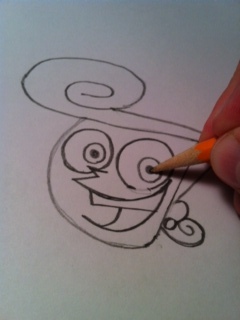
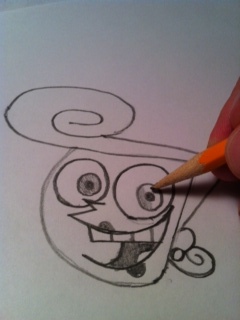
Step 7: Finish the Eyes
Draw a smaller circle inside each of the larger circular shapes you drew in the last step.
Inside those smaller circles, place an even smaller circle. Fill these smallest circles in with your pencil so they are solid black.
OK, you're finished with the eyes. How does your Wanda look so far? If you don't like the way your Wanda looks, it's perfectly normal to just trash it and start again from the start with a clean sheet of paper.
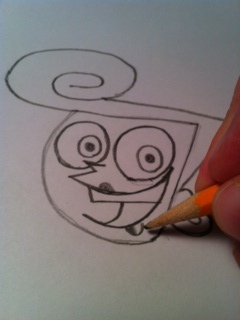
Step 8: Add Her Lips
This is a very easy but important step.
Draw a half circle shape on the top and bottom lines of her mouth as shown.
Fill these in with your pencil making them a medium gray color.
Step 9: Fill in Some Gray Color
OK, you have basically completed Wanda's head. All that you need to do on this step is to gray in the eyes, lips and inside her mouth as shown.
How are you doing so far?
You're done with the head -Congratulations!
If you want, you can stop here and you'll have Wanda's completed head.
If you want to finish drawing the rest of her, let's move on...
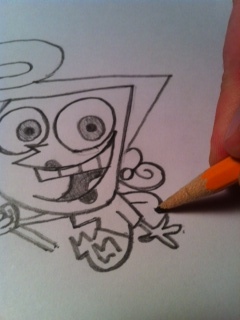
Step 10: Start Drawing the Body
OK, let's start by drawing her hand, arm and sleeve.
Don't let this intimidate you, this is the hardest part of the drawing. If you get past this, the rest is downhill.
Tip for drawing the hand: Remember to break complex things down into shapes. The fingers are basically 3 squashed ovals. The thumb is a sort of elongated triangle with a line in the middle. Combine the two shapes to make the hand.
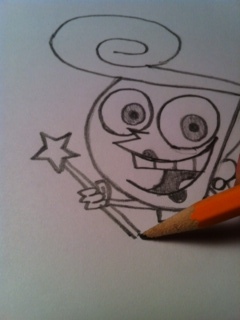
Step 11: Draw the Wand
This is a pretty easy step.
Just draw the two lines extending away from the top and bottom of her hand.
Next add the star at the end of the wand. Notice the star shape is not perfect, so don't worry about making it that way.
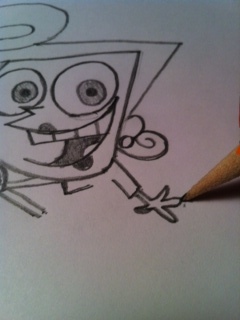
Step 12: Draw the Other Arm and Hand
Again, these are just straight lines here for the arm and sleeve.
To draw the hand, just think of a flower with 4 petals - that is the thumb and three fingers.
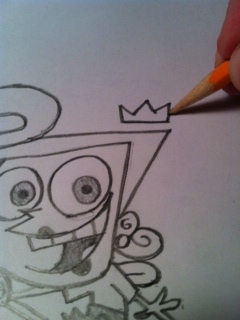
Step 13: Daaw Wanda's Body
For this step, think about the simple shapes that make up her body.
For example, you see a circular curve that goes around the bottom.
A straight line serves as her waistline.
The legs and feet are basically just zigzag lines.
Step 14: Add Wand's WIng
Super simple step - just draw a semi-circular line starting at the top of her shoulder and ending just above the edge of her sleeve.
Add a short line right in the middle as shown.
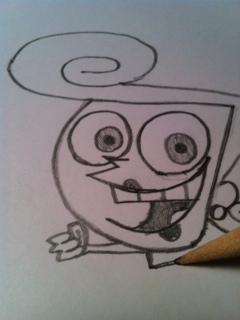
Step 15: Add Wanda's Crown
Another easy step to draw this crown as shown.
Notice that the crown is "floating" above Wanda's head, not touching her head at all.
Also notice that the crown is irregular in shape so don't try to make it a perfect crown shape - it is supposed to be irregular.
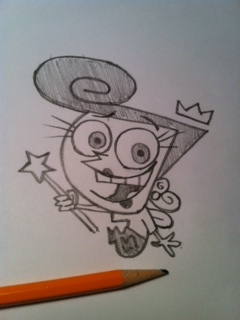
Add the Finishing Touches
If you've made it this far - Congratulations!
All that's left to do is add some of the finishing touches by shading her hair and lower body.
That's it -Step back and take a look. How does your drawing look?
Remember, drawing is simply making a bunch of shapes that fit together in a certain way. Drawings like "Wanda" do look complex at first but are basically simple.
Its perfectly normal to get frustrated and draw something many times until you get it right. The fun of drawing is in the journey as well as the end result!
Think about it. Does Wanda look as difficult to draw now that you have drawn her one (or more) times?
Guess what? - the more you practice, the easier drawing becomes.
I wish you the best with your drawing!
________________________________________________________________


")


