How to Make Beads From Washers and Bolts

It's not difficult to learn how to make beads from washers and other hardware. Pendants and beads made from hardware such as washers and bolts can add interesting accents to jewelry, altered bottles, upcycled containers, or other craft projects. Steampunk is a popular trend that uses hardware in art and crafts. These beads can be included in steampunk projects for something new. However, these beads need not be limited to steampunk art and crafts. They can be mixed with other beads to make jewelry or beaded accents for crafts. I didn't buy any washers or other hardware for this project. I simply asked relatives if they have any extra washers, nuts, or bolts around the garage, and I readily received an ample supply.
Materials Needed:
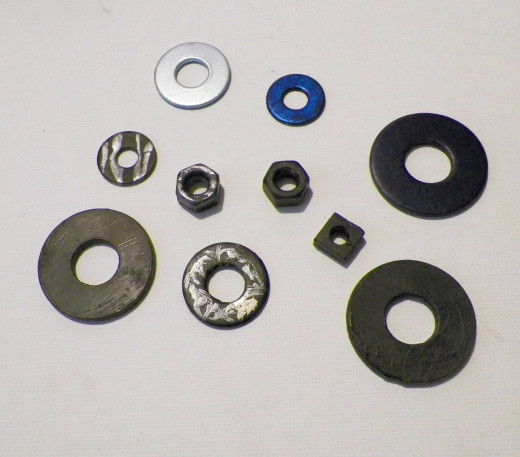
Metal washers, bolts, or nuts
Black acrylic paint
Mod Podge
Flat paint brush
Pages from an old book
Steps to Make Bolt and Washer Beads:
1. Paint the washers, bolts, or nuts the base color that you will use. I painted washers black, a light metallic blue, and medium blue as shown in the photograph below. I added some metallic silver paint to some of them. Those I will set aside. For this project, I'm only going to use hardware that I painted black. However, feel free to experiment with different colors and other materials.
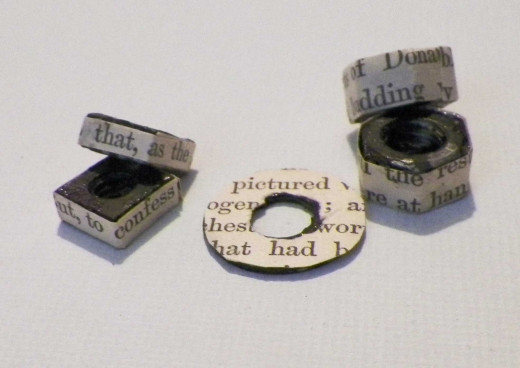
2. Cut strips of paper to fit around the bolts or nuts. If using a washer, trace the washer on paper and cut out the circle as well as the hole in the middle. Trim the circle to fit on the top of the washer without going over the edges.
3. Glue the paper to the hardware. I used Mod Podge, but you can use glue. If using Mod Podge, do not paint the Mod Podge over paper that was just glued to the metal. Paper tends to bubble and warp if both sides are wet with Mod Podge at the same time. To be safe, wait 20 minutes before using Mod Podge on any overlapping paper.
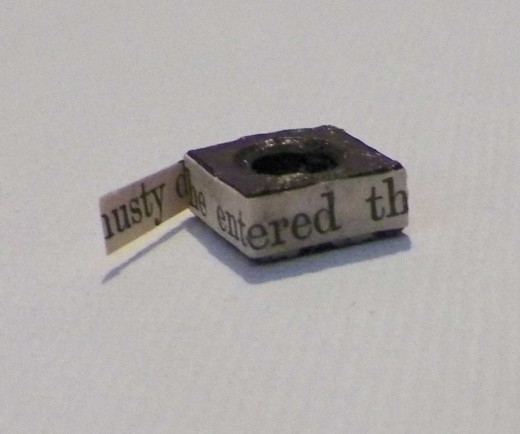
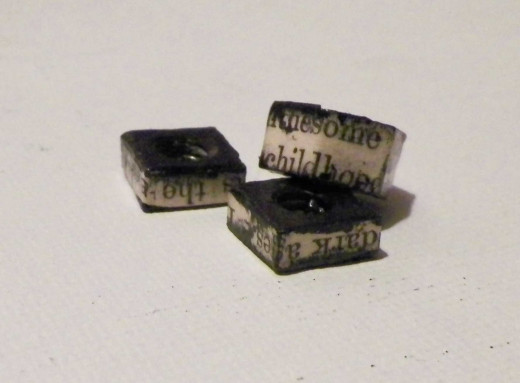
The following photo shows a washer with some nuts and bolts with strips of paper from an old book glued around the edges.
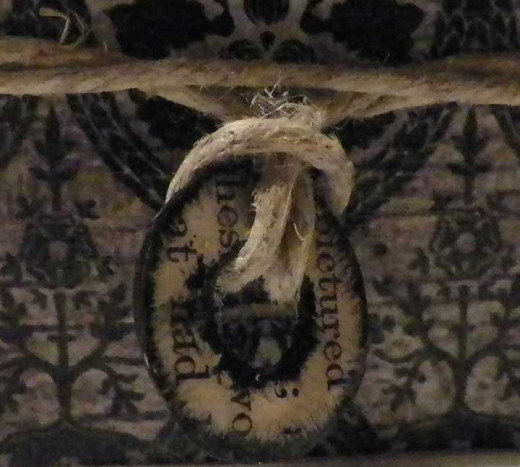
4. Dab the paint brush in black paint and tap the brush to remove any excess paint. Then, drag the brush just over the edge of the paper. In creating this aged look, don't worry if the paint doesn't look perfect. I think it looks best if the paint is uneven or if small dabs get on the page. There really aren't any mistakes here when painting the edges of the paper. For washers, I painted the exterior and interior edges of the paper.
5. Allow the paint to dry completely before applying a sealer. Seal with clear nailpolish, Mod Podge, or Diamond Glaze. Judikins Diamond Glaze is called a dimensional adhesive which means that it creates a clear, raised finish.
Variations for the Hardware Beads:
- Use scrapbooking paper instead of book pages
- Try different colors of paper and matching paint
- Paint washers with colored nail polish and add swirls of a different color of nail polish.
- Add an accent to dangle inside the inner hole of the washer.
- Mix these hardware beads with paper beads.
You could create a lot of different looks with these beads by using patterned paper instead of pages from books and different colored paint. Since it's not difficult to learn how to make beads from washers and bolts, this project could be used as a family activity. I enjoy doing these types of projects with my teenage son. I'd love to hear how you use these hardware beads. If you make these beads and find good use for them or add a new twist, please share in the comments. I hope you enjoy making some beads from hardware.


")

