How to Make a Punched Tin Lantern


We use a lot of canned goods in our house, and this is a great way to recycle the tin cans for a simple fall craft project. To make a punched lantern, you will need these supplies:
- tin cans
- stencil
- permanent marker
- hammer
- awl or nail
Step 1: Prepare Your Cans
Any kind of tin can will work well for this project. Wash and dry the cans; remove any labels and leftover glue.
Step 2: Apply a Stencil or Template
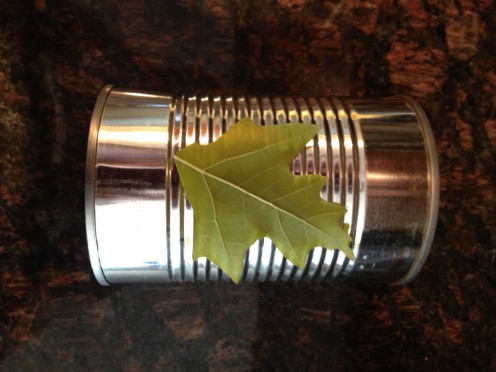
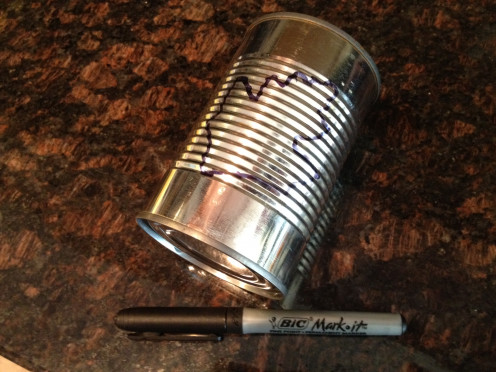
I picked a leaf off of a tree in our backyard to outline on my can. You can trace a clip art pattern, a cookie cutter, or free hand draw your design. Tape your template to the side of the can you want to punch. I put the seam of the can on the opposite side so it won't show. Trace the template with a permanent marker.
Step 3: Freeze the Can
Fill the can with tap water and freeze it. This will give the can weight and some resistence as you punch out your design.
Step 4: Punch Holes with the Hammer and Awl or Nail
Once the can is frozen, remove from the freezer and clamp the can in a jig or a workbench clamp to hold it securely. Use the hammer and awl to punch holes along your design. You make the punches as close as you like them, about every quarter inch is a good start. When you've finished punching your design, wash off the marker. You can use a little nail polish remover if the ink is stubborn.
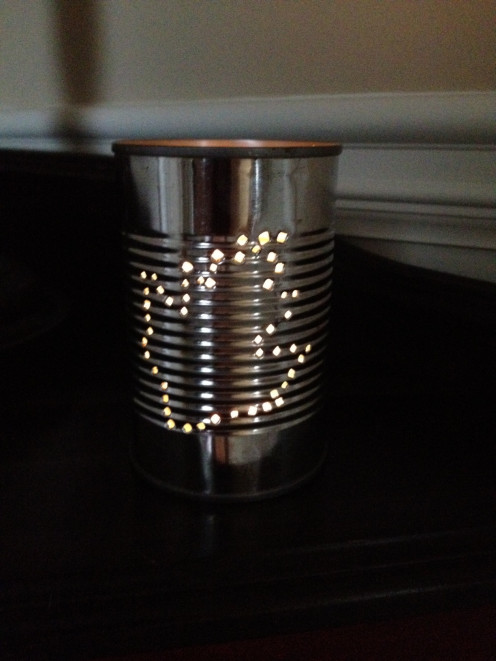
Step 5: Add a Handle, Candle, and Enjoy!
You can add a handle by punching two holes across from each other near the top of the can. Bend a small piece of wire and crimp the edges. Add a tea candle and light to enjoy your pattern.


