- HubPages»
- Arts and Design»
- Graphic Art & Design»
- Design Software
How to do Grayscale and Cropping in Photoshop CS5

Why use grayscale
Converting images to grayscale is a useful function that can be applied in several applications including Adobe Photoshop. The primary function of grayscale is to enable the user to convert a multicolored photograph or picture into a black and white image.
Now why would anyone want to use grayscale? Well, some people prefer a vintage look over a flashy colored image such as the creators of Sin City and the Walking Dead. Others want to illuminate or focus their attention on a specific object or groups of objects within the picture, so grayscale is used to fade out certain elements within the piece. Sometimes people want to hide certain areas because there is a mistake such as blurriness or other inaccuracies so they use grayscale to blend in those unwanted areas. Whatever the reason might be, here is a quick and easy demonstration of how to convert your image to grayscale.


How to convert an image to grayscale
Once the image is opened into Photoshop, the first thing that you need to do is make sure your image is at your desired specifications. The reason you might want to check your specifications first is because once your image is converted into grayscale the image may become distorted or look out of focus if you decide to alter the image in any way after you put it into grayscale. For instance, you may decide to change the resolution, scale, or the dimensions of the working space. In other words, you may want to decide what your specifications are before you get started.
So, in order to change the specifications, you first need to go to the tabs table located on top of the photoshop application and then select Image. Under the Image menu, select Image Size where you can enter your desired specifications. Many times, people want to change both the dimensions of the work space or the resolution. For instance, the default resolution is normally set around 72. A resolution of 72 is great for jpeg files because it captures both the quality of the picture and keeps the overall file size relatively small. However, if your photo or picture is in high definition (HD), you're going to want the resolution to be higher in order to capture all the high quality elements.
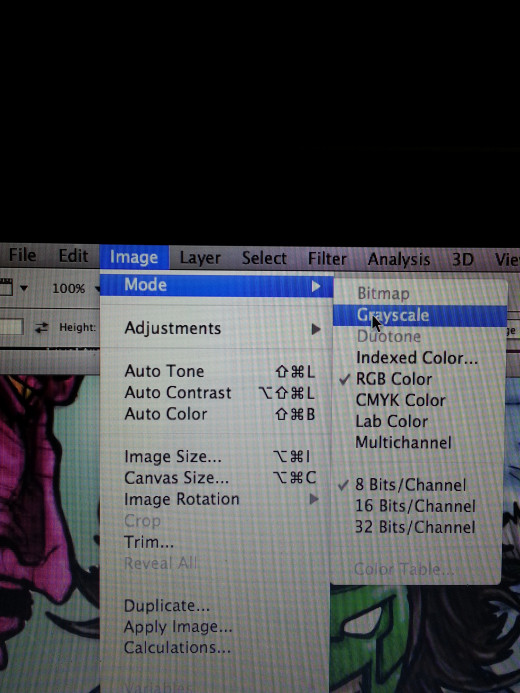
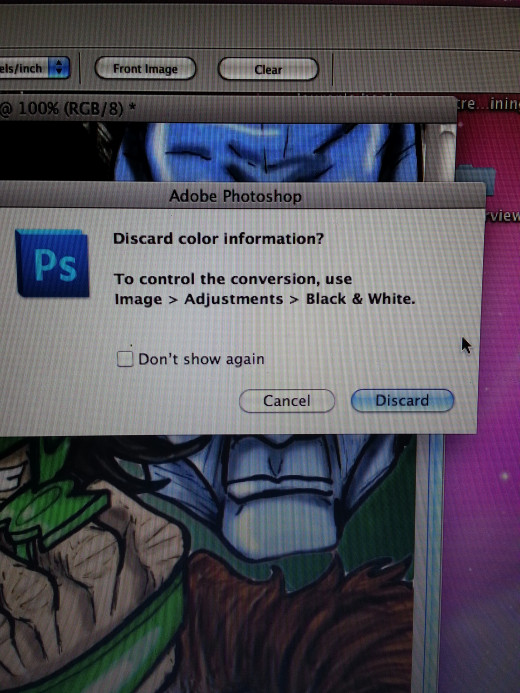
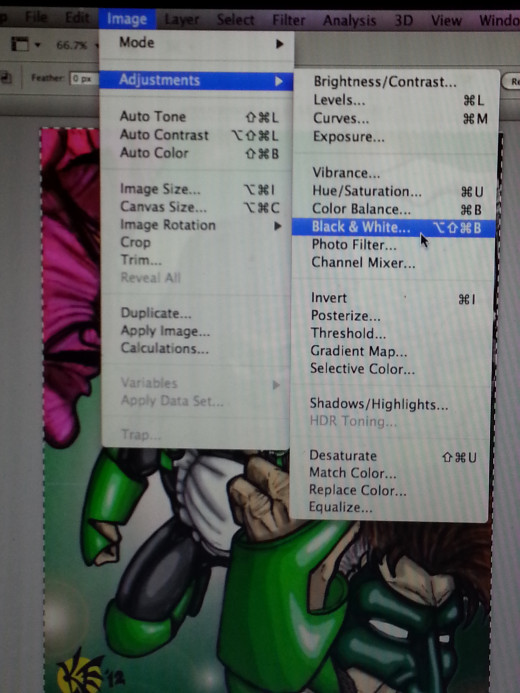
Once you selected your desired specs, go ahead and click okay. Now it's time to convert the image to Grayscale. Go back to Image, then select Mode. Under Mode select Grayscale. A little dialogue box should come up and depending on how many layers you have it may ask you if you want to flatten the image. Grayscale should be one of the last actions you do, so I would recommend flatting the image because then you'll have all your layers on one plane which allows for easier transfer to a smartphone, Facebook, a flash drive, etc. Next another dialogue box may appear which will ask: Discard color information? Go ahead and click discard. Your image should now be in Grayscale. Make sure to save your file.


Selective Grayscale
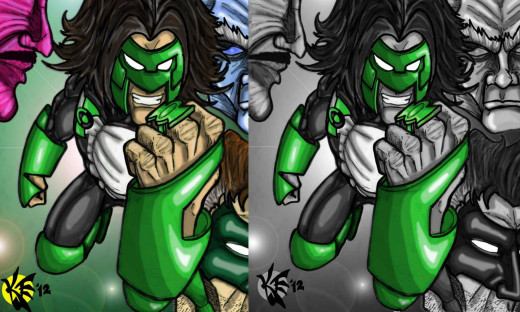
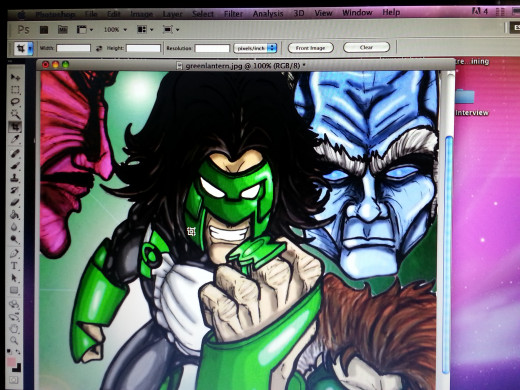
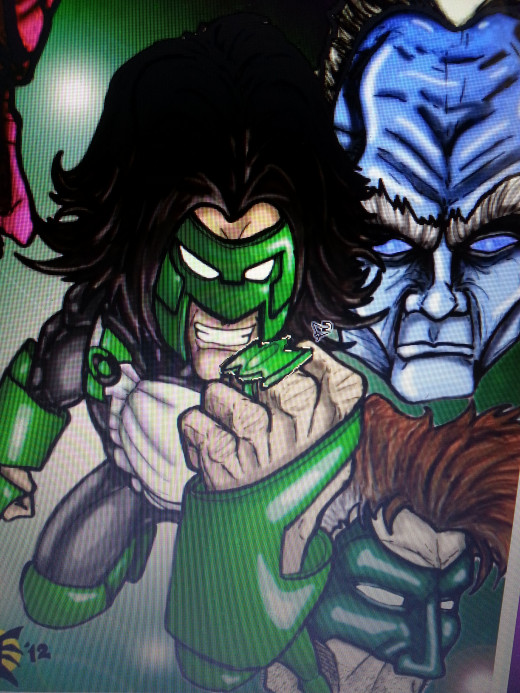
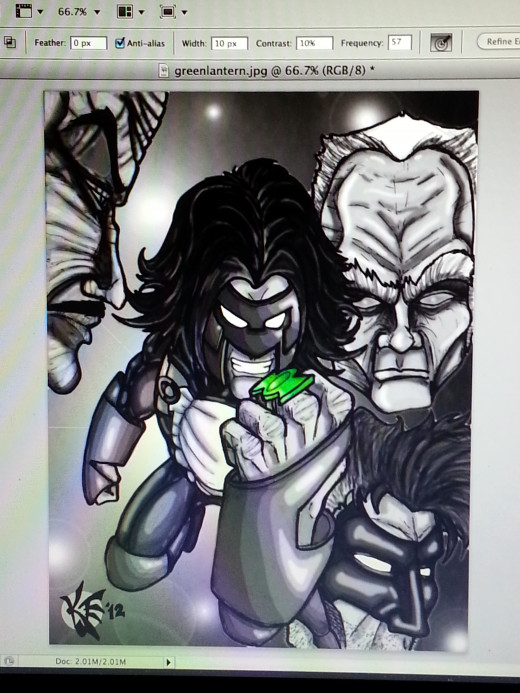
Let's say you want to keep some of the colors in your original picture but you want the rest of the picture to be in grayscale. Well, it's actually easier than you may think. First, open a new image into Photoshop. I'm going to use the Green Lantern picture from above in this example.
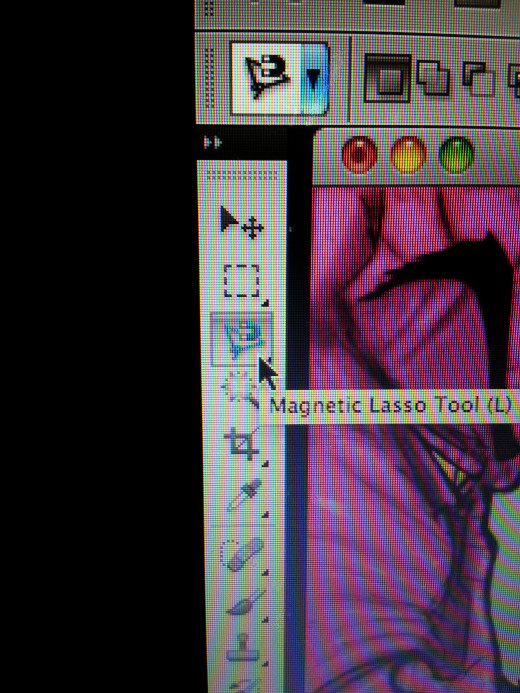
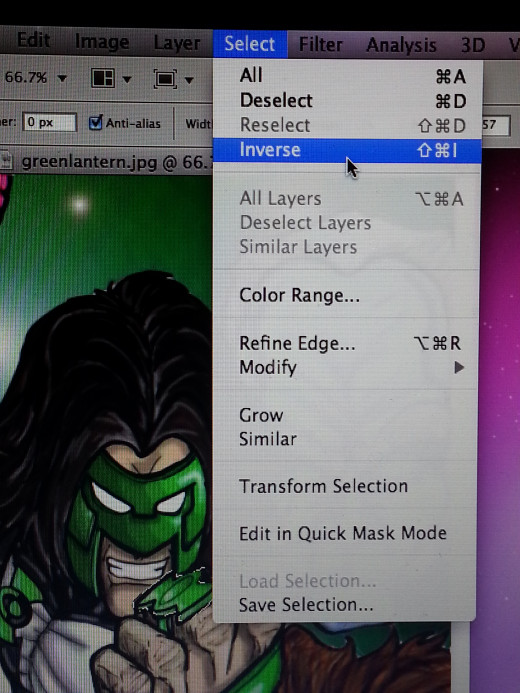
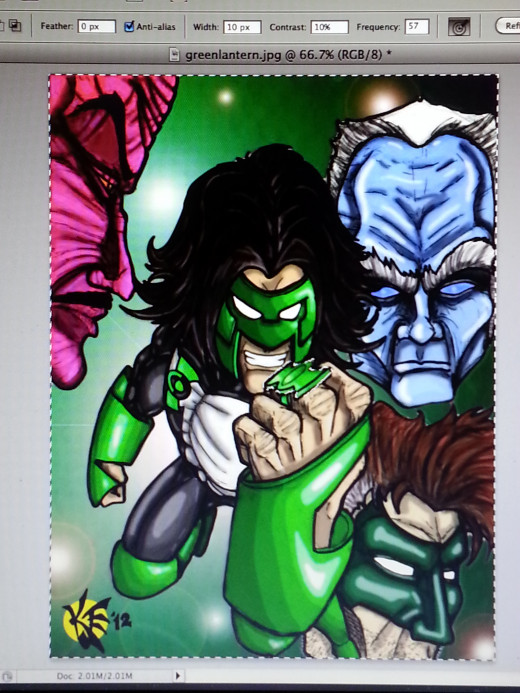
Once you have opened a new image go to the tools menu and select the Magnetic Lasso Tool (refer to the picture to the right to see what the magnetic tool looks like). Next, select the sections of the picture you want to keep and carefully trace over them with the magnetic lasso tool. Once you have everything selected, which will be indicated with "moving dashes", go to the tabs up top and choose Select. In my example, I'm going to keep Green Lantern's green power ring. Now, scroll down and choose Inverse. The reason you want to choose inverse is because you want the "moving dashes" to be the sections you want in grayscale. Next, select Image from the Tabs menu, then Adjustments, and then select Black and White. And that should do it!
")


