How to make the perfect Photoshop cutout

Introduction
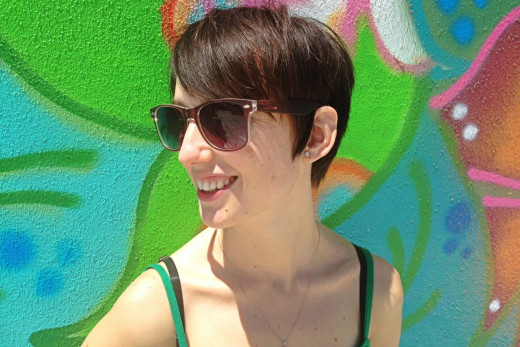
Some photographs are easier to cut out than others, but never fear, with this method you will soon be a pro at cutting images out of any background. I am using my Hubpages profile picture as an example here, so pick out a photograph for yourself and follow along. I'm doing this quickly as a tutorial, but take your time and do it carefully, you'll be surprised at the results!
This tutorial uses a Layer mask to help cut out the shape. Working with masks in Photoshop is really important, and using a Layer-mask in this scenario means you can quickly and easily replace parts of the photograph you may have accidentally erased, essentially eliminating mistakes so you end up with perfect results.
The Layer Mask is the Photoshop Guru’s alternative to the Eraser tool. The eraser tool is what's called a destructive technique, as you cannot get back the parts of the image you have erased. With a layer mask you can easily go back and alter or edit your work. The basic principle behind Layer Masks is black is transparent and white is solid, so whatever area of your mask is black will effectively be erased from the image.
Load your image into Photoshop
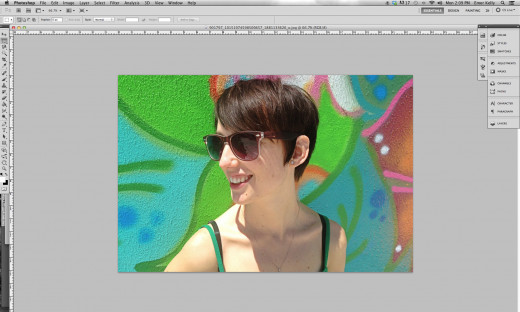
You can load your image into Photoshop in two ways:
1. By dragging the photograph into the Photoshop icon.
2. By opening Photoshop and selecting File-Open-Your photo.
Open the Layers Palette
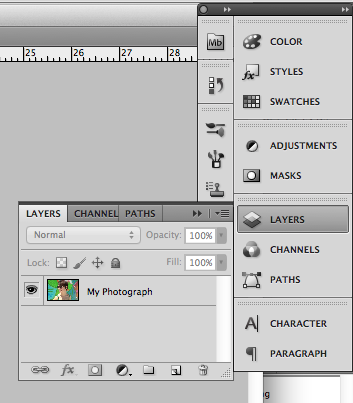
- On the right-hand side of the screen are a number of palettes. Click on the 'Layers' palette to open it. You will see your photograph is the only layer in the image, and that it is locked.
- To unlock your image, double-click on the 'lock' icon, name your layer in the dialog box that pops up, and hit 'enter'


Set up your workspace
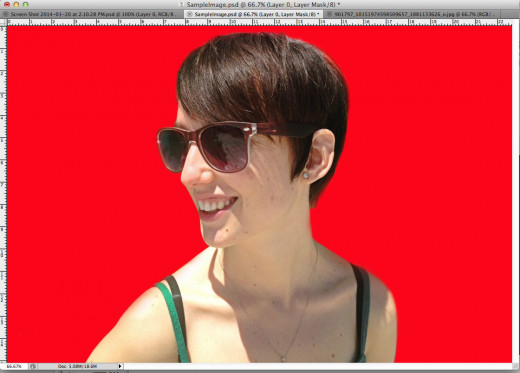
- Click the icon at the bottom of the layers panel that looks like a half-black, half-white circle. From the popup menu, select 'Solid Color', and select a bright color from the pop-up dialog box. This creates a new colored layer.
- Drag the thumbnail of your new colored layer so it is below your image layer.
- The colored layer works as a visual aid, making it very clear which areas of the photograph you have erased.
- Now click on the image layer. With the layer selected, go down once again to the set of icons at the bottom of the layers palette and this time select the 'Add Vector Mask' tool.
- Take a quick look at your layer in the layers palette. You should see a small thumbnail of your image, and a new white thumbnail beside it. Click on the new white thumbnail to select it. Make sure you have the white thumbnail selected and not the photograph while you are working.
- Hit the 'D' ket to reset foreground/background colors to black and white, respectively. This will be important when we start painting on the vector mask. As mentioned before, black means that part of the image is hidden/transparent and white means it's opaque.
- Now you are ready to start working!


Select the Magnetic Lasso Tool
- On the left-hand side of the screen are your tools. The third tool from the top looks like a lasso. Click and hold this tool, and select 'Magnetic Lasso' tool from the pop-out menu.
- Click anywhere along the border of the object you wish to cut out, and glide the mouse along the border of the image. You will see that Photoshop drops pointers along the line.
- Sometimes Photoshop drops a pointer in the wrong place, if this happens hit delete (Backspace on a PC) to get rid of previous points and try again. You can help Photoshop along difficult paths by clicking the mouse and placing points manually.
- Once you have selected the entire image you can close the shape manually (By ending up right where you started, or by pressing 'Enter'). If at any point you need to make a straight line hold down the 'Option' key and hold down the mouse while drawing.
- Now hit Control+Command+I (Shift+CTRL+I on PC) to invert the selection, and hit delete. The background will disappear and you'll be left with a rough cut out. Hit Command or CTRL D to deselect the selection.

Clean up with the brush tool
- The brush tool a great alternative to the eraser. Where the eraser deletes part of an image permanently the brush tool in conjunction with the layer mask hides or reveals part of the image. White is opaque (Reveals) and black transparent (Hides).
- Hit B to select the brush tool and slide the color slider to black. You can quickly adjust the brush size by using the bracket keys ( [ ] ). To adjust hardness, hold down SHIFT while using the bracket keys. A lower value of hardness means softer edges. Soft edges are especially useful around hair.

Cleaning up the Color

Take the Poll!
Did this method work well for you?
I have a problem with this photo in that the original green background is still reflected on my skin. Here is a quick tip for dealing with this kind of thing!
- On the layers panel select the thumbnail of the image, not the layer mask.
- Go to Image-Adjustments-Replace Color (Second from the bottom).
- Use the eye-dropper to pick up the color you want to get rid of.
- Once selected, click on the color thumbnail to choose a new color or use the sliders to change the hue, saturation etc. and bring down the tone. In this case I had the additional problem of having a dress the same color as the background so rather than switch out the green I brought down the hue.
- Play with the coloring until you are happy with it and Voila! you know have a perfect cut-out!
This video has some great tips for Photoshop beginners
© 2014 Emer Kelly


