ArtsAutosBooksBusinessEducationEntertainmentFamilyFashionFoodGamesGenderHealthHolidaysHomeHubPagesPersonal FinancePetsPoliticsReligionSportsTechnologyTravel

How to make toddler pants from a t-shirt.

Updated on June 23, 2016
   Fold your pants at the center seam of the pants so that you can see the shape of the pants.
Fold your pants at the center seam of the pants so that you can see the shape of the pants.
 Lay on the paper, and trace.
Lay on the paper, and trace.
After tracing your pattern use your tape measure to measure one inch all the way around your pattern (except for the top where it will be two inches) marking it using your pencil.
For the waist of the pants, I measure two inches above the highest corner, and just square it off.  You want the waist to be straight across.  If you use the lower corner of the waist you will not have enough rise to cover the diaper. Instead the pan
For the waist of the pants, I measure two inches above the highest corner, and just square it off. You want the waist to be straight across. If you use the lower corner of the waist you will not have enough rise to cover the diaper. Instead the pan
Once you have your lines use your tape measure to help you connect the dots. You use your tape measure to make the lines straighter. If you have a ruler handy, you could use it instead.
When you have connected all the dots, you will have your pattern ready to cut out. Grab your scissors, and cut on the outside lines.
Cut the sleeves off your shirt.Cut down the sides of the shirt. Then cut the shoulders of the shirt.
At this point you should have two pieces of material.
 Take one of your pieces of material fold it in two from sleeve to sleeve.  With the side that you want to be the outside of your pants on the inside of the fold.   Lay your pattern out on top of the material. Pin it in place.
Take one of your pieces of material fold it in two from sleeve to sleeve. With the side that you want to be the outside of your pants on the inside of the fold. Lay your pattern out on top of the material. Pin it in place.
Cut around the pattern, not the pattern. Do this again so that you have both legs for your pants.
 Lay one of the pieces out flat with the good side up. Lay the other piece on top of the other one with the good side down.  Lining up the  J parts on the left and right. Pin the pieces together.
Lay one of the pieces out flat with the good side up. Lay the other piece on top of the other one with the good side down. Lining up the J parts on the left and right. Pin the pieces together.
When you have pinned your pieces together you will sew just the J parts on each side. You seam should be about 1/4-1/2 an inch from the edges.
Line your first seam up against your presser foot and just follow the stitches down.  We do this so that if one seam opens up there is another one.  Do this on both of the J parts.
Line your first seam up against your presser foot and just follow the stitches down. We do this so that if one seam opens up there is another one. Do this on both of the J parts.
Now turn your pants so that the seams you just sewed are even with each other.
Pin at the crotch.
Pin at the crotch.
Match the edge of the fabric for the leg (the front side, with the backside) and pin.  Do this with the other leg too.
Match the edge of the fabric for the leg (the front side, with the backside) and pin. Do this with the other leg too.
Sew your pants.  Start at the bottom of one pants leg, and sew up until you reach the crotch the sew down the other leg.  I prefer doing this as one long line of stitches it is a time saver.
Sew your pants. Start at the bottom of one pants leg, and sew up until you reach the crotch the sew down the other leg. I prefer doing this as one long line of stitches it is a time saver.
Since we want the seam at the crotch reinforced, it is easier to just start at the bottom of the leg and sew another seam just like the previous step. Line your first seam up against your presser foot and follow the stitches around.
Use your tape measure and fold the material at the waist over. You want the pocket that doing this is making to measure 11/2 inches. Pin material in place. Do this until you have a waist band all the way around.
Start about an inch to one side of one of the seams, stop about an inch from the same seam.  You want to leave an opening to get your cord, or elastic through.
Start about an inch to one side of one of the seams, stop about an inch from the same seam. You want to leave an opening to get your cord, or elastic through.
To thread your cord or elastic through the waist band attach a safety pin.
Thread the side of the elastic through the waist band first.
When you get close to the back seam stick your pencil through the other side, and feed it through the seam.
After you thread the elastic through, remove the safety pin, , and straight pin the elastic together and make two rows of stitches.
Now pin the the waist band down to cover the elastic and sew the material, not the elastic.  Cut all of the pieces of thread that are too long, and take out all of the pins.
Now pin the the waist band down to cover the elastic and sew the material, not the elastic. Cut all of the pieces of thread that are too long, and take out all of the pins.
Have the toddler try them on. You can hem the pants legs if you choose, but is not needed unless child is tripping over them or you want a more finished look.

How to make to toddler pants from a t-shirt.

This is an easy way to recycle old adult t-shirts, and a great way to create unique pants for a toddler. Every toddler needs play pants, and these are a great way to make some without stretching your budget, while improving your sewing skills.

What you need:

  • a pair of toddler pants that fits them now
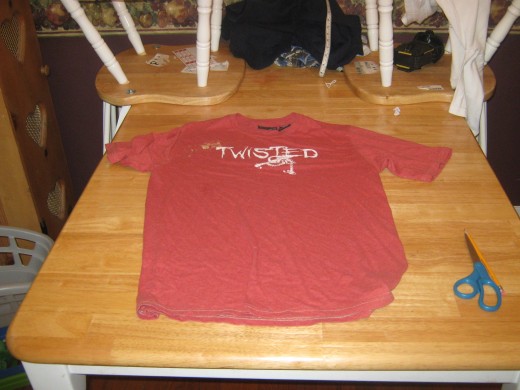
  • an old t-shirt
  • paper
  • tape
  • scissors
  • sewing machine
  • thread
  • tape measure
  • 3/4 inch width elastic, or string
  • a pencil
  • a safety pin


How to make your pattern

  1. Lay out your paper, I used big sheets of manilla paper. If your paper is not big enough tape a sheet of paper at the top and another one at the bottom.
  2. Fold your pants at the center seam of the pants so that you can see the shape of the legs.
  3. Lay on the paper, and trace.
  4. After tracing your pattern use your tape measure to measure one inch all the way around your pattern (except for the top where it will be two inches) marking it using your pencil.
  5. For the waist of the pants, I measure two inches above the highest corner, and just square it off. You want the waist to be straight across. If you use the lower corner of the waist you will not have enough rise to cover the diaper. Instead the pants will sit low on their hips.
  6. Once you have your lines use your tape measure to help you connect the dots. You use your tape measure to make the lines straighter. If you have a ruler handy, you could use it instead.
  7. When you have connected all the dots, you will have your pattern ready to cut out. Grab your scissors, and cut on the outside lines.
  8. At this point you should have a pattern larger than the pants you used to trace. Don’t be afraid that it is bigger you need some of it for the hems and the elastic at the waist will help them fit.


Prepare your material

  1. Cut the sleeves off your shirt.
  2. Cut down the sides of the shirt.
  3. Then cut the shoulders of the shirt. If you cut the shoulders out before you cut the sides then it is harder to cut the sides evenly.
  4. At this point you should have two pieces of material.


Laying out your pattern

  1. Take one of your pieces of material fold it in two from sleeve to sleeve. With the side that you want to be the outside of your pants on the inside of the fold.
  2. Lay your pattern out on top of the material, you may want to try it different ways so that you get the design from the t-shirt.
  3. When you are happy with how you laid it out, pin your pattern onto the material.
  4. Cut around the pattern, not the pattern.
  5. Do this again so that you have both legs for your pants.


Sewing your pants

  1. Lay one of the pieces out flat with the good side up.
  2. Lay the other piece on top of the other one with the good side down. Lining up the J parts on the left and right. (The J parts are the crotch.)
  3. Pin the pieces together.
  4. When you have pinned your pieces together you will sew just the J parts on each side. You seam should be about 1/4-1/2 an inch from the edges.
  5. We want the seat of the pants reinforced, so you are going to go back and make another seam. Line your first seam up against your presser foot and just follow the stitches down. We do this so that if one seam opens up there is another one. Do this on both of the J parts.
  6. When you have sewn the j parts take out the pins, and cut the pieces of thread. Now turn your pants so that the seams you just sewed are even with each other. Pin at the crotch.
  7. Now it is time to pin up the legs. At this point you can envision kind of what your pants should look like. Match the edge of the fabric for the leg (the front side, with the backside) and pin. Do this with the other leg too.
  8. Sew your pants. Start at the bottom of one pants leg, and sew up until you reach the crotch the sew down the other leg. I prefer doing this as one long line of stitches it is a time saver.
  9. Since we want the seam at the crotch reinforced, it is easier to just start at the bottom of the leg and sew another seam just like the previous step. Line your first seam up against your presser foot and follow the stitches around.
  10. Now it is time to make the waist band. Use your tape measure and fold the material over. You want the pocket that doing this is making to measure 11/2 inches. When you have got it to 11/2 pin and scoot down a little and do it again. Do this until you have a waist band all the way around.
  11. Start about an inch to one side of one of the seams, stop about an inch from the same seam. You want to leave an opening to get your cord, or elastic through. Take out the pins! If you forget to do this you are liable to get stuck.
  12. Measure your child’s waist so that you know how long to cut the cord or elastic. For elastic subtract a half an inch, this way it will be stretchy, but there is still room to grow.
  13. To thread your cord or elastic through the waist band attach a safety pin. When you get close to the back seam stick your pencil through the other side, and feed it through the seam. This makes it easier to get the elastic through the back seam.
  14. After you thread the elastic through, remove the safety pin, and straight pin the elastic together and make two rows of stitches. You want to reinforce this too since it will be another place that will be pulled on. Take out the pin that you used to hold the elastic together.
  15. Now pin the waist band down to cover the elastic and sew the material, not the elastic.
  16. Cut all of the pieces of thread that are too long, and take out all of the pins. Turn the pants right side out.
  17. Have the toddler try them on. You can hem the pants legs if you choose, but is not needed unless child is tripping over them or you want a more finished look.
  18. Save the sleeves and you can use them as a patch if the knees need it or to make a pocket.

working

This website uses cookies

As a user in the EEA, your approval is needed on a few things. To provide a better website experience, hubpages.com uses cookies (and other similar technologies) and may collect, process, and share personal data. Please choose which areas of our service you consent to our doing so.

For more information on managing or withdrawing consents and how we handle data, visit our Privacy Policy at: https://corp.maven.io/privacy-policy

Show Details
Necessary
HubPages Device IDThis is used to identify particular browsers or devices when the access the service, and is used for security reasons.
LoginThis is necessary to sign in to the HubPages Service.
Google RecaptchaThis is used to prevent bots and spam. (Privacy Policy)
AkismetThis is used to detect comment spam. (Privacy Policy)
HubPages Google AnalyticsThis is used to provide data on traffic to our website, all personally identifyable data is anonymized. (Privacy Policy)
HubPages Traffic PixelThis is used to collect data on traffic to articles and other pages on our site. Unless you are signed in to a HubPages account, all personally identifiable information is anonymized.
Amazon Web ServicesThis is a cloud services platform that we used to host our service. (Privacy Policy)
CloudflareThis is a cloud CDN service that we use to efficiently deliver files required for our service to operate such as javascript, cascading style sheets, images, and videos. (Privacy Policy)
Google Hosted LibrariesJavascript software libraries such as jQuery are loaded at endpoints on the googleapis.com or gstatic.com domains, for performance and efficiency reasons. (Privacy Policy)
Features
Google Custom SearchThis is feature allows you to search the site. (Privacy Policy)
Google MapsSome articles have Google Maps embedded in them. (Privacy Policy)
Google ChartsThis is used to display charts and graphs on articles and the author center. (Privacy Policy)
Google AdSense Host APIThis service allows you to sign up for or associate a Google AdSense account with HubPages, so that you can earn money from ads on your articles. No data is shared unless you engage with this feature. (Privacy Policy)
Google YouTubeSome articles have YouTube videos embedded in them. (Privacy Policy)
VimeoSome articles have Vimeo videos embedded in them. (Privacy Policy)
PaypalThis is used for a registered author who enrolls in the HubPages Earnings program and requests to be paid via PayPal. No data is shared with Paypal unless you engage with this feature. (Privacy Policy)
Facebook LoginYou can use this to streamline signing up for, or signing in to your Hubpages account. No data is shared with Facebook unless you engage with this feature. (Privacy Policy)
MavenThis supports the Maven widget and search functionality. (Privacy Policy)
Marketing
Google AdSenseThis is an ad network. (Privacy Policy)
Google DoubleClickGoogle provides ad serving technology and runs an ad network. (Privacy Policy)
Index ExchangeThis is an ad network. (Privacy Policy)
SovrnThis is an ad network. (Privacy Policy)
Facebook AdsThis is an ad network. (Privacy Policy)
Amazon Unified Ad MarketplaceThis is an ad network. (Privacy Policy)
AppNexusThis is an ad network. (Privacy Policy)
OpenxThis is an ad network. (Privacy Policy)
Rubicon ProjectThis is an ad network. (Privacy Policy)
TripleLiftThis is an ad network. (Privacy Policy)
Say MediaWe partner with Say Media to deliver ad campaigns on our sites. (Privacy Policy)
Remarketing PixelsWe may use remarketing pixels from advertising networks such as Google AdWords, Bing Ads, and Facebook in order to advertise the HubPages Service to people that have visited our sites.
Conversion Tracking PixelsWe may use conversion tracking pixels from advertising networks such as Google AdWords, Bing Ads, and Facebook in order to identify when an advertisement has successfully resulted in the desired action, such as signing up for the HubPages Service or publishing an article on the HubPages Service.
Statistics
Author Google AnalyticsThis is used to provide traffic data and reports to the authors of articles on the HubPages Service. (Privacy Policy)
ComscoreComScore is a media measurement and analytics company providing marketing data and analytics to enterprises, media and advertising agencies, and publishers. Non-consent will result in ComScore only processing obfuscated personal data. (Privacy Policy)
Amazon Tracking PixelSome articles display amazon products as part of the Amazon Affiliate program, this pixel provides traffic statistics for those products (Privacy Policy)
ClickscoThis is a data management platform studying reader behavior (Privacy Policy)