How to Make Your Own Custom Picture Frame

Picture frames accent the picture within it and add to the decor and comfort of your home. A great frame can be made or purchased, but to save money, we are going to look at how you can make your own picture frames. These frames can tailor made to suit your needs and wants. The ideas can be endless if you use your imagination and some creativity.
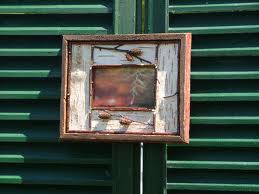
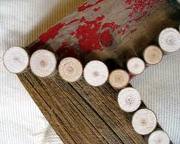
Frames can made from wood, either finished and stained or you can try the rustic look with some old barn boards. They can be made from glass that can be decorated by taking two pieces of glass and putting your pic in the middle and then decorating the outside frame with coloured glass beads, coloured glass paint or even some flat plastic flowers, that will frame and accent. You could also use plastic, or recycle an old frame by using glue and adding to it. Any material will work as long as it has the correct dimensions and you have cut it correctly. Decorating the frame to suit the type of picture will allow you to dress up some pictures while others can have a contemporary look.
Size and Measurements
To begin, you will need to take a look at the size of the frame that you require. Then take some measurements of material that you plan on using. Barn boards seem like a wonderful rustic idea and to keep this simple, I am going to give you plans for a barn board frame. If you are using plain, trim or wood, you may want to use a router to put curves and grooves in it to enhance the look.
Gluing and Fastening
Fastening the pieces together will hold your picture securely in place. There are a few different materials that you can use for this. You can use corrugated nails, tack plates, open splines, biscuits or wood plugs for this job. Once you have fastened it together, you will then need to glue it to be sure that it is secure. Apply the glue and clamp it (if you have one) and wait for 24 hours before finishing or using.
Cuts and Grooves
Now you will need to flip the pieces of wood so that you are able to put grooves onto the back of the frame, for the glass to sit inside, once it is put together. You can do this by making a rabbet profile by routing on the inside of all of the pieces(3/8" rabbet bit is recommended).
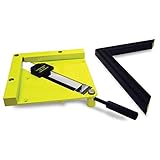
You are ready to measure and cut. You can begin by using either a protractor set and measuring a 45 degree angle and cutting with a saw or you can use a mitre saw if you have one available. You could also use a table saw with a mitre guide. It is recommended to practice on some practice wood until you have the measurements correct and are happy with the pieces fitting together.
If you desire finishing the wood, there are lots of paints and stains on the market to enhance your frame. If you are using materials that require decorating, then this is the time to get busy gluing on your adornments and creating your masterpiece. You can be proud of the frame and the picture within it once you have completed and hung it on your wall. Framed pictures also make a great gift for loved ones. Happy crafting!


