Make your Own DIY Thankful Tree

DIY Thanksgiving Tree

Looking for a last minute Thanksgiving Craft?
With Thanksgiving just around the corner, you may be looking for a last minute decoration craft to occupy your kids over the weekend with. Reminding kids that they have lots to be thankful for is a great family bonding experience!
The Thankful Tree
This fun craft takes approximately 2.5 hours, depending on how artsy you want to go, and lets your children list all the things they are thankful for in a visually appealing way.
When you sit down to make this craft, you can choose between two different crafting styles. The first DIY Thankful Tree allows you to build your own “tree” using a wire clothes hanger, cardboard, and brown paper bags. The second DIY Thankful Tree enables you to use small branches and sticks from your yard to create your tree.
Creating your own tree would be much more time consuming, but if you have the time, it would make your craft more fun.
Making your Tree From Scratch
What you need for a DIY Thankful Tree: wire hanger, piece of cardboard, strong tape, brown paper bags, hot glue, water, scissors, wire, Elmer’s glue/paper mache glue
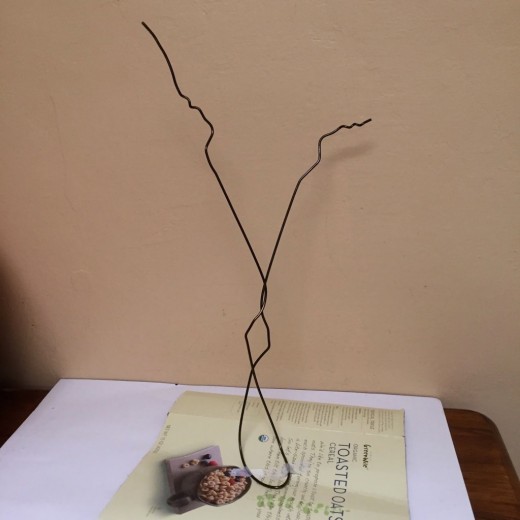
Pull out your crafting skills for this paper-mache, DIY tree. First, take the piece of cardboard, tape, and wire hanger and lay them all out on a flat surface. Completely un-hook the hanger and bend it so that the hypotenuse of the hanger is now the bottom trunk of the tree. (Push the sides of the hanger together until they are less than an inch apart.
Push the hanger slowly together to resemble the tree shrinking in circumference, and the use the tips of the hanger to point out in different directions to create branches. Bend the lower part of the tree onto the cardboard, and use the tape and hot glue to secure it to the cardboard.
Wire Hanger Tree
Assembling the Tree
Next, use the smaller wire to loop around the “main” branches, and tape them to secure them to the tree. Twisting the wire together and creating “Y” shapes works best for creating life-like branches.
When you like the look of your tree, tear your brown paper bags into strips, mix your Elmer’s glue and water to create paper mache paste, and start dipping the strips into the paste. After dipping the strip, wrap your strip around the tree to create the trunk. (Hint: it works best when you go from the tip of the branch down towards the trunk, and you can use clothes pins to hold the paper mache to the wire hanger.)
Next, take your brown paper and wrap it around the base of the tree to create a crinkled ground effect. You can use the hot glue or Elmer’s glue to secure the bag to the cardboard.
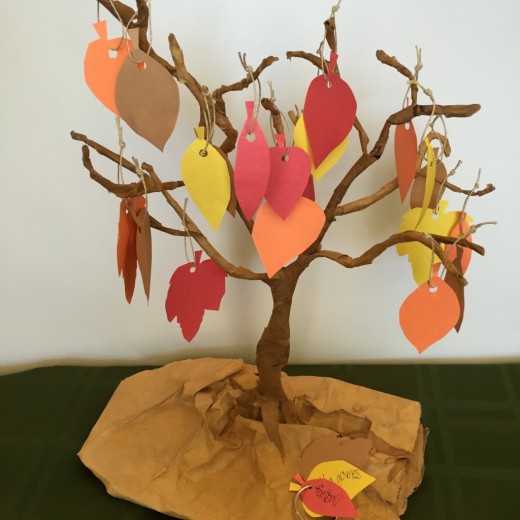
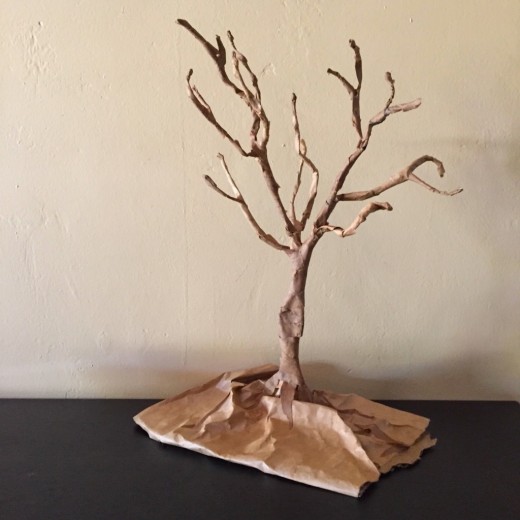
Finished Tree
"Real Life" Tree
What you need for a DIY Thankful Tree (from sticks): small branch (should form base of the tree), sticks (ranging in thickness and length), hot glue, sand paper, piece of cardboard
Making the tree from branches is much more time efficient. In order to make your tree, first grab your main branch, the cardboard, hot glue, and a brown paper bag. (In order to get the best results, sand down the bottom edge of the branch to create a flat, level bottom.
Place the cardboard on a flat surface and attach the flat end of the branch to the cardboard using hot glue. When the hot glue has dried, you can wrap the cardboard and base of the branch in brown paper to create the ground.
To give the tree ‘branches’ take the sticks and hot glue them to the upper portion of the larger branch. Continue to hot glue sticks until you have enough branches to hand leaves on.
Creating the Leaves
What you need for a DIY Thankful Tree Leaves: construction paper, hole punch, scissors, string
Take the construction paper and cut as many leaf shapes as you want in the various colors, and make sure to include stems. Red, brown, yellow, and orange colors work best for this project. You can cut easy, pointed almond shape leaves, or you can create more elaborate, oak leaves with tips and ridges.
When you’ve created all the leave you want, use the hole punch to punch a hole in the base of the leaf right above the stem. Tie the string through the hole, and then allow each child to write what he or she is thankful for on each leaf.
When you’re finished, hook the leaves onto the sticks using the string. Now, you should have a beautiful and colorful Thankful Tree!
DIY Tree