Sand Blasting for Glass Artists - Part 1

Sandblasting Cabinet

Portable Pressure Pot Sandblaster


Sand Blasting Equipment
Unless it is a Wet Belt Sander, I can't think of a more useful piece of equipment for your studio than a sandblaster. The sandblaster is great for cleaning away devitrification and other undesirable surface artifacts. It is also a great tool for adding design elements to finished pieces. There are two types of sandblasters, the Siphon Blaster, and the Pressure Pot. The Siphon Blaster operates as its name implies.
The Siphon Blaster
A siphon blaster has an unpressurized storage container which holds the abrasive. The siphon gun itself has two hoses, one to the compressed air source and one to the storage area for the supply of abrasive. The blaster is trigger operated which releases the air through the gun. The high-pressure air creates a siphon effect as it passes over the hose to the abrasive and sucks abrasive up into the air flow and out through the nozzle.
While the Siphon Blaster is less expensive than the Pressure Pot, it has some distinct disadvantages. The Siphon Blaster usually has a larger nozzle and therefore requires much more air than the Pressure Pot. This, in turn, dictates a more powerful air compressor. On the other hand, the Siphon Blaster is straight forward to operate with few adjustments, and it is easier to master in the short run. Another advantage cost-wise is that a Siphon Blaster is usually included with most blast cabinets.
The Pressure Blaster
A Pressure Pot holds the abrasive in a pressurized hopper. The compressed air goes to the pressurized tank where it mixes with the abrasive and goes to the actual gun thru a single hose. Pressure Pots have an adjustable mixing valve which controls the mix of air and abrasive going to the gun. This is a distinct advantage when you are using the blaster to do artistic designs and want to have better control of the abrasive.
Pressure Pots require less air, and since you can adjust them for the type work you are doing, they are more flexible. The fact that they typically use smaller nozzles and consume less air means a lower cost air compressor which can be significant.
The Nozzles
These little items concentrate the flow of air and abrasive and control the pattern of the abrasive striking the piece being blasted. They are also consumable items and are being sandblasted themselves as they concentrate the air/abrasive flow. This means they wear out and have to be replaced. Larger nozzles also consume more air and that leads back to the size of your compressor. Typical diameters are 1/16", 3/32", 7/64", 1/8" and 5/32". They come in steel, ceramic and carbide. Steel is least expensive and carbide is the most expensive and as you would imagine, the carbide lasts much longer. If you are a starting sandblaster, you should probably start with the ceramic nozzles, either 3/32" or 1/8" until you (and your pocketbook) develop a feel for the performance.
The Abrasives
There are only two abrasives that I would recommend for glass work, Silicon Carbide (SC) and Aluminum Oxide (AO). Glass Artists all have their preference and their reasons for it.
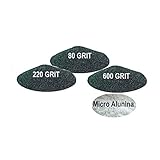
AO is less expensive than SC but it has a tendency to develop static electricity when blasting that can give you a little zap under the right circumstances. AO also fractures into sharp pieces as opposed to wearing down smooth. This means that your original 80 grit may become 220 grit after some period of use (the higher the grit number, the finer the abrasive). Over time SC loses its sharp edges and becomes less effective, but it takes a while. If I had to guess, I would suspect that more glass artists use SC, but I can't tell you why. Regardless, it is a decision you can change at any time since it is in no way equipment dependent. One last factor, abrasives are expensive to ship, so the final decision may well be based on what your closest supplier carries.
One word of caution though, clean out your blast cabinet any time you switch the type of abrasive or abrasive grit, You don't want to contaminate one abrasive with another or one grit with another. In my studio, I stock SC in 80 grit and 220 grit.
The Blasting Cabinet
All of our toys seem to be expensive, and the blasting cabinet is no exception. There are several manufacturers, and I would search the net for potential suppliers. Craigslist and eBay often have units being offered as well. The major considerations are the size and being airtight. What you don't want is a studio with a lot of abrasive dust in the air. I don't consider a Blasting Cabinet to be functional if it doesn't include a dust collection system. A good dust collection system makes it easier to see your work in the cabinet and keeps your studio from looking like a dust storm just came through. You can either buy a dust collection system or rig-up your own with a shop-vac and a HEPA filter.
Other considerations is a light inside the cabinet. One that you can adjust the position so that you don't have it glaring in your eyes as you try to work. Thin film plastic sheets are also available to put over the inside of the viewing window. This prevents the abrasive from fogging the window. When the plastic sheet gets hard to see through, you simply replace it.
Practice makes perfect. When you get your sand blaster up and running, start practicing. That about covers it for equipment; Part 2 will talk about actual blasting.