Scrap Art


Easy, Inexpensive Decorations
This is a guide to creating small, beautiful pieces of artwork used for decorating your small abode! The following tips and ideas are my own, and were very inexpensive to create.

Helpful Hints
- Use a small sponge to get a different texture with paint
- Use a colored sharpie to outline your shapes when cutting from burlap
- Fabric scissors work great but remember they are sharper so please be careful!
**Also, the HOT GLUE gun is dangerous and should be closely monitored while turned on**
What you'll need:
- Small burlap covered frame (or the standard canvas)
- Acrylic paint and brushes
- Alphabet stencil set for kids (with cool shapes preferably)
- Hot glue gun (about $5-20, but the cheaper, low-heat guns work just fine on the fabric) and glue sticks ($3)
- Your beads, pictures, small charm-like items, mirror pieces, etc.
Some extras:
- Ribbon or roll of different colored burlap
- Glitter and other toppings
In the beginning...
Before any art project, you want to try to pause before pouring paint, drawing lines, or making cuts to anything. Stop and envision the final product, what color do you want it to be? Do you need or want to have a theme to your designs?
For mine, I had picked up some animal/beach themed stencils and I wanted to create something that was light-hearted, carefree, and soft.

Which of these do you prefer to use?
Some Questions to Get You Going
Do you want to paint something?
Do you like to sew?
Did you like using hot glue as a child?
Do you like to build small shapes using colored paper?
Can you use wire jewelry?
*Use these to help you figure out what type of thing you feel like doing!*


Step Two: Paint!
Once I decided what words/images I wanted on my artwork, I decided to lay down some stencils and do some spray painting!
***Remember to keep your painting area ventilated, preferably just do it outside on a nice day!!***
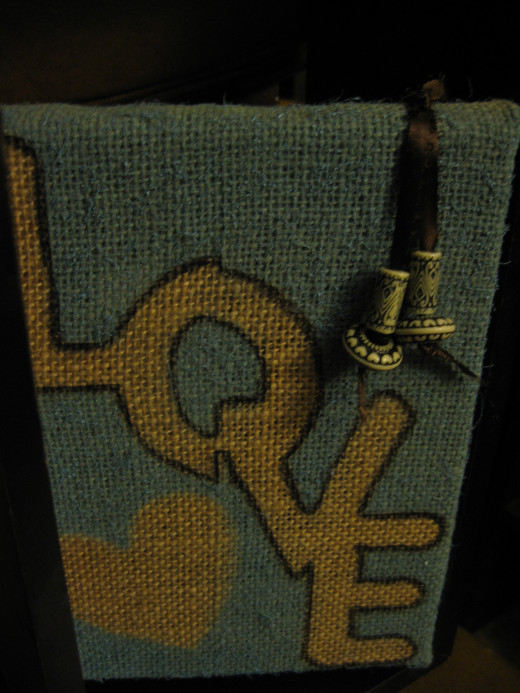
I picked a nice, light blue that looks like Carolina blue (UNC Tarheels!) and matches several other decorations I have up already. I laid out the letters of LOVE and the heart stencil and spray painted the small, burlap covered frame.

Tutorials, Tips, and Tricks
Painting with Stencils
In this video:
A general guide to spray paint and stencils
Tips and Tricks!
Or use Acrylic Paints
You don't always have to worry yourself with spray painting (maybe it's raining outside!) and can always substitute acrylic paint instead. The color combinations are endless with a painter's wheel, which allows for the mixing of your paints.
[Hint: Mixing white with a color brightens the shade, while black will darken the mixture]
There are so many kinds and shades of paint that it can be a little overwhelming sometimes. Don't panic! Keep it simple :) Red, orange, yellow, green, blue, indigo, and violet work just fine!


Variety of Colors
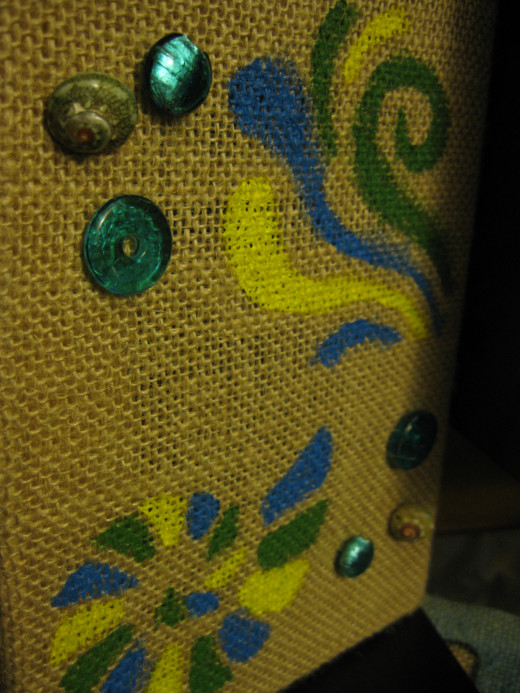
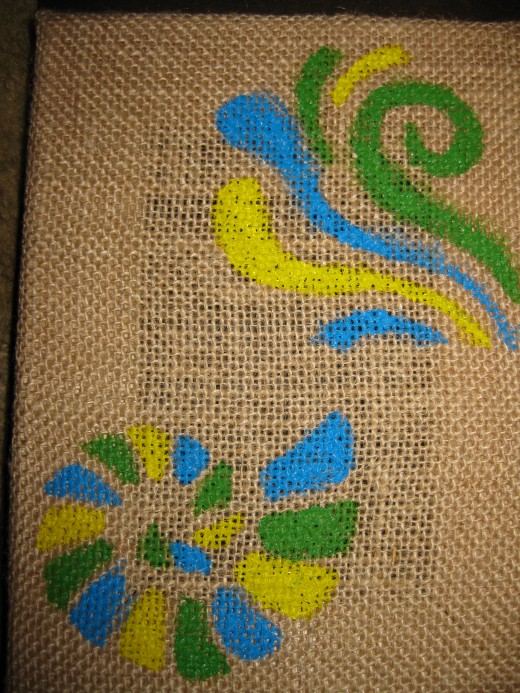
Remember to grab attention with your colors! Bright colors draw the eye while even tones (biege, tan, gray, and brown) tend to smooth edges and create a calm tone. By contrasting the brown of the burlap with the bright blue, green, and yellow, I have created an eye-catching combination.

I added some small, glass and seashell beads to give it some depth and character. I simply used a low-heat glue gun (seriously only $5 at Wal-Mart) works great on the fabric.
You can also use small mirror pieces, ribbon, glitter, paper flowers, pictures of loved ones, or anything else you would like to add that match the overall theme or mood of your artwork. But seriously, when in doubt, simple is a great start because you can always add more at a later date!

For my second piece, I used some brown, decorative ribbon and a few black and white beads. First, I tied a knot in the middle of the strand of ribbon, essentially creating two strands to work with. Then, I slipped the beads on in the order I wanted them and knotted the ends to keep them from sliding off. Once the beads were secure, I blotted some of the hot glue on the top knot and attached it to the top of the frame. I secured it even more with dabs of glue on the other parts of the ribbon touching the frame.

TA DA!!
Step back and enjoy your creations!
Muhahahaha ;)