The Easiest Way to Create a Great Ebook or Print Cover Free Online

I have struggled with Paint, an accessory that comes with Windows, GIMP, an excellent free software and most recently with MS Word. While I did find it easier to create a decent book cover through MS Word with the help of a tutorial online, when I stumbled across Lunapic.com, I thought I had hit the jackpot. No messing around with layers and all that.
Let me show you how to create your book cover in 4 easy steps.

Step 1. Upload Your Photo/s
- First make sure you have already picked your picture/s. You can find some very good images you can use free on the internet. For example, there’s free Google Images and some you can find on Wikipedia and elsewhere.
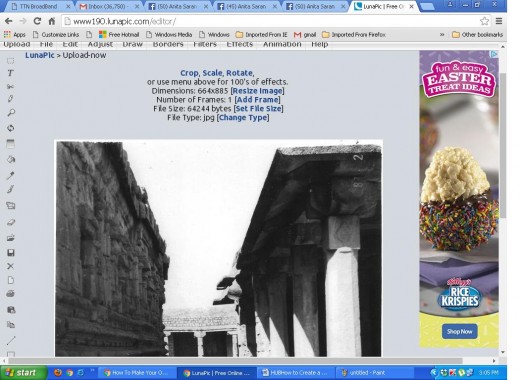
- Go to Lunapic.com and click on Browse below the Edit a Photo button. You can upload photos from URLs or your computer, Picasa, Dropbox and more. Pick your choice and upload. It’s pretty fast. In fact creating the book cover you see on top just took me half an hour.

Do You Design Your Own Book Covers?
Step 2. Edit the Cover Photo For Your Book
Once your photo shows up, you can use a whole gamut of edit options such as the Filters. You can apply a range of effects to your photo from here such as sepia tone, rainbow, etc. You can also crop, rotate, flip, sharpen, blur and much more. The instructions are simple and easy to follow. All those buttons on top open down into drop down menus when you click on them.

Step 3: Add Text to Your Book Cover
To save your image you can go up to File on the top left bar and click on ‘Save Image’ which will take you to ‘Save As’ and from there you can choose to save to your computer in whatever format you like – pdf, jpg, etc. You can also post to Facebook or Twitter, and other social media. But for now you are not going to save yet.
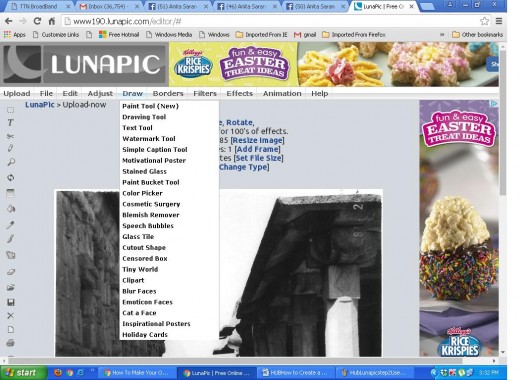
3. Now you can add text to your cover. This is the easiest part I think. In other software you need to create layers and when you put in a text box, it eats into the photo and then, if you don’t like that look, there are other complications. But with Lunapic you simply click on the T tool on the left sidebar of your screen or access that via the Draw button on the top bar.
Step 4: Tips on Adding Text to Your Cover Image
As you are instructed, first position your cursor wherever on the image you want your title, then choose your font and size and colour. You’ll see that you can move the title around at this stage into the correct position. Once you’re satisfied, click on ‘Apply Text’. Make sure you do this whole process for each line of text on the page, even if it is just one word on a line. Each time, click on ‘Apply Text’. This saves the image each time and in this way, you can add your name and any other text you want.
For your convenience, there’s an Undo button at every stage and in the end, once you have saved your file to your computer, you can delete your history. The site offers a video tutorial in case you get stuck, but I didn’t need it because everything was so easy to follow. It’s such fun to create book covers with Lunapic.


