How to Make Bias Tape

Make DIY Binding for Infinite Choices
Purchasing ready made bias tape for my sewing projects used to leave me so frustrated because of the limited choices in colors and patterns. I don't have that problem any longer.
Innovation and a few affordable sewing tools offer creative solutions to make binding tape cut on the bias in endless fabric combinations. Learn about these handy items plus a quick, super clever trick that allows an easier and faster way to skip all the tedious sewing of the bias strips together. (see link below to Prudent Baby's tutorial)
(Photo credit Pam Irie)

Basics on Cutting on the Bias
Fabric binding is made by cutting fabric on the bias instead of on "straight of grain". Cutting on the bias allows the fabric to stretch and follow curved edges with ease. More information can be found from the experts at Simplicity Creative Group.
(Diagram credit Simplicity)
Prepare the Fabric
")
Bias Tape Tutorial - Easy to Do via Prudent Baby
I was ecstatic when I found this easy to follow tutorial which cuts the time to make bias binding literally in half. One half yard of fabric is transformed into a parallelogram with one cut and one seam. This is the first step you'll learn via Prudent Baby's tutorial and I guarantee you'll NEVER go back to the old method. Once you do it, you're hooked! ;)
(Photo credit Prudent Baby)
Drawing Bias Lines
Easy to do with a bias ruler!
Get a Specialty Ruler To Draw Bias Tape Cutting Lines
Marking fabric for cutting on the bias is so easy with this ruler. I don't know why I waited so long to get one because this binding buddy ruler is one of my very favorite sewing accessories now. Marking the bias cut lines on the fabric takes only half the time it used to take. So, all I can say is "what are YOU waiting for?" :)
Pause for a Poll - Biased or Not?

(Photo credit Pam Irie)
Exactly how biased are you?
Forming Bias Tape
Manual or Machine?

Manual Method
Once the bias strips are cut, the basics of shaping bias tape can be done one of two ways. Using the handy tool shown in the picture allows you to manually pull the bias strips through one side while ironing the shaped fabric as it emerges from the opposite side. It's quick and affordable and the finished look is absolutely professional.
Tip: Notice the beginning edge of the bias tape has been cut at an angle. This makes it easy to insert and feed into the bias tape tool OR the bias tape maker machine.
(Photo credit Pam Irie)
Using the Simplicity Bias Tape Maker Machine
If time is critical, a bias tape maker machine is lightning fast. Watch the video below to see how easy it is and then go make your own bias tape. Angela Wolf shares her tips on this video.
Difference in Single Fold and Double Fold Bias Tape

Bias Tape Maker Machine Tips
The bias tape maker machine comes with the tip made for 1" single fold bias tape. There are more tips available to make the single fold bias tape in specific sizes. Tips just snap in and out to change. Easy!
Do The Math!
1/2 yard of fabric = over 11 yards of bias tape!
How do ya like those numbers? :)
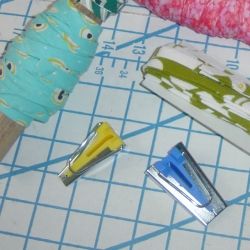
Handy Cutting Grid


(Photo credit Pam Irie)
Don't Forget The Last Step
Manual or machine.....the first run through will always produce single fold bias tape.
To make double fold, simply fold over the single fold bias tape down the middle and you have created double fold bias tape. :)
Easy, quick and the results are fabulous every time!
Sewing Projects with Bias Tape
- Sew a Bias Tape Facing
A neat way to finish neckline or armhole facing. - Bias Tape Handbag for Beginners
With free downloadable pattern; this is a cute and easy project! - Great things to make with bias tape. | Whipstitch
Be inspired to make some great projects with bias tape. - PDF Pattern for ADOPT ME DOG VEST
Available on Etsy. Help homeless animals by sewing this ADOPT ME Vest for dogs.


")

")