Drawing My Little Pony Ponies

Draw My Little Pony: Friendship is Magic Style
Friendship is Magic is the newest reboot of the popular My Little Pony cartoon show. My Little Pony: Friendship is Magic has become hugely popular with children as well as adults, and the guys seem to enjoy it just as much as gals! The new cartoon is much more modern, and has a livelier take on the characters, each one having a unique and relate-able personality.
Now, with the help of this tutorial, you can draw ponies in the My Little Pony: Friendship is Magic style. You can use this to draw your own original characters, or draw your favorite characters from the show! This tutorial is focused on drawing a female pony. Check back later for a male pony tutorial.
With that all said, let's go ahead and get started!
Sketching the Basic Form
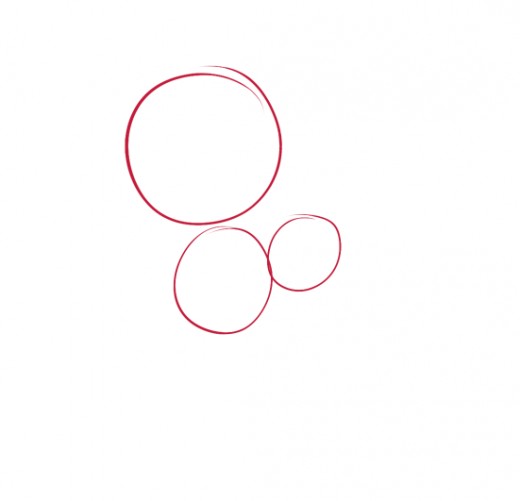
Friendship is Magic ponies have very large heads, and slightly beanshaped bodies. Draw a large circle for the head, and two smaller ones for the torso. Set the smaller circle so that it just touches the mid-sized one, and place it just a little higher.
Adding the Smaller forms
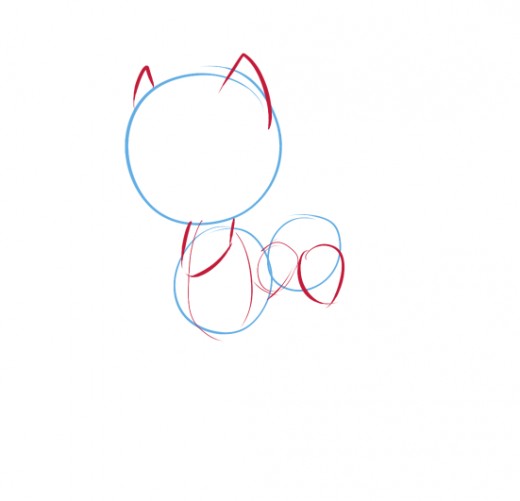
Add a small tube for a neck, and a few guidelines around the torso to help position the legs later on. Add a tearshaped form to the small circle to represent the pony's flank. Two curving triangles will be the guidelines for her ears.
Positioning the face
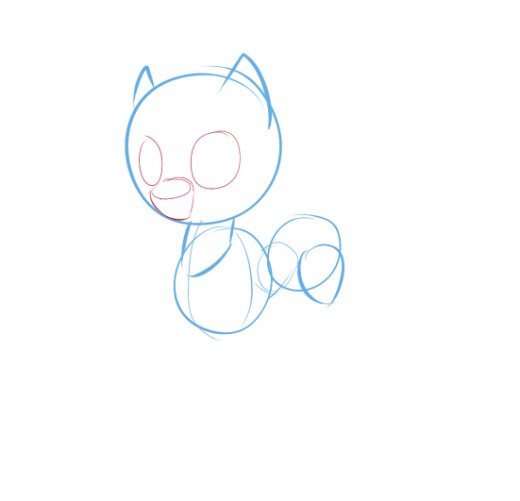
Female ponies have a very small nose and very big eyes. Most ponies have unique eye shapes, so we'll just be drawing a generic one. Check out your favorite characters to see what kind of eye shapes they have!
Drawing the Face
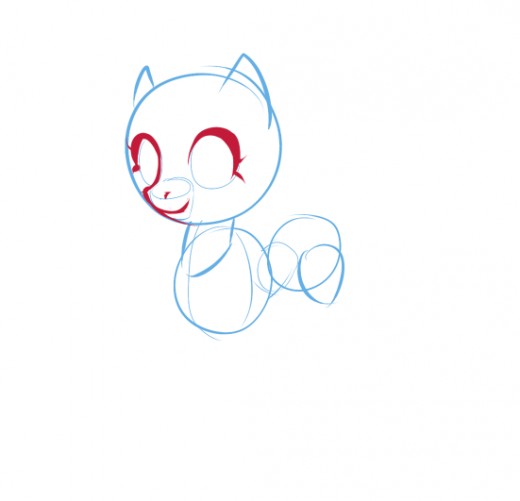
Ponies have pointed noses that curve toward the neck at the bottom, and a very curved mouth. Add big thick eyelashes, too!
Drawing the Legs
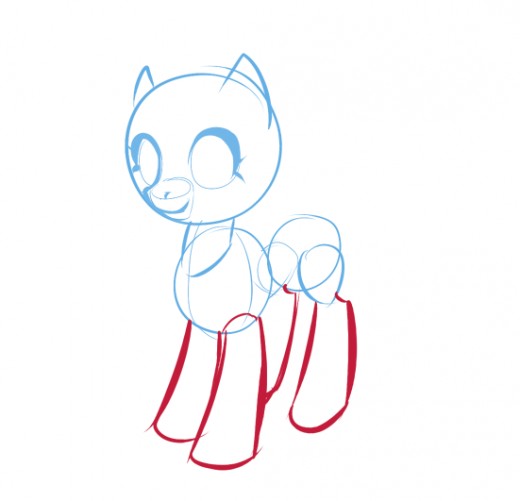
Pony legs are extremely simple shapes. Draw a cylinder that curves a little bit (both sides curve in the same direction) and make sure it is wider at the bottom than at the top. Friendship is Magic ponies usually do not have defined hooves. For the back legs, add a curve at the back of the knee to represent the joint.
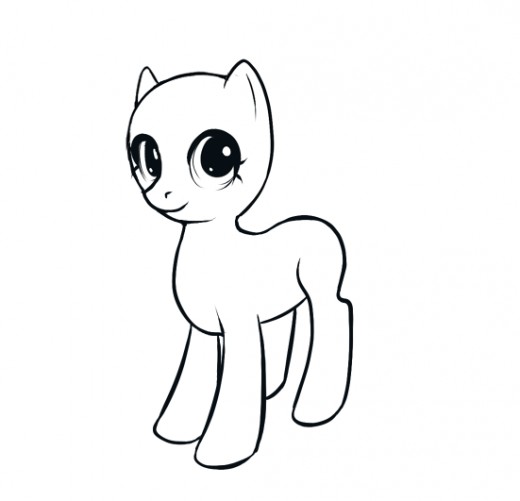
Progess So Far
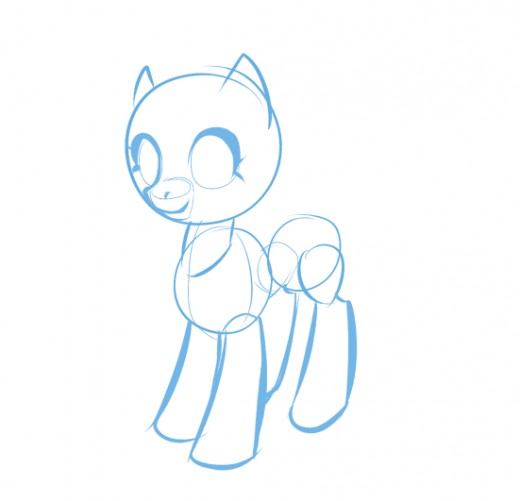
How does it look? Make any changes you need to at this stage, because we're about to start the outline!
Drawing the Outlines
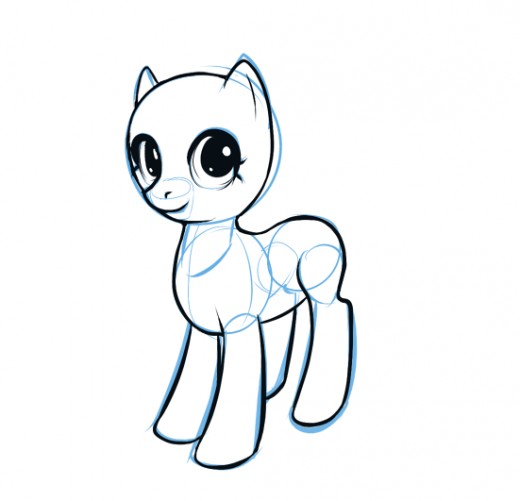
Follow your guidelines and connect the shapes. Notice that there is not a defined "elbow" for the front legs when the pony is standing up. Add two little curves inside the ears, and make the back of the head just a little flatter than the guideline we drew earlier. Add big pupils for the eyes, and spots of white to show their shine.
Cleanup Stage
What About Hair?
Ponies have unique hairstyles. Take a few minutes and brainstorm what kind of hair you would like your pony to have. Should she have a ponytail? A mohawk? Do you want her to have hair like Rarity, or Pinke-Pie? It's all up to you!
Adding the Hair
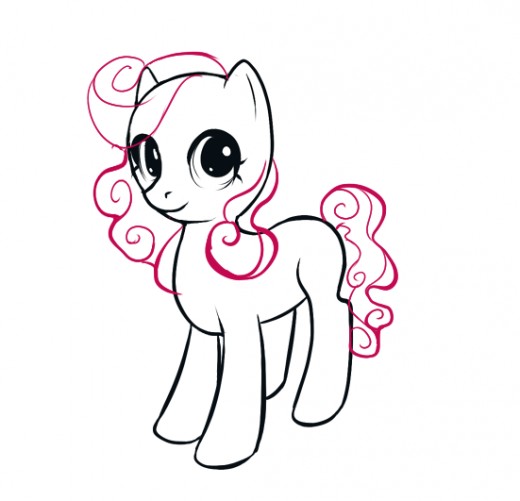
I chose a fun curly and wavy hairstyle for my pony. Sketch in the flowing shapes of the hair. I can't tell you how to do this exactly, because each hairstyle will be different: just follow your instinct!
When drawing pony hair, generally you will not be able to see the ear on the far side of the head, nor will you see the back of the neck. There are exceptions, but that's usually how it will be.
Finishing the Hair
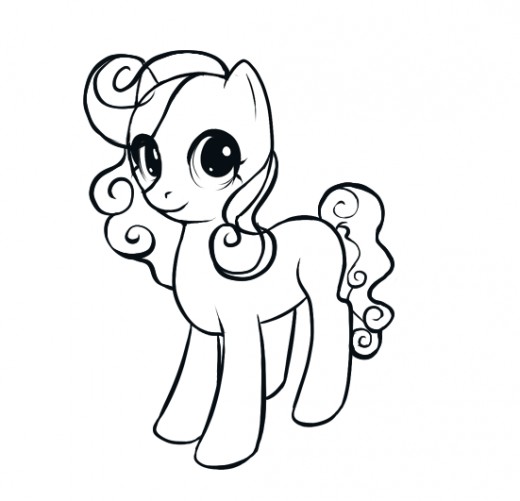
Outline the hair and fix anything that looks odd.
Cleanup and Colouring the Outline
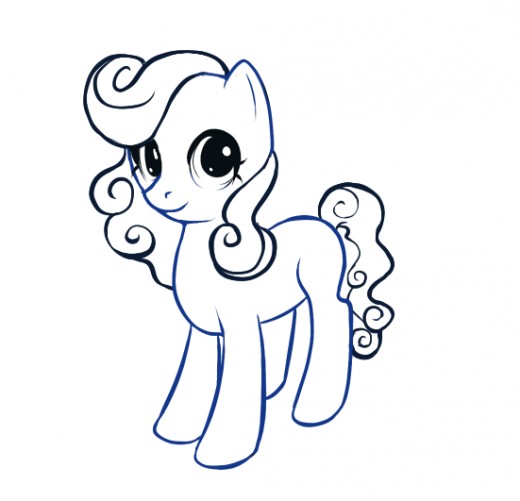
Clean up the lines that are hidden by the hair. I added color to my lines, because I'm doing this on the computer and it is easy. It isn't necessary if you're working with crayons, pencils, or markers, I just think it add authenticity to the style.
Filling with Color
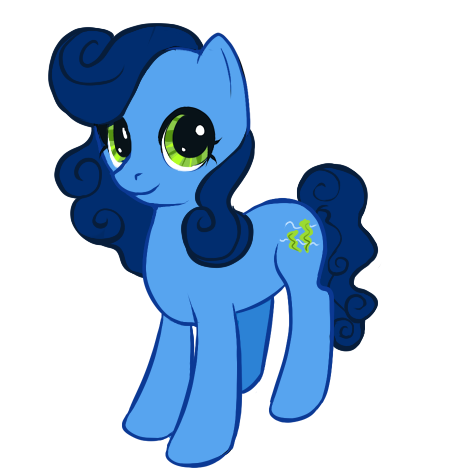
Fill in the lines with your chosen color. Ponies come in all sorts of colors, even crazy ones! I wanted a very blue pony with green eyes.
Most ponies do not have variations in their coat colors. I've never seen a dappled pony, for instance, but yours can look however you like: that's what makes it unique.
Adding the Shading

Friendship is Magic ponies don't have a lot of shading, so just shade the rear back leg to add depth, and add streaks of dark shades and light shades to the eyes. Have you noticed what's missing yet?
Cutie-Mark!

Hurrah! Our pony is no longer a blank-flank. Cutie-marks help show the personality of your pony, because they are granted based on a pony's talents, interests, or habits. My pony has seaweed, because I think she's interested in the ocean. Maybe she is a marine biologist?
Cutie marks don't usually have outlines, and they don't have to match the other colors on your pony, either: mine just happened to.
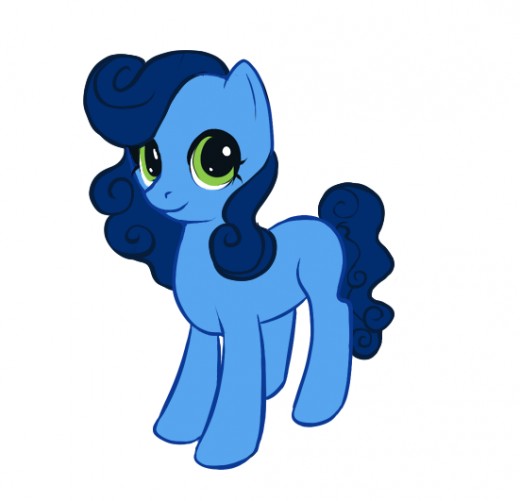
You're Finished!
Wow, great job! Drawing ponies can be addictive, because there are a million ways to make them unique and special. I like creating different hairstyles for ponies, and inventing cutie-marks and personalities. You can even dress them!
I hope you enjoyed this tutorial, and have lots of fun creating your own My Little Pony ponies.
Other Drawing Tutorials
- Drawing a Kawaii Cute Ice Cream Cone
Draw an adorable ice cream cone using this quick tutorial! Be careful: it's very sweet! - Drawing a Kawaii Cute Cake Slice
Learn how to draw a cute slice of cake with these step-by-step instructions! - How to Draw a Baby Seal
Follow this walk through to draw a cute seal pup. In just a few steps you can have a baby seal of your own!


")


