- HubPages»
- Arts and Design»
- Graphic Art & Design»
- Design Software
How to Make an Animated Banner for Your eBay Listings
Photoshop Animated Banner
Creating an animated banner in Photoshop is easy, when you know how. eBay is becoming more and more popular by the day; it is a site that will continue to grow in terms of both buyers and sellers. Which is why, as a seller, you need your eBay listings to stand out from the rest. Having an animated banner will help to give a professional look to your listing and will ultimately edge that potential customer towards parting with their money.
Step by Step - How to Make Your Animated Banner
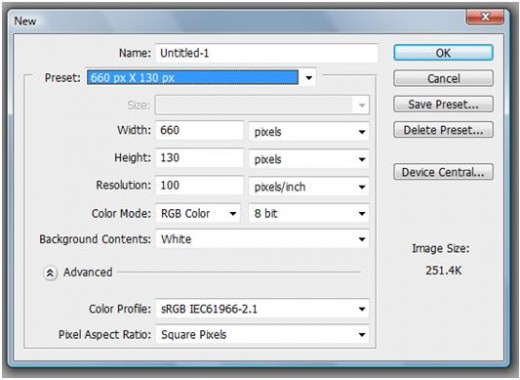
Open Photoshop and create a new document with the dimensions of 660 pixels wide by 130 pixels high. Save and name the dimensions as ‘Banner’.
This size banner can be used to top an eBay listing or it can be used as a Blog banner. As an eBay banner, there is room to widen some more if you want it to go all the way from one side of the screen to the other.
Create a New Document in PS
Layers are Essential
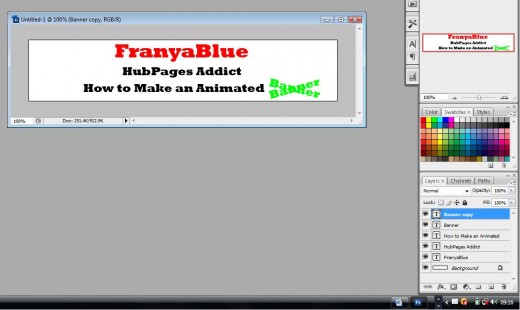
You will probably have an idea about how you want your animated banner to look. Design your banner and keep in mind that anything you want to flash or move should be on individual layers. To be on the safe side, every individual element within your banner should be on its own layer, so if you change your mind later on you won’t ruin anything you’ve already created.
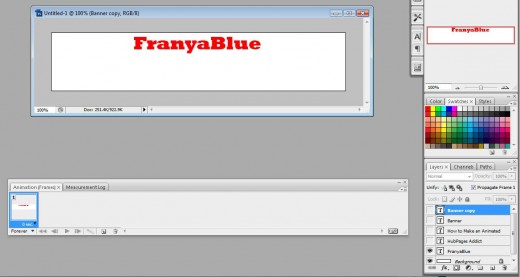
In my example, I want each sentence to appear one after the other with the word banner rotating or rocking side to side. Each sentence has been placed on its own layer, and the layer ‘Banner’ has been copied so that I have two the same. I have positioned both of the ‘Banner’ words where I plan for them to appear within the animation.
Open Animation Palette
Go to WINDOW > ANIMATION to open up the animation palette. For your first frame, decide on what you want to appear at the start. I have decided to keep my first layer visible and the rest of the layers are turned off.
Add Animation Frames
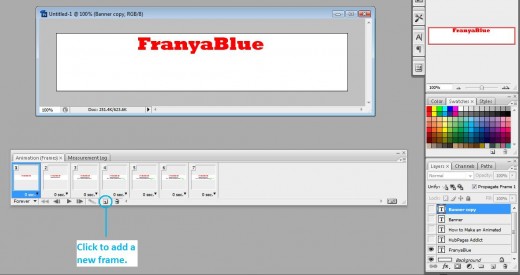
Add as many new frames as you need to create the animated effect. With each new frame, add a new element to your animation by making that layer visible within that frame. Beneath each frame is a little black down arrow, this will allow you to change the time of that individual slide, which you will play around with once all of your frames and elements are in place.
Time Your Frames
When all slides are on zero seconds, the frames flick past so fast that you barely have a chance to see the effect. I normally change all of the slides to 0.2 seconds just so that my eyes can actually register what’s going on once I hit the play button below.

Tween Your Frames
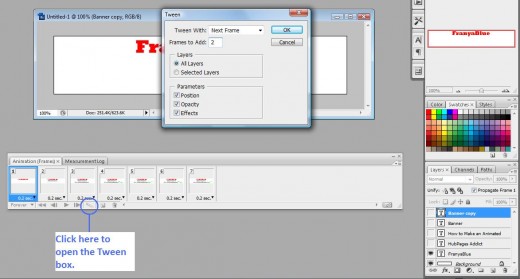
Now you may want to tween the frames together. I normally change the number of ‘Frames to Add’ to 2, this will add two more frames that will be lighter versions of the original frame. You have the option to add the frames before or after the original frame. Do this to each frame that you need to create your animated effect.
Now you just need to adjust the timings of each frame to make sure that it looks smooth when you hit play.
Saving Your Animated Banner
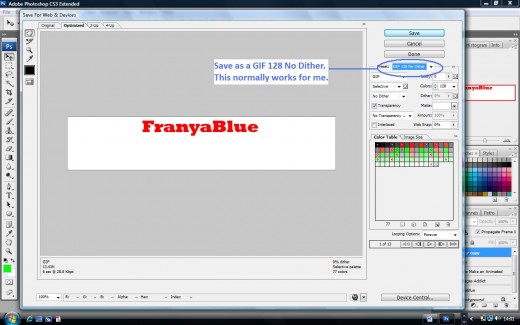
Now you have your animated banner you need to save it in a way that will allow you to use it on your eBay listing. To do that, go to FILE > SAVE FOR WEB AND DEVICES When the save box appears, choose GIF 128 No Dither option, then hit the save button.

Upload Your Banner to eBay
If you don’t already have a photobucket account then create one now. Photobucket is a free image host where you can upload your images and generate HTML code to use elsewhere. Signing up is quick and the benefits of having an account with them are many. Generating the HTML and uploading your animated banner relies on your image having a source from which to be generated from, without that source there can be no image. So you must get a photobucket account (or something similar).
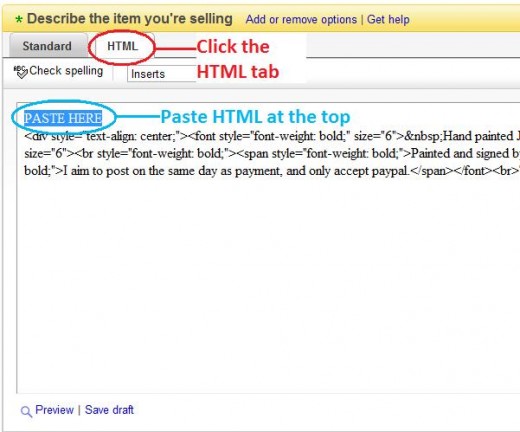
Upload your image to Photobucket, generate the HTML and use the code that is specifically designed for eBay. Copy the code and past it into the design area of your eBay listing (don’t forget to select the HTML tab above the description box before you paste it in) go back to the normal view to check that the HTML has worked.
Your image will be linked to your image page on Photobucket, but you can change this by deleting the Photobucket web address and putting in your own one.
