Make a Heated Neck Warmer - Reusable Hot Pack


a quick and easy gift for yourself or others!
If you can sew a straight line with a sewing machine (or even if that's a little challenging) you can make the reusable neck warmer that I'm about to describe. These make fantastic gifts! You can use scrap fabrics or buy something special. The other ingredients are rock salt and rice. How easy is that?
As much as I'm calling this a neck warmer, you can make up your own sizes easily and adapt this concept for all sorts variations. They are great for the aches and pains that the athlete in the family might get, or even the ones that your armchair athlete has... Give one as a gift at the baby shower for the expectant mom. Make one up for college student who sits up studying late.
And of course, if you sit in front of a computer making lenses on Squidoo, you'll love one too!
Getting Started - assembling what you need

Don't Be Afraid To Experiment
Once you make one of these warmers and get the basics down, you start to get ideas for different shapes, materials and how stuffed you'd like to make them. Be sure to have extra stuffing and fabric on hand and allow yourself to play!
Flannel Fat Quarters
One of my favorite materials to use for these neck warmers is flannel. It's strong, comes in fun prints and feels fantastic against the skin. By getting "fat quarters" (square quarter yards) you can mix and match to make your warmers. Obviously if you want just one pattern, get more conventional long quarter yards.

Sizing and Cutting The Fabric - get the base warmer constructed

To get started, you'll want to make sure that your fabric is both washed and iron before you start working with it. This removes any sizing (starch) on the fabric, eliminates stretch and makes everything nice and smooth for measuring.
The average human neck length is somewhere in the 4" to 6" range. Think about if the person you are making this warmer for has a short or long neck. I allowed about an inch and a half per "channel" in the warmer to make mine. The length of the fabric can be as long as you wish. This warmer might just sit at the back of the neck, might wrap around or might even be a bit longer (which is what you see me making here). If you want a suggested size to try for a first warmer, I recommend having a piece of fabric that is 9" wide and 18" long. This is a good fit for around the back of the neck, or over a shoulder.
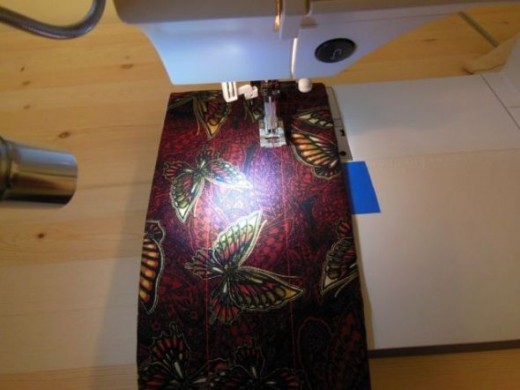
Fold the fabric in half long ways, so that you wind up with a double piece that is 4.5" wide and 18" long. You want to fold the fabric so that the "right" sides (which show the bright color/pattern) are folded to the inside. Iron to press flat this way. Then you want to stitch one of the short sides shut using a 1/4" seam allowance, and sew along the long open side the same way.
Then turn the long bag you've just made so that the right sides are facing out and iron flat again. If you don't do this before the next step, you'll find yourself either starting over or spending some time with a seam ripper.
Sewing The Channels - making stuffing pockets
Next up you will sew the channels in the warmer. This makes it so that the stuffing is better distributed and managed inside the neck warmer and makes for some more comfy shaping when you use it. This stitching is sewn on the outside of the warmer, so you will want to make sure that the thread you use for this part matches your fabric. Or you can make it contrasting on purpose as part of the design.
If you want to be really formal, measure the width of your sewn warmer bag and divide by three. Sew lines of stitching those exact widths down the length of the neck warmer.
If you want to be simple, mark a width of 1.5" on your sewing machine (as if you were making that thick a seam allowance), line up one long side of the warmer and sew in a straight line down the entire length. Then flip your neck warmer around so that the other long edge lines up and sew in a line the same width in from the edge the entire length on that side. This will leave you with three long skinny pockets open at one end.

Mix Up Your Stuffing
half rice and half kosher salt
The stuffing for these neck warmers is half rice and half kosher salt. DO NOT USE INSTANT RICE! It will not stay dry and will become disgusting in a short amount of time.
The mix is half-n-half even. Start by putting one cup of rice in a bowl, then add one cup of salt. See if you need more for your warmer and keep adding one of each to the bowl until you think you have enough to fill the fabric.
Keep an eye out for really large salt chunks. You may want to pick those out so that they are too lumpy inside the warmer.

Filling The Pockets
with a homemade funnel
I made a funnel from a piece of paper when it came time to fill the neck warmer. By doing this, I was able to make a much skinnier funnel than the one we had in the kitchen and it fit into the pockets more securely.
If you like a really firm "sandbag" feeling, fill the neck warmer channels leaving just about a half inch still open at the top. If you like a softer and floppier warmer, then you can leave several inches open at the top of the channels.
While filling your neck warmer, it helps to hold it over the rice/salt bowl so that any stuffing that falls can be easily reused.
Sewing The Neck Warmer Closed - the finishing steps

Once stuffed to your liking, you then just have to sew the neck warmer closed. You will want to turn in the raw edges a bit and then pin the openings closed before you sew them. This keeps all the stuffing inside. It will only take a pin or two to close the open end of the warmer.
BEFORE YOU SEW THE END CLOSED, test the neck warmer firmness/softness first. Be careful since it's just pinned shut but do drape it around your neck and see how it feels. You can still easily add or remove stuffing at this point. Once you get the stuffing just right, then you just sew a straight seam about a quarter of an inch from the folded edge.
Heating and Use
In case you've never used one of these before, they get heated up in your microwave oven. You will want to heat the hot pack for just one minute (60 seconds) on high. Even the biggest ones I've ever made only need about 90 seconds at most to get really, really hot.
It is possible to overheat these and burn the rice if "nuked" for too long. There's a really bad burnt smell if that happens. However, you can empty and restuff the warmer if you have a heating mishap.
So, how did it go? Did you have any problems along the way? Got any questions?
Related

Crafts for Men & Boys to Make -- Manly Projects to Build and Sew

How to Make Pinch-Pleated Drapery From Rod Pocket Curtains

How to Make Soft Toys - Beginner Guide & Making Stuffed Draft Stoppers

3 Classifications for Rice Length: Long, Medium and Short Grain

Fabric Sculpture - Creating Sculptural Forms with Textiles


