How to make christmas tree ornaments

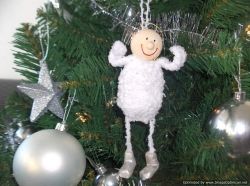
Boring Christmas balls? Here is how to decorate your Christmas tree this year with beautiful cute Angels!
Make your Christmas tree beautiful and decorate it with a few of these Angel ornaments! They're easy and fun to make. Your whole family can participate in making them as all materials and instructions are child friendly. Your little ones (3 years old and over) will love helping you put all the pieces of the angel together!
You can also make this angel ornament a nice personalized gift by just writing the name of your special friend, or favorite person onto the angel's belly!!
You can find a more detailed instruction on my blog, which can be found on my website, www.yourownsculpture.com.
Happy Holidays!
What you need:
Materials
These tree ornaments are easy and fun to make!
Here is what you need:
1. Air-drying clay, or modeling clay.
2. Red and black acrylic paint.
3. Golden and silver sparkling paint.
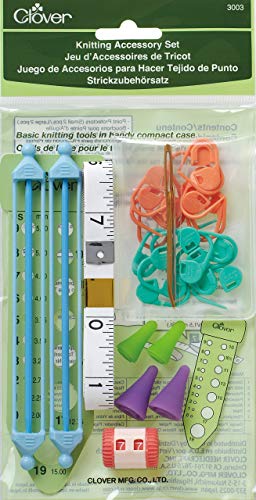
4. White wool and knitting tool.
5. Cotton.
6. Glue (transparent).
7. Thin or craft wire.

Angel's head, wings, and boots
How to work your clay into shape
- Break off pieces of clay and roll them up into small to medium sized clay balls.
- Take a small amount of clay and roll a very small clay ball for the nose. Stick the nose onto the face.
- Roll two small balls and pinch any side of the ball to form a heart-shaped piece. Make small holes at the bottom of each piece. These will be the wings of your angels.
- Extend a clay ball to make a "long snake" of about 20cm. Cut that in half. Bend in half way to make L-shaped pieces. Make small holes on top of each piece. These will be used as boots for your angels.
- Cook your pieces in the oven as instructed. You should find cooking instructions on the packaging of your air-drying clay, polymer clay, or fimo clay. The average cooking time to bake your clay should be around 20 minutes to 1 hour. Most of these air drying clays can be cooked at a temperature of 200°C. The cooking time and temperature depend on which kind of clay you are using.

Angel's body
Time to do some knitting!
- Start knitting the body of your angel meanwhile. The body is a small bag or sac that is wider on the bottom and narrow on the top.
- Make a loop of about 6 stitches and work your way around to make a diameter (circle) of 15cm (not more unless you're making a big angel!).
- Elongate your work reducing the number of stitches to make the top part narrower than the bottom. The entire body should be about 20-30cm in length.
- Knit two rectangular pieces to use as arms for your angel. This rectangular piece should be about 3cm (5 stitches) by 7cm long.
- Stuff your sac or bag with cotton.
- Glue the arms onto the top part (narrowest) of the body.
And for those who can't knit!
Other things you can use to make the body:
- A CLEAN, white sock (stuff it with cotton) : )
- A foam ball or sphere
- Any round object that you can paint or cover with wool or clothe.

Painting your angel
Painting the face, wings and boots
- Paint your angel's face once your work has been cooked or air-dried. To do this just paint two black dots on top of the nose and a "U" shaped line under it.
- Paint the wings and the boots silver.

Angel's wings
How to insert the wings on your angel:
- Bend a small piece of thin wire into a "U." Pass this small piece of thin wire through the body.
- Glue one heart-shaped piece onto one end of the thin wire. Cut the other end of the wire as necessary to make the wings come against the body of your angel.
- Glue the other heart shaped piece onto the other end of the wire once you're satisfied with the wire's length.
- Let the glue rest for a while.

Angel's dandling legs
This is how it's done:
- Cut a small piece of wool to make the angel's leg. Choose any length: short or long.
- Insert this threat of wool into the body using your knitting needle.
- Glue the ends of the wool into the holes of the boots (holes you made on each of them before you baked them).

The last details
Halo and hanging tool
- Cut another piece of wire of about 15cm and make a loop with it.
- Paint this loop with golden paint.
- Glue this loop onto the back of the angel's head.
- Cut a small piece of wool and make a loop with it.
- Glue this loop onto the back of your angel's head.
AND....here you have a nice Christmas tree ornament!
DIY
Which is a better gift?
Other Christmas tree ornaments
If you prefer to lay back and relax this Christmas season but you still want a nice Christmas tree then check out these offers!


If you can't follow these steps, please visit my blog (www.yourownsculpture.com) as I have more pictures of this project there. Feel free to contact me if you still have questions...or just simply want to say hi!


