How To Change The Oil In An Outboard Motor

If you own a boat, learning how to change oil in the lower unit of your outboard motor will save you hassle and money in the long run. You could easily take your boat and outboard motor to a dealership that services boats to have your oil changed. While it isn't a bad idea to go for the occasional tune up, you don't need to do it for every oil change. Changing the oil in your lower unit can extend the life of your outboard motor and reduce wear on the internal parts. One easy way to remember to change your oil is to have a routine. One routine that I would suggest is at the end of the boating season, before you winterize your boat, drain all of the oil from the lower unit. In the spring, when you are ready to go boating again, replace the oil in your lower unit with fresh oil. This helps to make sure that there is no water left in your lower unit over the winter, which could lead to freezing and cracking. Let's take a look at how I changed the oil in my 40 horse power Mercury Force outboard.

Drain The Oil
The first step is to drain the oil from your lower unit. Check with the manual for your outboard. There should be two screws that you will need to loosen. One will be the drain, the other is a vent. The top screw on my outboard was labeled vent, the drain hole was not labeled at all. The first step is to place something underneath your motor to catch the oil. Then you open up the drain screw and allow the oil to start seeping out. Next you open the vent screw and the oil will start coming out more quickly. The oil is pretty thick, so you might want to go and do something else for a little while, until the oil is completely drained. It might help to rotate the prop a little to make sure that all of the oil is out. If you are going to rotate the prop, make sure that the throttle is in neutral and remove the spark plug leads to make sure that you don't start the motor.

Adding Oil
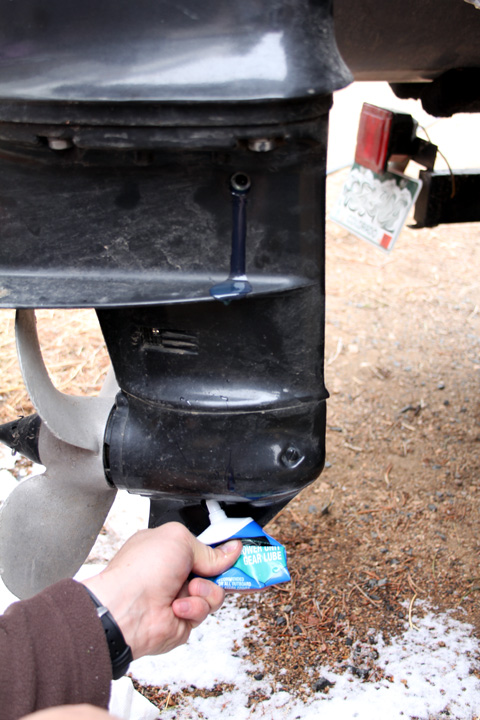
The next step is to add the oil. Even though it may seem a little counter intuitive, you will want to add the oil from the bottom hole, the drain hole. This will allow the oil to push any air out through the vent hole as the lower unit fills up. You can choose to use a pump, or with smaller motors, like the one I used, a squeeze tube worked just fine. I inserted the tube into the drain hole, then like a tube of toothpaste, I rolled up the tube until it was empty. I then returned the vent screw in place while I remove the oil tube. Because of the vacuum created by leaving the vent screw in place, very little oil drained while I readied the second tube. Once the second tube was in the drain plug, I removed the vent cap and continued to fill the lower unit with oil.
Oil Change Complete
While I was adding the oil, I rotated the prop every few seconds in an effort to get out any air bubbles that may have been left in place. Don't forget my warning from above about rotating the prop. Continue to add oil until you notice it seeping out of the vent hole. You want the oil to come to the bottom of the vent hole. Once it does, you can replace the vent screw, remove the tube of oil and then replace the drain screw. Both screws have a rubber seal around them and it is not a bad idea to replace the seal each time you change the oil. Once those steps are complete you have just changed the oil in your lower unit and are one step closer to getting out on the water and enjoying your boat. When you change the oil in your motor you increase it's serviceable life and help reduce the chances of having problems on the water.