Formatting Tables
FORMATTING TABLES
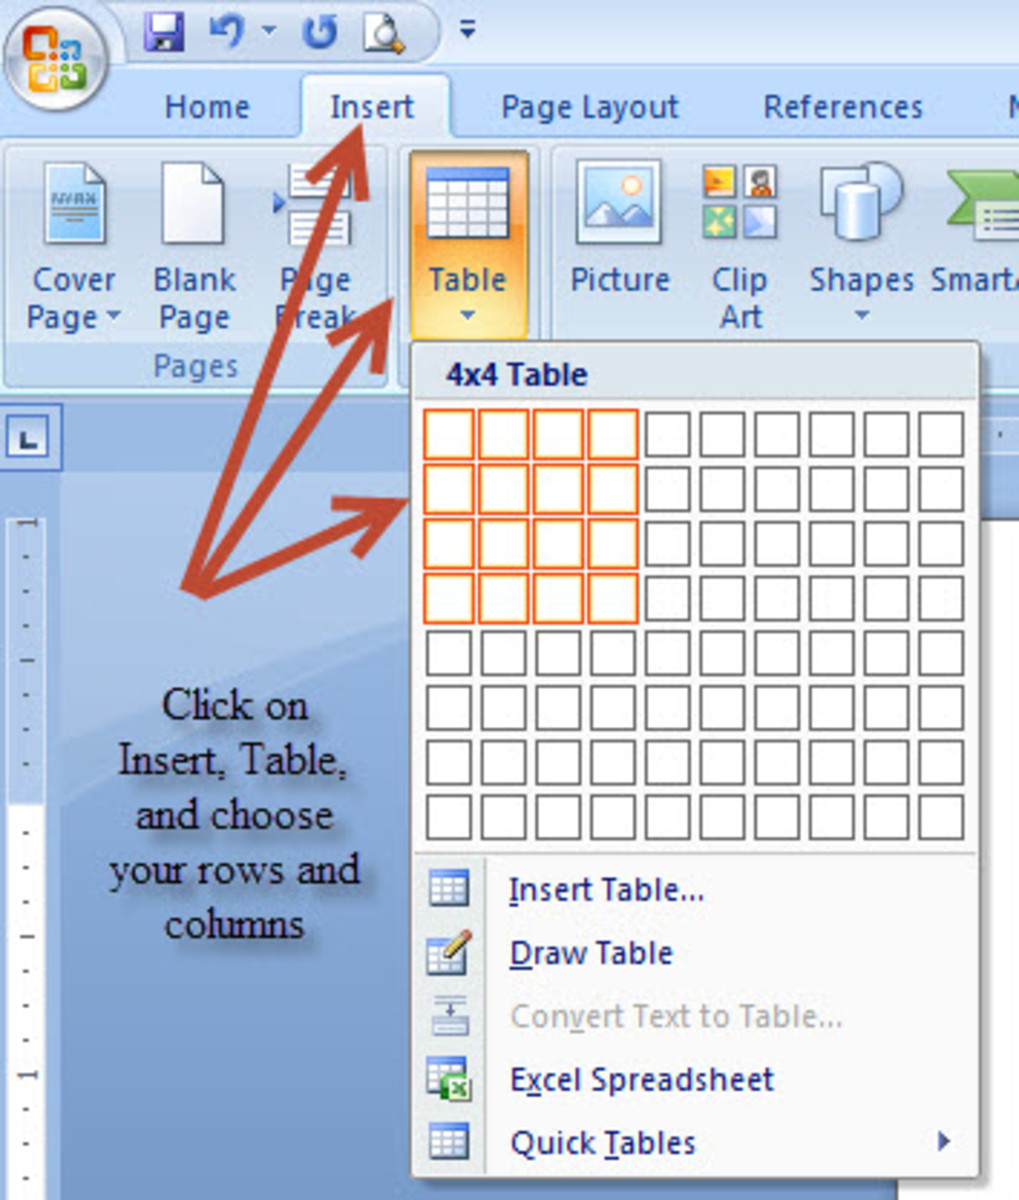
Word table – is composed of vertical columns and horizontal rows. It uses a tabular format which allows you to arrange text and graphics in an organized manner using columns and rows.
Steps in inserting a table:
1. Position the insertion point in the document where you want to put the table.
2. Select Table then Insert then Table. This will display the Insert Table dialog box.
3. Set the number of columns.
4. Set the number of rows.
5. Click the Remember Dimensions for new tables if you want to set the number of rows and column as default for succeeding tables.
6. Click OK to accept the settings and close the dialog box. The table will then be inserted into your document.
You can also insert a table using the Insert table button on the standard toolbar and select the number of rows and columns. Another way of creating a table in your document is by drawing the table.
Steps in drawing a table:
1. Select Table then Draw Table.
2. Click where you want to create a table and drag the mouse to create the outside border of the table.
3. Release the mouse when you are finish drawing the outside perimeter of the table.
4. Use the pencil to add rows and columns to the table by drawing horizontal and vertical dividing lines, respectively.
5. Click the Draw table button located on the tables and Borders toolbar when you have completed the table.
There are other useful buttons found in the tables and borders toolbar, these are:
Ø Distributes Rows Evenly – this button divides the table height evenly among all the rows.
Ø Distributes Columns Evenly - this button divides the table width evenly among all the columns.
Ø Eraser – this button toggles the eraser. This is used to erase column and row partitions columns.
Ø Line Style – this drop down box allows you to modify the thickness and style of the row and column lines.
In moving through the cell of the table you will use the TAB key. If you want to go back to the previous cell you are going to press SHIFT+TAB.
Some keyboard combinations that are helpful in working with tables are:
Ø ALT+HOME – moves the pointer to the first cell of the current row.
Ø ALT+END – moves the pointer to the last cell of the current row.
Ø ALT+PAGE UP – moves the pointer to the topmost cell of the current column.
Ø ALT+PAGE DOWN – moves the pointer to the last cell of the current column.
To delete text in a table just select the text in the table and press DELETE.
To delete text in the entire row just select the text in the whole row and press DELETE.
To delete text in the entire column just select the text in the whole column and press DELETE.


