How to darn a sock

Why you should Repair
Darning socks has become a time honored tradition with the women in my family. This was something that my Grandmother did and insisted that I must learn to become a ‘proper’ wife and mother. She was taught this technique before the time of the Great Depression, by her mother. All the women in my family have learned this as it has been passed from Mother to daughter. When the time of the Great Depression came, my grandmother found it easy to recycle, reuse and repair items of clothing. In the North where we are from, with winters such as they are, repairing socks was considered a necessity since there was just not money with which to buy new. The time has come to honor her request, that I too must pass this technique along. With the economy as it is, the time for recycling, reusing and repairing is once again called for.
For less than .50 cents you can repair a pair of socks that cost upwards of $5.00 per pair. With plenty of left over materials to repair dozens more socks. So in effect, for less than .50 cents you can repair a $100 worth of socks. How’s that for savings?
A skein of embroidery floss at most fabric stores are around .33 cents. If you have to purchase a needle this will cost approximately $1.00 and you will get several in a package. Store your needle in a dry place and it will last you for many, many years to come. You can also use yarn for almost all sock repairs as well, to purchase a skein of yarn, this will cost you much more in ’start’ up, but will repair so many socks that I couldn’t even venture a guess.
For the purpose of this lesson, in the photos I have used bright yarn in contrast with a white sock, so it was more visible. For your purpose you should use a color as close as possible to the color of your sock.
Step by Step


Sewing is easy!!
1.) It helps if you have gotten the sock before it becomes unrecognizable. A hole the size of a quarter or less, is more easily repaired by these simple methods. As soon as the hole is noticed set it aside to prevent further wear, unless time allows for you to get to it right away.
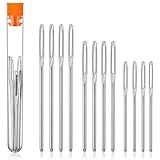
2.) Gather together 6 simple materials, darning needle or you can use an embroidery needle if you have one, just make sure it has a fairly large hole to allow yarn or embroidery floss to be passed through. Scissors, Yarn or embroidery floss, a drinking glass and of course the sock in question.
3.) Place sock onto glass and pull it snug, set it aside.
4.) Cut yarn or floss, using a good length, approximately 2 feet, you will want enough on the needle to finish the job. If using yarn, separate 4 ply yarn into 2 ply, set one section aside for using the next time. Thread needle by folding over an end of the yarn/floss and putting through the eye of the needle.
5.) Grasp the glass with the sock under your fingers, keeping it snug but not causing it to pull open any further. You want the ‘natural’ shape of the hole to appear. Starting at one end of the hole draw your needle through, leaving a ½ inch tail, this will be weaved in as you sew. I must mention here that you do not want knots in the ends of your yarn/floss, if you are repairing the heel, this will make it uncomfortable to walk on.
6.) Begin sewing across the hole, at each end of the hole you will want grab a couple ‘rows’ of the sock, taking care not to pull the yarn/floss too tightly. You want it to rest naturally on the glass.
7.) When you get to the end of the hole, you will need to begin weaving in the opposite direction. Moving your needle up and down across the yarn that you just sewed. Making sure to grab a row or two of the sock with the needle as you reach the end of the hole. Continue making rows, weaving as you go, making sure that at each end of the hole you are grasping some of the sock with the needle.
8.) When you have reached the end, and you are satisfied that all of the hole has been covered, draw the needle through the weave and using the scissors cut yarn/floss.
When taking these few simple steps you will be able to feel proud that you have you done your part in helping save your family money. As well as being able to pass along this technique to your loved ones!