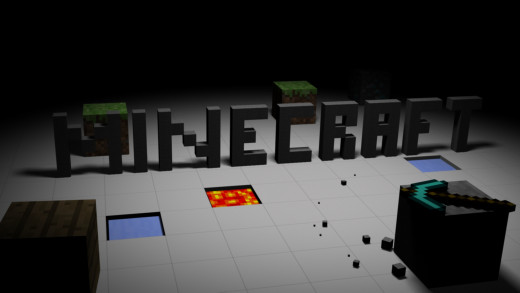
Creating and Hosting your own Minecraft Server

Resources
Required Java Download
Vanilla
Vanilla Minecraft Server (winodws)
Vanilla Minecraft Server (Linux/Unix Distros)
Bukkit
Bukkit Dev
Bukkit Server
Bukkit Server GUI(Windows)
Introduction
Hello and welcome to another one of my guides. Today I will be showing how to create and manage your very own minecraft server. It is pretty simple and easy to do. All you have to do is run it and maybe know a few back end things. But do not fret as I will go over a few of them.
Let's get started.
What is minecraft
Java -version
Installing Java
The very first thing we need to do is download and install Java. Now you may say, well I already have java installed. We need to make sure you have the JDK of java installed. We can do this by opening a command prompt and typing in a very simple command which is shown on the right. If it gives you a Java version, then we are in business. If not, then you will need to click on the Java download link under resources and find the right OS download.
Downloading your Minecraft Server
Now we need to figure out what to do with the server. Let's ask a few questions first.
- What do you plan to do with this minecraft server?
- Do you plan to make this a public server for anyone to join or just for your friends?
- Do you want to have customizations added to the server so that you can change gameplay and other such events.
If you are just hosting this for friends to play on. I would recommend just having the server to be a Vanilla Minecraft server. It doesn't take a whole lot to mange and it is really easy to set up and get started.
If you plan on making this server a public server for multiple people to get on, then I would use Bukkit for the job. Bukkit allows you to download plugins to help you manage the server and to also add other gameplay functions so that your users don't get tired of the old everyday mining in Minecraft.
Both of these links are in the resources at the top of the page.
Download and Run the Minecraft Vanilla
I you chose Vanilla, this is going to be a relatively short tutorial. Now depending on your preference, you may want to download a GUI version (If you are on windows). If you don't mind not having a GUI (user interface) then we can go ahead and download the Linux/Unix version. It will work on windows as well. For this one I am first going to go over the Windows version First.


Windows Vanilla
Please download the Minecraft server (windows) which is provided above. After that, move the Minecraft_Server.exe to a folder that is easily accessible if you need to modify anything. Once you double click this executable it will generate a bunch of files. It would also be good to keep those files in its own separate folder.
I moved my folder under C:\Minecraft and I placed the Minecraft_Server.exe in that folder and double clicked on it. It should open a window that says a few files are missing and it is generating a new world. If you close the window and look in the Minecraft folder you have created it will have all these new files and folders. One in particular file I would like to direct your attention to is the server.properties file. This is where you can specify settings for the server. Like the server name, the world name and the port that it should be run on. More information on the settings file below.
If you would be so kind to download the Vanilla server for unix and Linux, then we can proceed with this tutorial. Please note, I don't have a Mac or linux computer. But I can say the steps are very similar since Minecraft is in java. There may be some minor details that are different and you will have to do some research on how to do what I am about to do on a Windows operating system.
Other Vanilla
Alright, this is a little more advanced than the windows "double-click-a-file-and-you-are-done". However it isn't that much more difficult as I will basically provide everything you need. After you have downloaded the file, we need to put it in a folder. I put mine in c:\Minecraft folder. So it is easily accessible. Next we need to create a file that will execute the Minecraft_server.jar file. For windows you can use a .Bat file. For Linux you can create a vi script. All of them can have the exact same stuff as what I am providing below.
java -Xmx4G -Xms1024M -jar minecraft_server.jar
PAUSE

For windows copy and paste the above code in notepad or some text editor that can create batch files. Next we need to do some configuring.
- Xmx - This is the maximum amount of ram you want to give your server. Don't set this to how much ram you have on your box. Set it to half or less. I have 8Gigs of ram on my system. I set it so that it can use up to 4G total. If you have less than 1 Gig you would like to give it. You can specify in megabytes by putting an M instead of a G next to the number.
- Xms - This is the minumum you would like to start off with. You do not want to specify a very high number for this. For mine I set it to 1gig of ram. You may want to set it a lot lower, but for me this was personal preference.
- jar - This specifies what Jar file you would like to execute.
- PAUSE - stops the command prompt from closing with out user input first. (Windows)
After that if you are in windows you can click save. Make sure by file type you have selected all files. In the name type in what you want to call the batch file then add a .bat to the end of it. Now you can click save and you will now have a batch file you can double click on to start the server with.
Download and Run the Bukkit Server
Please download the latest bukkit version.
After we have done this you can actually go through the steps from the above. The linux and unix distros are set up the same way as bukkit. The only difference is the site you are downloading it from. For bukkit downloads, download their server software at their site Bukkit.org.
Bukkit Gui Video
Bukkit Gui (Windows)
I think this is one of the best developments for bukkit. It offers a very indepth user interface with loads of options. It has fully impressed me and I think it is great if you are on windows and don't like using the command prompt. Definitely check out the video on what it can do, and how it can make your life better.
Final Comments
If you want this server to be public. You will need to port forward through your router or other means. Otherwise when you send out the your Ip no one will be able to connect to it outside of your home.
Thank you for reading through my guide. If there are any questions about things that were unclear or needed to be fixed. Please let me know and I can improve anything and go over anything in further detail.


 Games For PC")