ArtsAutosBooksBusinessEducationEntertainmentFamilyFashionFoodGamesGenderHealthHolidaysHomeHubPagesPersonal FinancePetsPoliticsReligionSportsTechnologyTravel

Decking and Insulating the Roof of an Air Conditioned Dog House

Updated on October 28, 2016
Papillon man profile image

Working with wood has been a pleasant diversion from Dale's computer career and is an interest he learned from his father, a cabinet maker.

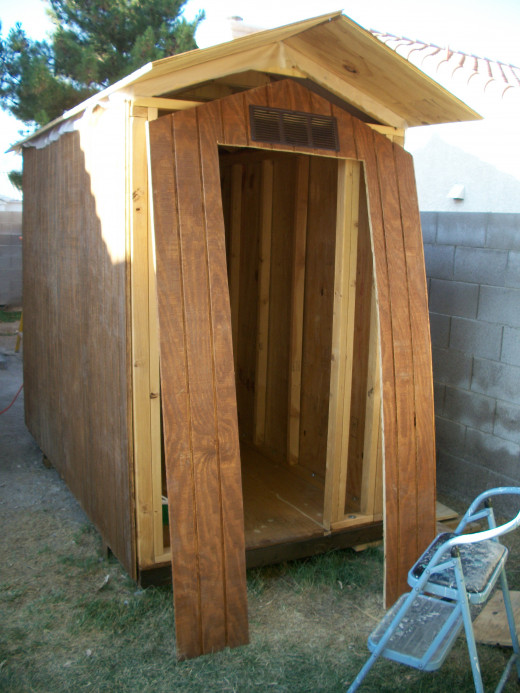
Installing T1-11 Siding on Roof

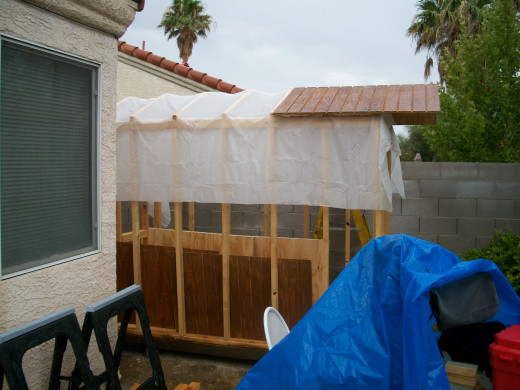
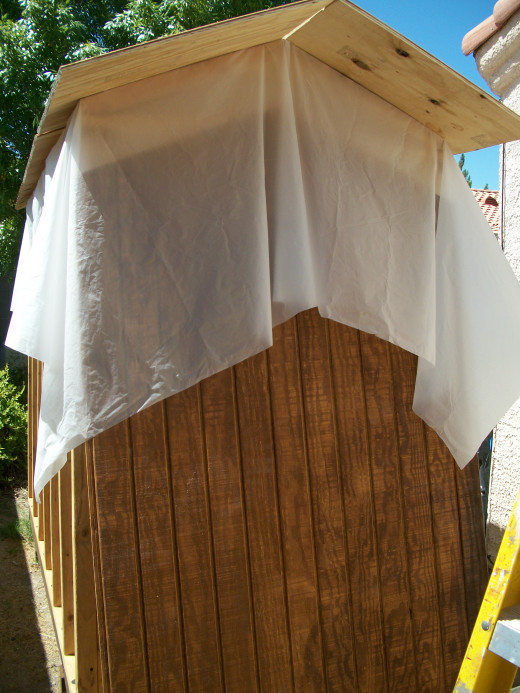
A sheet of plastic protects the wall frames and floor while the roof decking is installed. Most of the plastic remains underneath for extra moisture protection.

Design Considerations

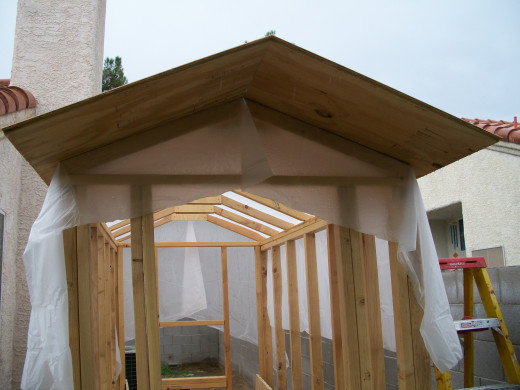
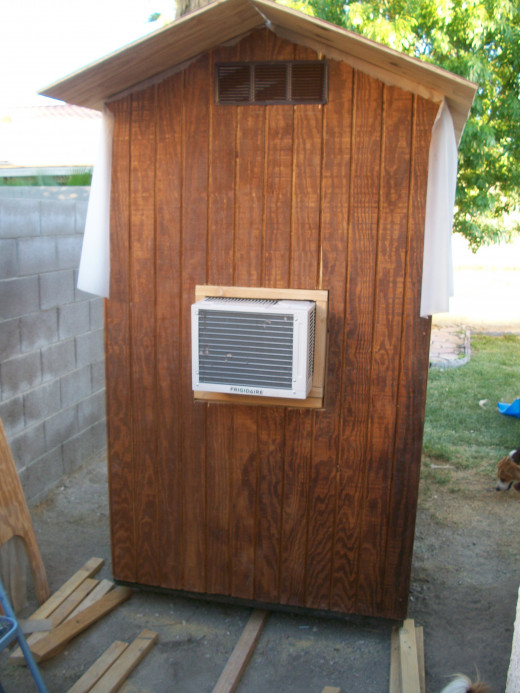
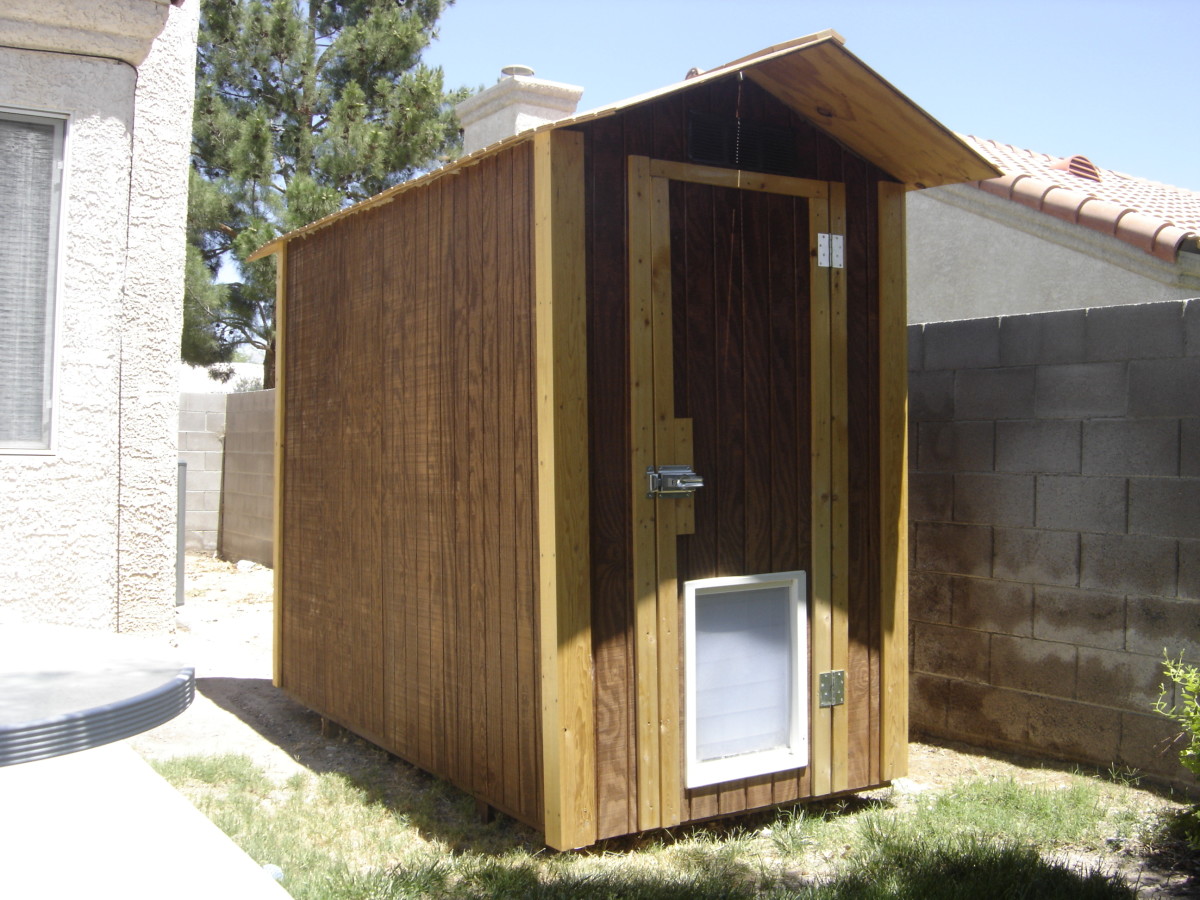
The roof was designed to extend out over both the front and back of the doghouse. The purpose for the front extension is for protection from the rain while going in or out the door, whether for man or dog. But the extension over the back is primarily to provide shade for the air conditioner so that it doesn't have to work quite as hard.


After a year, the roof corners are starting to droop, so you might think about either shortening the extension a bit (maybe 6 to 8 inches) or installing some bracing. I have thought about adding a short 2 by 3 brace at each corner coming up and out from the wall at a 45 degree angle. The edge of the brace cut for the roof would need to be miter cut at both 45 degrees and 22 ½ degrees simultaneously. I hesitate to do that because the problem with bracing is that someone may bump his head on it, and the concussion I prevent may be my own.


A large sheet of plastic (in my case, a plastic “drop cloth” for painting) was draped over the rafters and stapled in place. This also provided rain protection for the floor and wall frames because, as one might expect, it decided to start raining in the Las Vegas desert just between the time that I finished framing and the time I was ready to start roofing. After the roofing and siding was installed, I used scissors to trim back the plastic so that it barely extended out over the siding. This provides a little extra water protection.

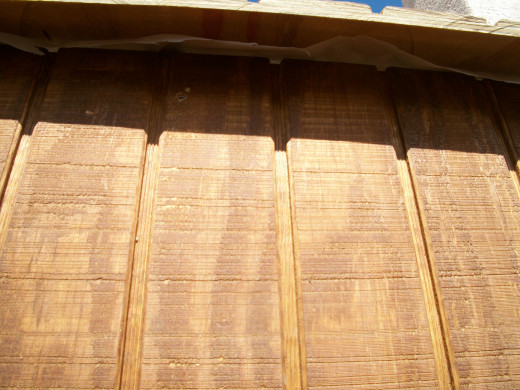
Staining the T1-11 Siding

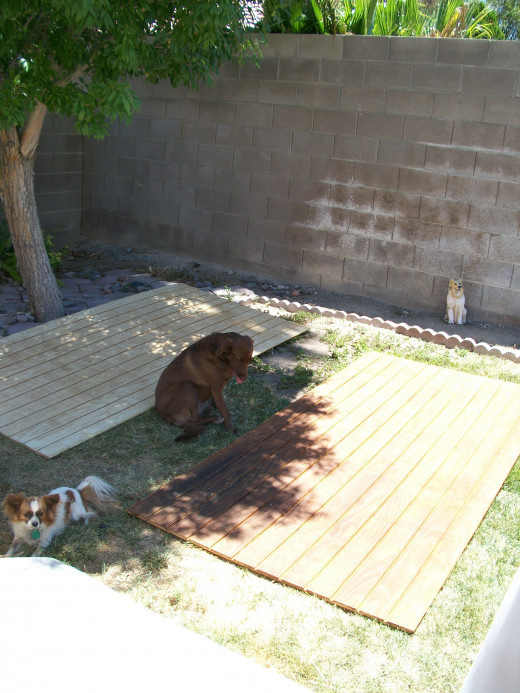
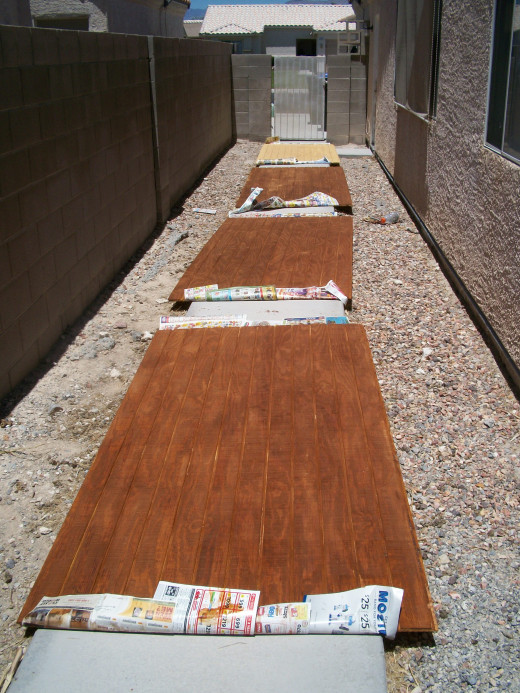
I chose to stain all the siding before installing it. I believe it was easier both to apply the stain and to get an even finish by doing it this way rather than once it was cut and installed. I included some photos of my "assembly line." Of course I moved from one piece of siding to the next instead of having the line move to me.

I used Lowe's part number 15211, GL Olympic Maximum Canyon", which includes some waterproofing in addition to the dark stain. I also bought some clear varnish for the unstained pine trim to give some contrast, and decided to apply it also to the siding on top of the stain after the siding was installed. I applied the stain with a paint brush, but used a roller for most of the varnish, and got both the trim and the siding during the same application. The clear varnish was Lowe's part number 73095, "GL Gloss Spar Varnish Cabot".

Staining the T1-11

Click thumbnail to view full-size
I tried to get these done before the sun got directly overhead, but had to finish the next morning.Bella and Maggie watch from the one shady spot in our back yard.
I tried to get these done before the sun got directly overhead, but had to finish the next morning.
Bella and Maggie watch from the one shady spot in our back yard.

Installing the first two roof sections
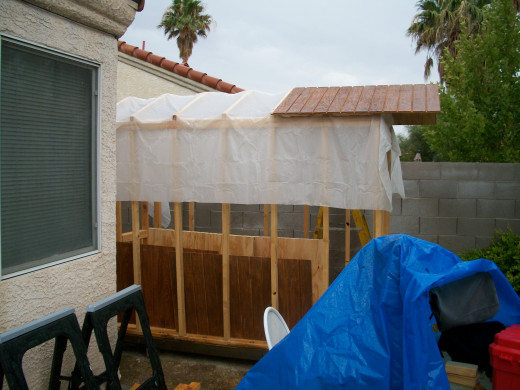
The first two screws of each section were placed on opposite ends of two different rafters.

Installing the roof sections

Click thumbnail to view full-size
Front view after installation of first two roof sections.After four roof sections are installed.The plastic remains under the roof sections to divert any water leaks to the outside face of the wall siding.View of roof from inside.The wall siding is installed under the plastic.Then the plastic is trimmed back, but not too far back.After the roof and back wall siding are installed.You can see daylight on the plastic.  Pine trim to be installed on the roof crown will help, but the plastic will probably deflect some moisture  someday.The plastic was trimmed back quite a bit to make it easier to install the front siding, but will need to be trimmed more later.After trimming the plastic back on one of the side walls.
Front view after installation of first two roof sections.
After four roof sections are installed.
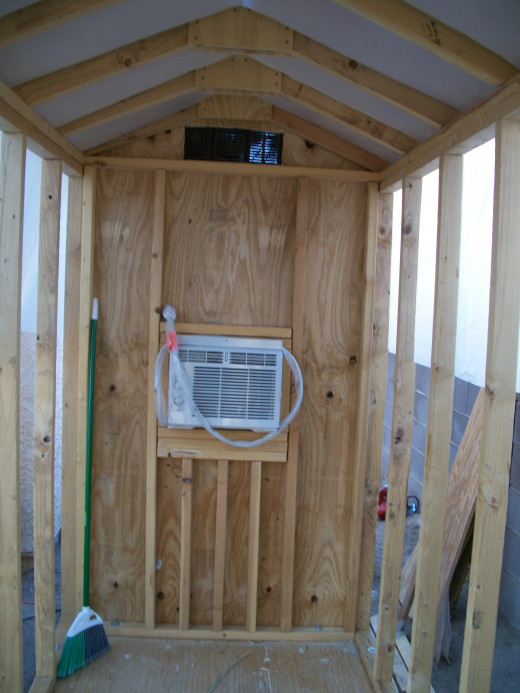
The plastic remains under the roof sections to divert any water leaks to the outside face of the wall siding.
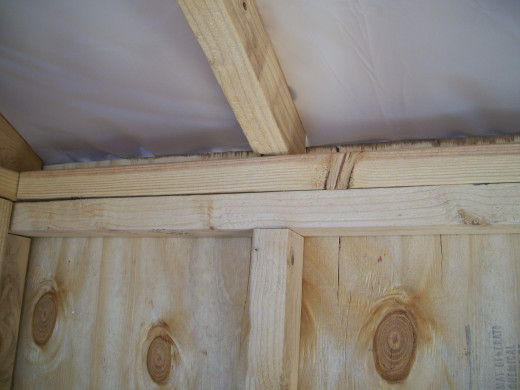
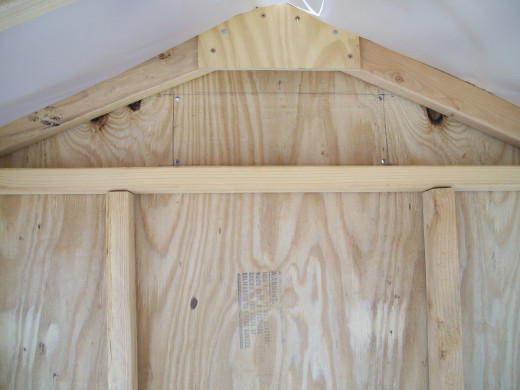
View of roof from inside.
The wall siding is installed under the plastic.
Then the plastic is trimmed back, but not too far back.
After the roof and back wall siding are installed.
You can see daylight on the plastic.  Pine trim to be installed on the roof crown will help, but the plastic will probably deflect some moisture  someday.
You can see daylight on the plastic. Pine trim to be installed on the roof crown will help, but the plastic will probably deflect some moisture someday.
The plastic was trimmed back quite a bit to make it easier to install the front siding, but will need to be trimmed more later.
After trimming the plastic back on one of the side walls.

Installing T1-11 Siding

The siding is designed so that one side will overlap the side of its neighbor on one side, but be overlapped on its opposite side. So when making cuts, keep in mind which side you want to keep the factory edge on and make your cut on the side that will be on the end of the roof or wall. This siding is expensive, so it pays to take your time and visualize how the piece is going to look when you go to carry it up to install it. Theoretically, you could just turn the piece upside down and it will work, but if there is a knot or defect you are trying to cut away, it would make a difference. The dimensions of the walls were selected so that no cuts are required on the ends, and cuts were required on only one end of the roof.

The siding is also quite heavy. Fortunately, enough is cut away from the roof pieces to make the weight manageable for one person to install by himself. But it would be easier and safer to have help. The first piece is the trickiest. You want to calculate the overlaps so that they are right over the rafters for the screws to grab. You also want to make sure that the first piece is square with the rafter and will be positioned vertically so as not to extend too much or too little toward the crown of the roof.

The siding was attached using exterior screws, Lowe's part number 323906, "2x8 PGP EXT SCR STAR DR R". These have a reddish waterproof coating that blends in well with the siding stain.

Installing Pine Trim Over Crown

Click thumbnail to view full-size
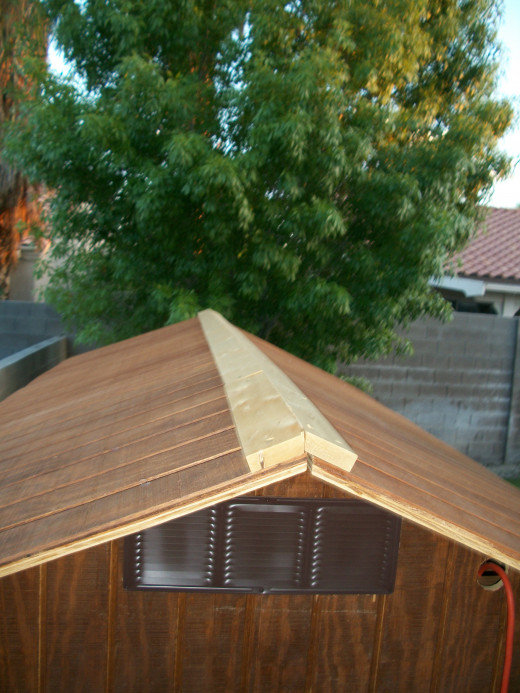
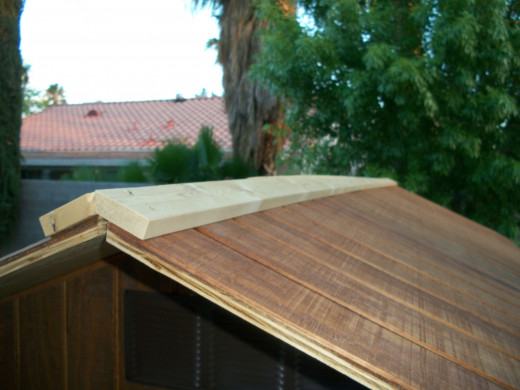
The joint between the trim boards is deliberately offset from the joint in the siding.The trim boards were ten feet long.  The roof was several inches longer, so I added a short section of trim, one on each end.If I had it to do over, I would have shortened the roof to ten feet, about four or five inches per side.
The joint between the trim boards is deliberately offset from the joint in the siding.
The trim boards were ten feet long.  The roof was several inches longer, so I added a short section of trim, one on each end.
The trim boards were ten feet long. The roof was several inches longer, so I added a short section of trim, one on each end.
If I had it to do over, I would have shortened the roof to ten feet, about four or five inches per side.

Installing Pine Trim Over the Crown

In some places the gap between the siding was large. I installed Lowe's part number 17291, "1x3x10 Whitewood Resawn T", over the crown. The two trim pieces formed a much tighter joint, and that joint was offset from the siding joint to make it harder for water to find its way through. I used shorter exterior screws to attach the trim to the siding, Lowe's part number 323893, "1-1/4 x 8 x 8 PGP EXT SCR STARD". These screws have the waterproof paint, but are yellow and blend in nicely with the natural color of the pine.

Installing Insulation Between the Rafters

Click thumbnail to view full-size
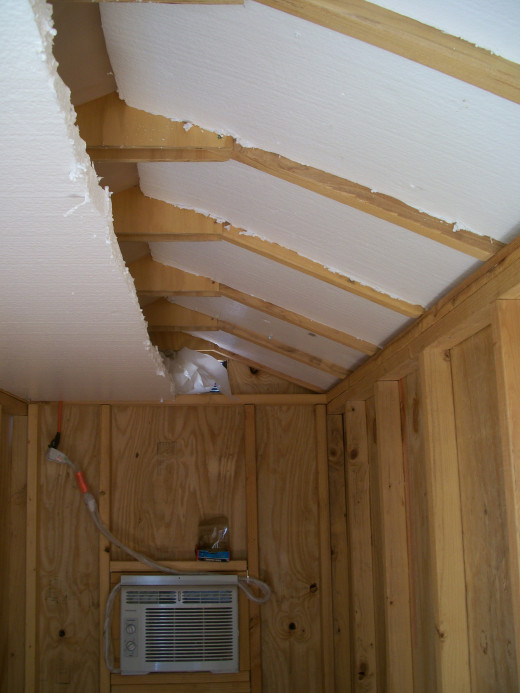
I measured between each set of rafters and cut the insulation to fit snugly.I couple of sections needed a few roofing nails to help hold them in place.Bella and Maggie remind me that it's getting hotter, could I please speed it up a little with the insulation?
I measured between each set of rafters and cut the insulation to fit snugly.
I couple of sections needed a few roofing nails to help hold them in place.
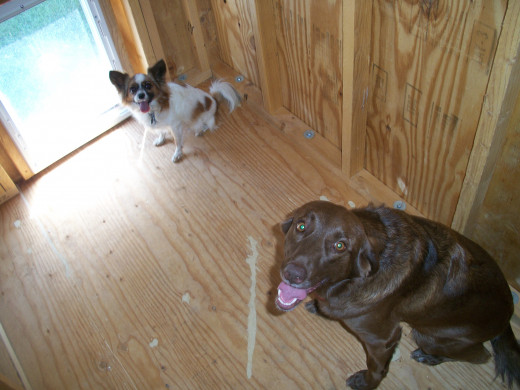
Bella and Maggie remind me that it's getting hotter, could I please speed it up a little with the insulation?

Installing the Roof Insulation

I used Lowe's part number 41505, "1.5 Inx4x8 Expanded Polystyrene" for insulation. This material should also help to divert or trap moisture until it evaporates (we get about 4 inches of rain per year). I made the cuts with a linoleum cutting blade included with the "Kobalt 28 piece All Purpose Knife kit", Lowe's part number 12809. This was the best way I found for cutting this material. It was still messy, but the Shop Vac (also purchased at Lowe's) took care of the "crumbs".

By cutting the pieces so that they fit tightly between the rafters, they were held firmly by the pressure exerted by the polystyrene after the pieces were squeezed into place. Sometimes I had to trim a little off here or there, and in some places where I had trimmed too much, I had to drive in some 2-inch roofing nails through the insulation and into the roofing to help hold the pieces in place.

In the photos you will notice a half sheet of insulation positioned as a partial ceiling (there were other, smaller pieces covering the other half that had to be removed while working). This was a temporary setup that allowed the air conditioner to be run sooner. It helped a little.

working

This website uses cookies

As a user in the EEA, your approval is needed on a few things. To provide a better website experience, hubpages.com uses cookies (and other similar technologies) and may collect, process, and share personal data. Please choose which areas of our service you consent to our doing so.

For more information on managing or withdrawing consents and how we handle data, visit our Privacy Policy at: https://corp.maven.io/privacy-policy

Show Details
Necessary
HubPages Device IDThis is used to identify particular browsers or devices when the access the service, and is used for security reasons.
LoginThis is necessary to sign in to the HubPages Service.
Google RecaptchaThis is used to prevent bots and spam. (Privacy Policy)
AkismetThis is used to detect comment spam. (Privacy Policy)
HubPages Google AnalyticsThis is used to provide data on traffic to our website, all personally identifyable data is anonymized. (Privacy Policy)
HubPages Traffic PixelThis is used to collect data on traffic to articles and other pages on our site. Unless you are signed in to a HubPages account, all personally identifiable information is anonymized.
Amazon Web ServicesThis is a cloud services platform that we used to host our service. (Privacy Policy)
CloudflareThis is a cloud CDN service that we use to efficiently deliver files required for our service to operate such as javascript, cascading style sheets, images, and videos. (Privacy Policy)
Google Hosted LibrariesJavascript software libraries such as jQuery are loaded at endpoints on the googleapis.com or gstatic.com domains, for performance and efficiency reasons. (Privacy Policy)
Features
Google Custom SearchThis is feature allows you to search the site. (Privacy Policy)
Google MapsSome articles have Google Maps embedded in them. (Privacy Policy)
Google ChartsThis is used to display charts and graphs on articles and the author center. (Privacy Policy)
Google AdSense Host APIThis service allows you to sign up for or associate a Google AdSense account with HubPages, so that you can earn money from ads on your articles. No data is shared unless you engage with this feature. (Privacy Policy)
Google YouTubeSome articles have YouTube videos embedded in them. (Privacy Policy)
VimeoSome articles have Vimeo videos embedded in them. (Privacy Policy)
PaypalThis is used for a registered author who enrolls in the HubPages Earnings program and requests to be paid via PayPal. No data is shared with Paypal unless you engage with this feature. (Privacy Policy)
Facebook LoginYou can use this to streamline signing up for, or signing in to your Hubpages account. No data is shared with Facebook unless you engage with this feature. (Privacy Policy)
MavenThis supports the Maven widget and search functionality. (Privacy Policy)
Marketing
Google AdSenseThis is an ad network. (Privacy Policy)
Google DoubleClickGoogle provides ad serving technology and runs an ad network. (Privacy Policy)
Index ExchangeThis is an ad network. (Privacy Policy)
SovrnThis is an ad network. (Privacy Policy)
Facebook AdsThis is an ad network. (Privacy Policy)
Amazon Unified Ad MarketplaceThis is an ad network. (Privacy Policy)
AppNexusThis is an ad network. (Privacy Policy)
OpenxThis is an ad network. (Privacy Policy)
Rubicon ProjectThis is an ad network. (Privacy Policy)
TripleLiftThis is an ad network. (Privacy Policy)
Say MediaWe partner with Say Media to deliver ad campaigns on our sites. (Privacy Policy)
Remarketing PixelsWe may use remarketing pixels from advertising networks such as Google AdWords, Bing Ads, and Facebook in order to advertise the HubPages Service to people that have visited our sites.
Conversion Tracking PixelsWe may use conversion tracking pixels from advertising networks such as Google AdWords, Bing Ads, and Facebook in order to identify when an advertisement has successfully resulted in the desired action, such as signing up for the HubPages Service or publishing an article on the HubPages Service.
Statistics
Author Google AnalyticsThis is used to provide traffic data and reports to the authors of articles on the HubPages Service. (Privacy Policy)
ComscoreComScore is a media measurement and analytics company providing marketing data and analytics to enterprises, media and advertising agencies, and publishers. Non-consent will result in ComScore only processing obfuscated personal data. (Privacy Policy)
Amazon Tracking PixelSome articles display amazon products as part of the Amazon Affiliate program, this pixel provides traffic statistics for those products (Privacy Policy)
ClickscoThis is a data management platform studying reader behavior (Privacy Policy)