Nitro R/C Cars - Engine Tuning Secrets


The Importance of Correct Engine Tuning
Nitro R/C cars can be huge fun but for that to be the case there is one thing that you need to get right and that is the tuning of the engine – or more correctly getting the carburettor settings right. If you do not, then you are just going to get endless frustration. So before you dash out to try out your new pride and joy just have a little patience and take a short while to follow through these simple steps to ensure that you will have a happily running engine that will power your RC car to hours of endless thrills and spills.
Every engine has its own unique characteristics or ‘personality’ if you like. You need to become acquainted with this to get it tuned just right. However there are some common rules or guidelines that need to be followed in the procedures outlined below.
1. In getting your engine running correctly temperature is a core factor. If the engine is running too hot the lifespan of components and the engine itself will be greatly shortened. The engine runs hotter when the carburettor is set lean and cooler when the engine is richer. It is better therefore to err on the rich side, especially when running in a new motor. I will reiterate this throughout the article to emphasize the point as it is of critical importance.
2. When making adjustments bear in mind that it takes at least 30 seconds for the temperature of the engine to change in response to the new setting. Therefore wait at least half a minute between making each adjustment.
3. Always work from too rich a setting and lean out the carburettor when tuning it.
4. Nitro engines were given to us in order to help us develop patience, given half a chance. Do not give it that chance. Take your time, proceed slowly remembering the 30 second rule between each adjustment and you will soon have it running so sweetly.
5. Finally a point on safety. Nitro engines run at temperatures that can easily cause severe burns. Guard yourself and others, especially children, against this.
So bearing these simple rules of thumb in mind let’s get started.

The simplest type of carburettor has a single needle valve to adjust. Whilst these are the easiest to set up the disadvantage is that there is a trade-off because either acceleration or top speed are going to be sacrificed (or both may be sub-optimal) in finding a compromise setting using the one needle to control both low-speed and high-speed settings. The way that you go about tuning a single needle carburettor on a radio controlled model is too start with a setting that is as rich as you can to get the engine started. This is safe because, again, the engine runs cool when it is rich and hot when it is lean so there is no danger of overheating the engine. Once you have got it started you then just keep leaning out the needle setting by 1/8 of a turn at a time until you arrive at the engines sweet spot. At this point it will have a great sound, clean and high revving, quite shrill and will not cut out at either high or low revs.

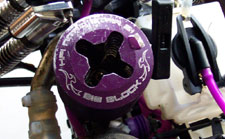
More complex carburettors have either 2 or 3 needles. Many have idle adjustment screws as indicated in this picture. The idle screw sets the idling speed of the engine. The ideal is to have the idle speed set so that the engine revs are as low as possible without the engine cutting out. In any case it should be below the revs that cause the clutch to engage so that the wheels of your R/C car, truck or buggy start turning. In most cases you will find that this has been correctly set at the factory. If you remove the air filter from the carburettor you can see how far the valve is open when it is shut right down. The gap on the barrel should be about 1mm (or 1/8”).

Once this has been set you can proceed to setting the low speed adjustment needle, indicated in this picture. This needle sets the fuel/air mixture when the engine is running at below half revs – in other words 0 to 50% throttle. If you are having trouble starting your engine no matter how much you yank on the pull starter it is this needle that needs attention. The setting can be fiddly as some engines are very sensitive to it and even a quarter of a turn can make the difference between an engine that is impossible to start and one that is a dream to work with. However, once you get this set right you should not need to make any changes to it again, unless you have to strip the carburettor down. So if you have been pulling on that starter and it just will not fire up here is how to proceed (assuming that you have first set you idle speed adjustment as above). One way is just too start increasing the richness of the low speed needle in tiny increments until the engine starts to fire up. On most common engines the fuel mixtures is leaned out by turning the screw clockwise, whilst turning it anti-clockwise gives a richer setting. Alternatively you can do the following to find the point where almost all engines should start. First turn the low speed adjustment screw clockwise as far as it will go. Then turn it back anti-clockwise 2 ½ turns. This is the neutral point and your engine should now start. It then just needs fine tuning to find the optimal setting, which should be within ½ turn of this point.
Once you think you have it set right perform the following test to check, known as the pinch test.
1. Start your engine and allow it to get up to operating temperature (about 2 minutes of normal running).
2. Cut the fuel supply to the engine by pinching the fuel line between the fuel tank and the engine with your fingers.
3. The engine should run on for about 3 seconds.
4. If the engine dies abruptly then the low speed needle is set too lean.
5. It is set too rich if it takes more than 4-5 seconds to die.
6. Adjust the low speed needle valve accordingly and repeat the test until it is taking about 3 seconds.

Now to the high speed adjustment needle (indicated in the picture) – the last of the three. Nearly there now! This controls the fuel mixture when the carburettor is more than half open (50-100%). Getting this right gives you maximum performance out of you RC car. Run it around and as you accelerate towards full throttle note how you car behaves. A radio controlled car that “chugs” and hesitates before it picks up revs and accelerates has the high speed needle set too rich and you need to lean it out. On the other hand when you open the throttle up if the engine slows like it is hesitating or slowing down then the needle is set too lean.
OK, so now we have it all set up let’s run one final test to check. An engine that is correctly tuned will have a running temperature of around 250 degrees. The optimal temperature does vary between models and makes so you may want to check your engine manual or the manufacturer’s manual, however seeing as you are unlikely to have access to accurate temperature measuring equipment the exact temperature is not important. So here is a simple test to check if your engine is running at the right temperature and tuned correctly:
1. Run your RC car, buggy or truck for a few minutes normally to get it up to running temperature.
2. Place a drop of water on the cylinder head and time how long it takes to completely evaporate.
3. If the water evaporated in less than 6 seconds then the engine is running hot and therefore the high speed needle is set too lean. Correct this by making anti-clockwise turns to the needle so that it runs richer. Adjust it in 1/8th of a turn increments. Make an adjustment, run the car for at least 2 minutes and then repeat the temperature test until the spot of water is evaporating in at least 6 seconds but not more than 7 seconds.
4. If the drop of water takes 8 or more seconds to evaporate the high speed needle is set to rich and your engine is operating at below its optimum temperature. Clockwise turns to the high speed needle will give a leaner setting and increase the running temperature. Again make 1/8th of a turn adjustments and run for a couple of minutes before checking again.
Job done. You should now have an engine that is running perfectly happily in your R/C car and ready for endless hours of untroubled fun ahead of you. Patience at this stage and getting it set up correctly at the start pays huge dividends in the long run. Now let’s HIT THE ROAD!!!

For More Information On RC Models
- World of RC Helis and Cars
For information, advice and a selection of quality R/C cars, trucks and truggies powered by nitro, petrol/gas and electric - RC Helicopter World
A blog on The World Of RC Helicopters, one that will continuously captivate, challenge and excite anyone who ventures into it. This blog logs my experiences, adventures and projects with the hope that it will inform, entertain and inspire.
Related

Maintaining Your Vintage Lionel Steam Engine

Rites of Passage for a Model Railway - 17: Benchmark - Tank Loco Models, Are They up to Spec?

How to Fix a Broken Sewing Machine: Troubleshooting Guide

Ford Duratec Engine Series: Mondeo/Contour 2.5L V6, EcoBoost, Cyclone V6, and Duratec I4
: 2-Stroke Engine and Carburetor Troubleshooting")
String Trimmer Won't Start (Strimmer): 2-Stroke Engine and Carburetor Troubleshooting


